> ## Documentation Index
> Fetch the complete documentation index at: https://docs.tread.ai/llms.txt
> Use this file to discover all available pages before exploring further.
# Master Data Overview
> The data sets you'll prepare, in the order they need to be uploaded.
## What you'll do
Prepare and upload nine master data sets in order. Each set unlocks the next.
## Before you start
* Confirm your [company hierarchy](/onboarding/company-hierarchy) first. All master data lives at the parent level.
* Export source data from your accounting and HR systems (drivers, customers, vendors, materials).
* Decide which records carry an Ext. ID — Tread's external identifier used to match rows back to your accounting system. Each Ext. ID must be unique within Tread and is reusable only across integrations.
## Bulk import with CSV
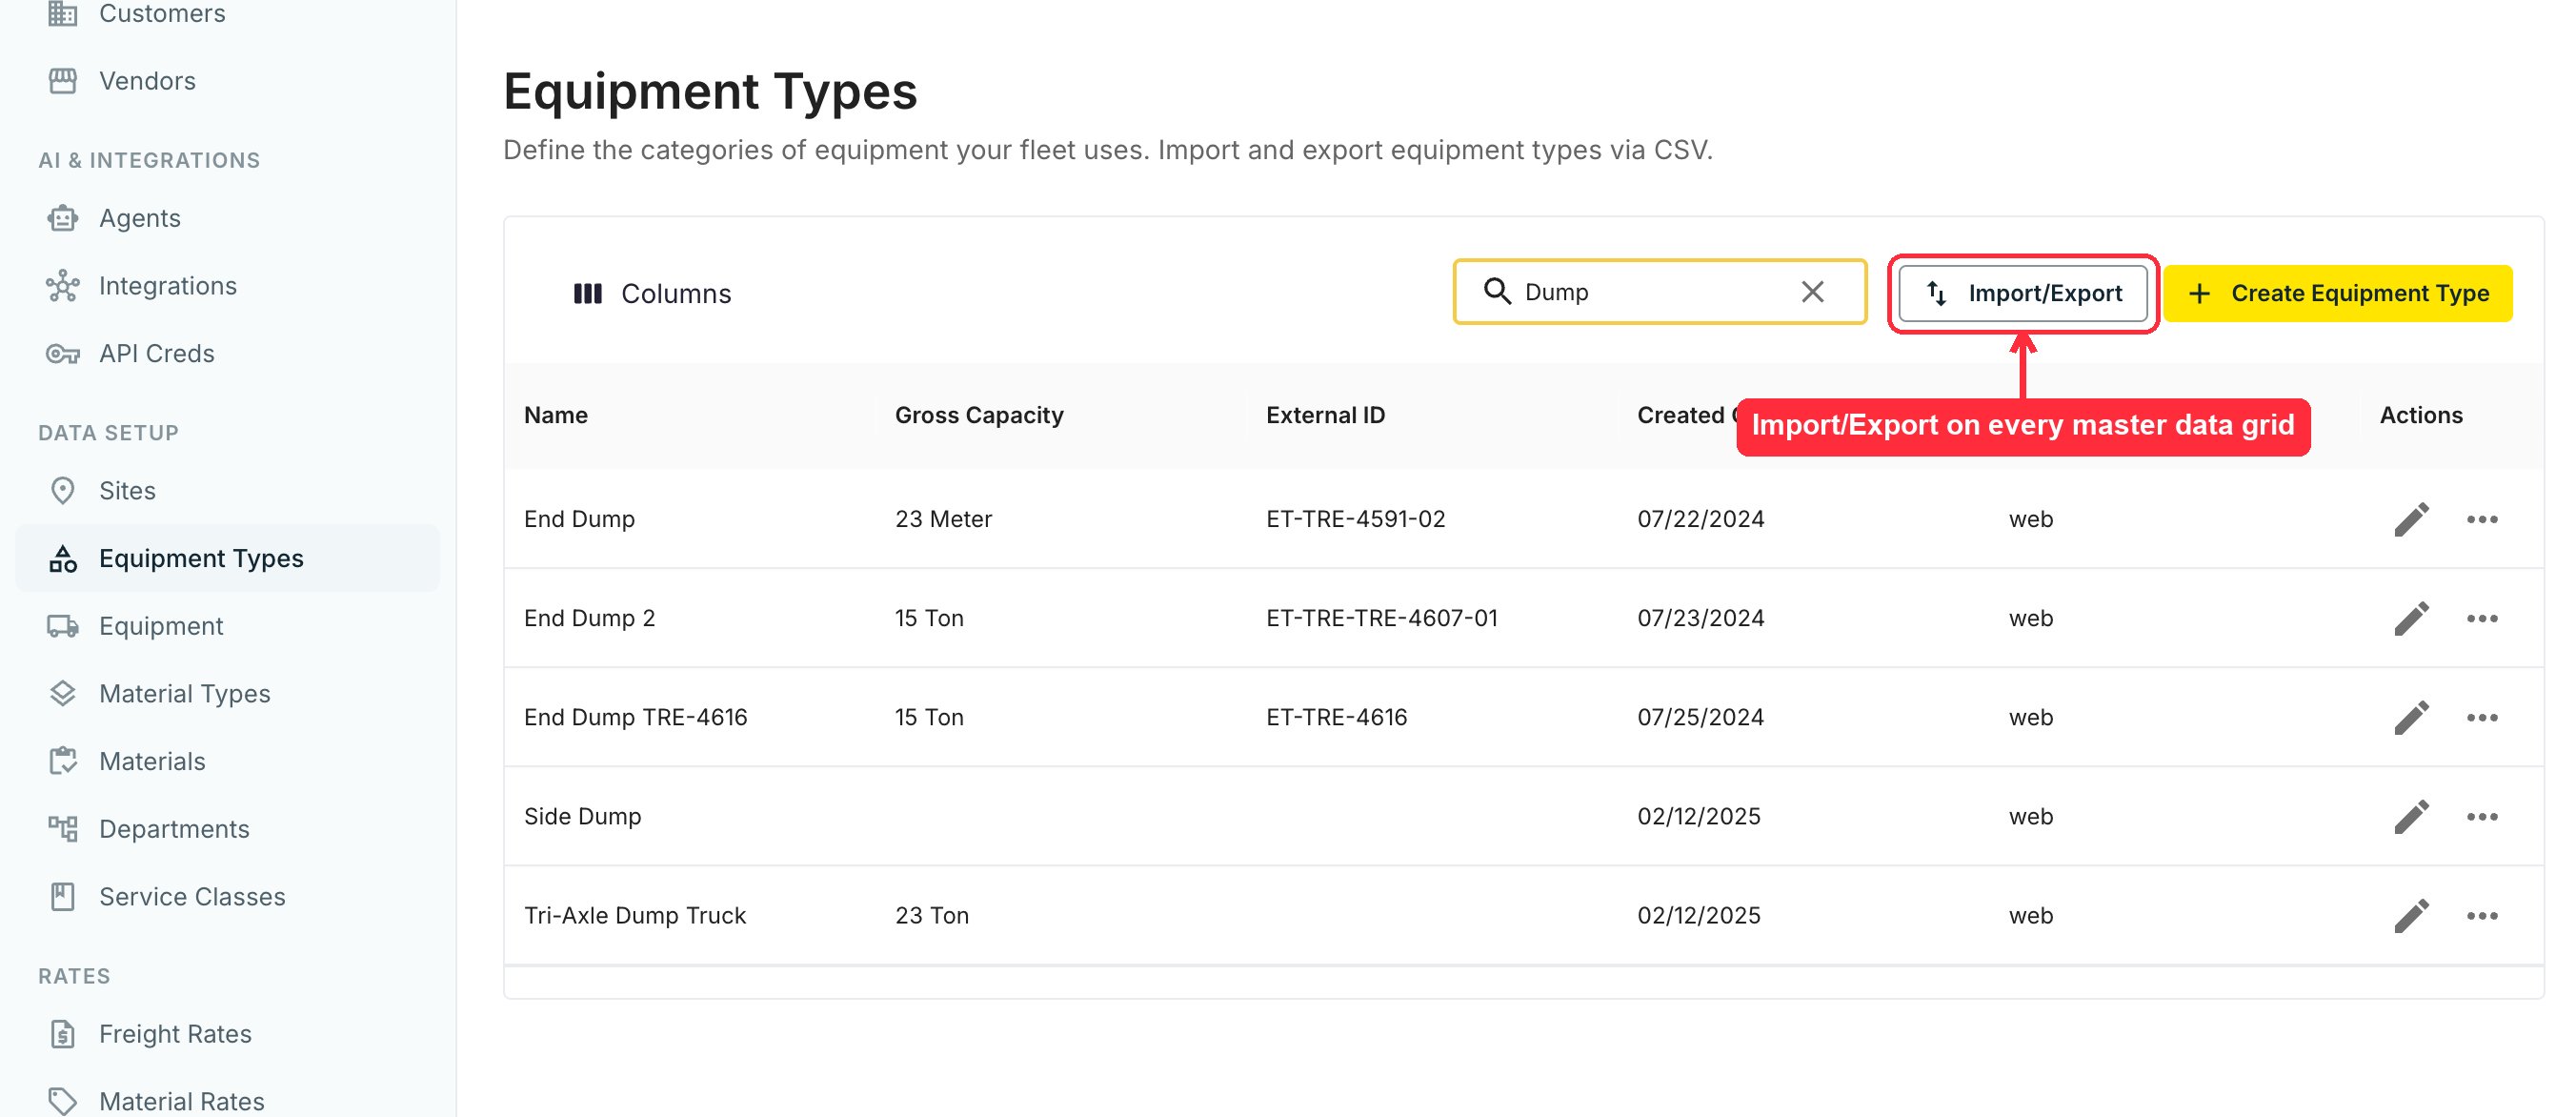
You don't have to type records in one at a time. Every master data grid in Settings — Users, Drivers, Customers, Vendors, Equipment Types, Equipment, Material Types, Materials, and Sites — has an **Import/Export** button that loads a whole data set from a CSV file.
 **Download Template** gives you a blank CSV with every column and example values. Open **Column Reference** in the same dialog to see which columns are required and what values each accepts.
One row per record, straight from your accounting or HR export. Include the Ext. ID column so each row matches back to your accounting system.
**Upload CSV** (max 5MB) creates new records — or updates existing ones when the row carries the record's ID. Tread validates every row and reports failures with the reason per row. Download the failed rows, correct them, and re-upload just those.
**Download Template** gives you a blank CSV with every column and example values. Open **Column Reference** in the same dialog to see which columns are required and what values each accepts.
One row per record, straight from your accounting or HR export. Include the Ext. ID column so each row matches back to your accounting system.
**Upload CSV** (max 5MB) creates new records — or updates existing ones when the row carries the record's ID. Tread validates every row and reports failures with the reason per row. Download the failed rows, correct them, and re-upload just those.
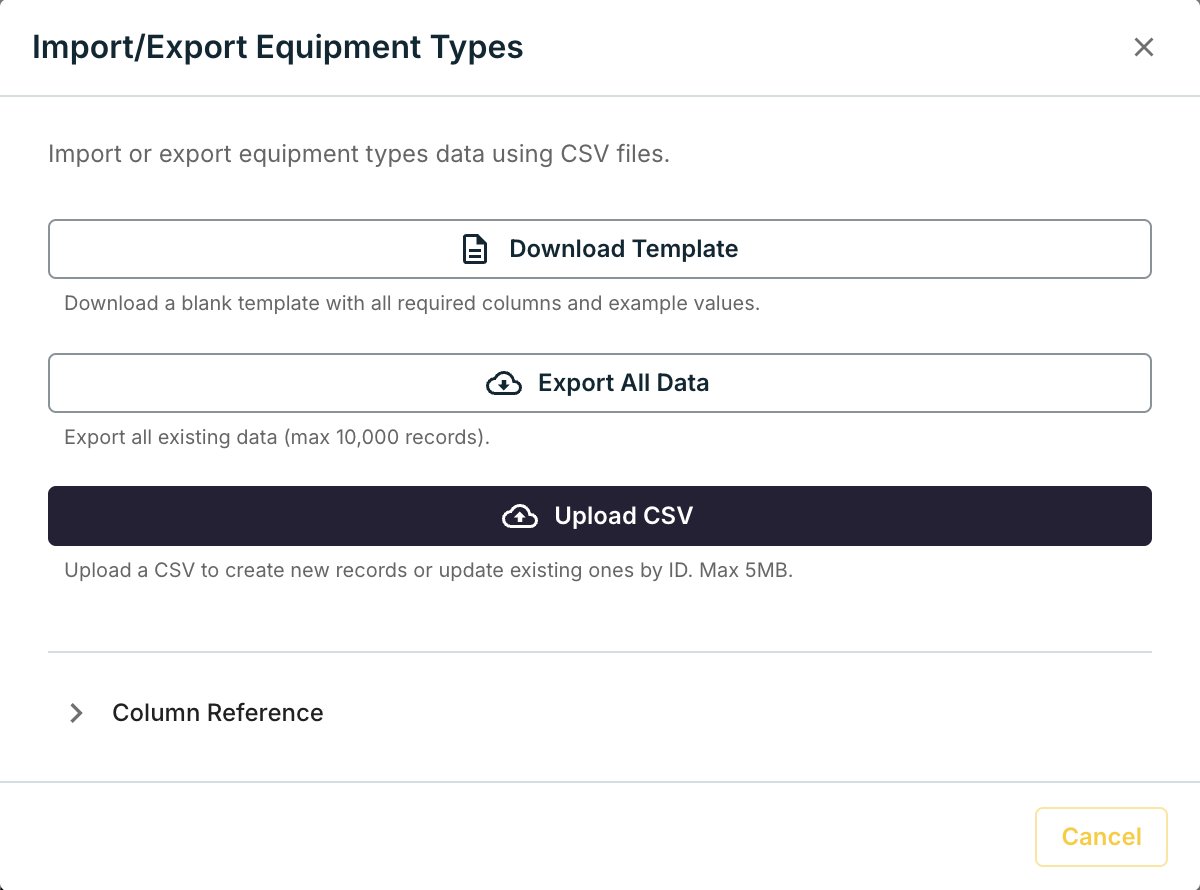 **Export All Data** in the same dialog downloads what's already in Tread (up to 10,000 records) — useful for auditing a finished import against your source.
Historical operational data — past orders, projects, and tickets — imports through Tread's import API, not CSV upload. Your Tread contact runs these during onboarding. Developer teams can integrate directly; see the [API reference](/api-reference/introduction).
## Walkthrough
Upload in this order. Skipping ahead breaks references.
Add the people who log into Tread. See [Users](/onboarding/master-data/users).
Add the drivers who receive dispatches. See [Drivers](/onboarding/master-data/drivers).
Add who you bill. See [Customers](/onboarding/master-data/customers).
Add the third-party haulers you dispatch to. See [Vendors](/onboarding/master-data/vendors).
Set up types before equipment — capacity and unit of measure (UoM) live here. See [Equipment Types](/onboarding/master-data/equipment-types).
Add the trucks and trailers. See [Equipment](/onboarding/master-data/equipment).
Pull from accounting. See [Materials](/onboarding/master-data/materials).
Add job sites and yards with lat/long and geofences. See [Sites](/onboarding/master-data/sites).
Optional categorization for reporting and dispatch flow. See [Departments, Labels & Service Classes](/onboarding/master-data/departments-labels-classes).
## Verify
Settings → each panel shows a populated list. Spot-check three rows per set against your source export, or use **Export All Data** and diff the file against your source.
## Common mistakes
**Uploading equipment before equipment types.** Capacity and UoM live on the type. Without types, material tracking and ticket calculations don't work. Always do types first.
**Export All Data** in the same dialog downloads what's already in Tread (up to 10,000 records) — useful for auditing a finished import against your source.
Historical operational data — past orders, projects, and tickets — imports through Tread's import API, not CSV upload. Your Tread contact runs these during onboarding. Developer teams can integrate directly; see the [API reference](/api-reference/introduction).
## Walkthrough
Upload in this order. Skipping ahead breaks references.
Add the people who log into Tread. See [Users](/onboarding/master-data/users).
Add the drivers who receive dispatches. See [Drivers](/onboarding/master-data/drivers).
Add who you bill. See [Customers](/onboarding/master-data/customers).
Add the third-party haulers you dispatch to. See [Vendors](/onboarding/master-data/vendors).
Set up types before equipment — capacity and unit of measure (UoM) live here. See [Equipment Types](/onboarding/master-data/equipment-types).
Add the trucks and trailers. See [Equipment](/onboarding/master-data/equipment).
Pull from accounting. See [Materials](/onboarding/master-data/materials).
Add job sites and yards with lat/long and geofences. See [Sites](/onboarding/master-data/sites).
Optional categorization for reporting and dispatch flow. See [Departments, Labels & Service Classes](/onboarding/master-data/departments-labels-classes).
## Verify
Settings → each panel shows a populated list. Spot-check three rows per set against your source export, or use **Export All Data** and diff the file against your source.
## Common mistakes
**Uploading equipment before equipment types.** Capacity and UoM live on the type. Without types, material tracking and ticket calculations don't work. Always do types first.