> ## Documentation Index
> Fetch the complete documentation index at: https://docs.tread.ai/llms.txt
> Use this file to discover all available pages before exploring further.
# Payment Terms
> Set payment terms once so every settlement gets a due date automatically — in Tread and in QuickBooks.
Payment terms turn "when is this owed?" into a field Tread fills in for you. Pick a term on a settlement and Tread sets the due date, prints it on the settlement PDF, and carries it into QuickBooks exports.
## How it works
A payment term is a name and a number of days (for example, *Net 30*). It drives the due date on a [Settlement](/concepts/settlements-driver-pay): the settlement's created date plus the term's days. *Due on Receipt* is 0 days.
Every company gets five standard terms automatically: **Due on Receipt**, **Net 15**, **Net 30**, **Net 60**, and **Net 90**. They belong to your company like any other term — rename, edit, or deactivate them as you like.
Payment terms work with or without an accounting connection. Companies connected to [QuickBooks](/integrations/quickbooks) can also map each term to a QuickBooks term.
## Manage your payment terms
Go to **Settings → Rates → Payment Terms**. Users who can manage rates see this page.
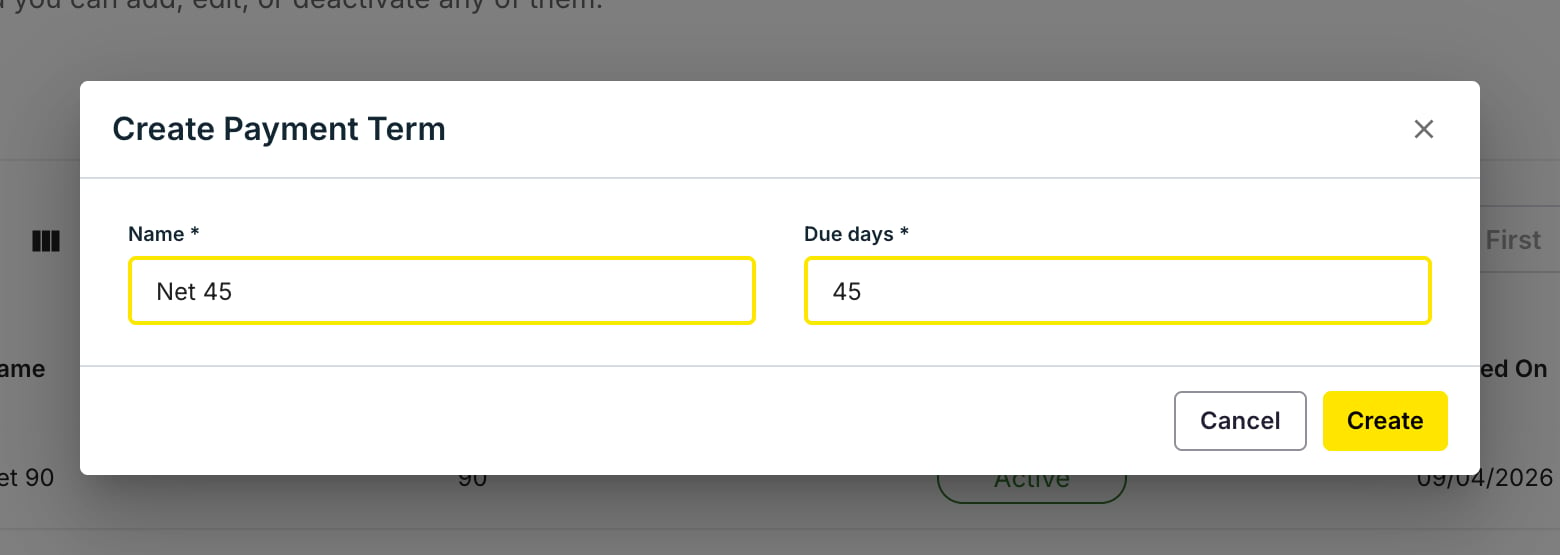
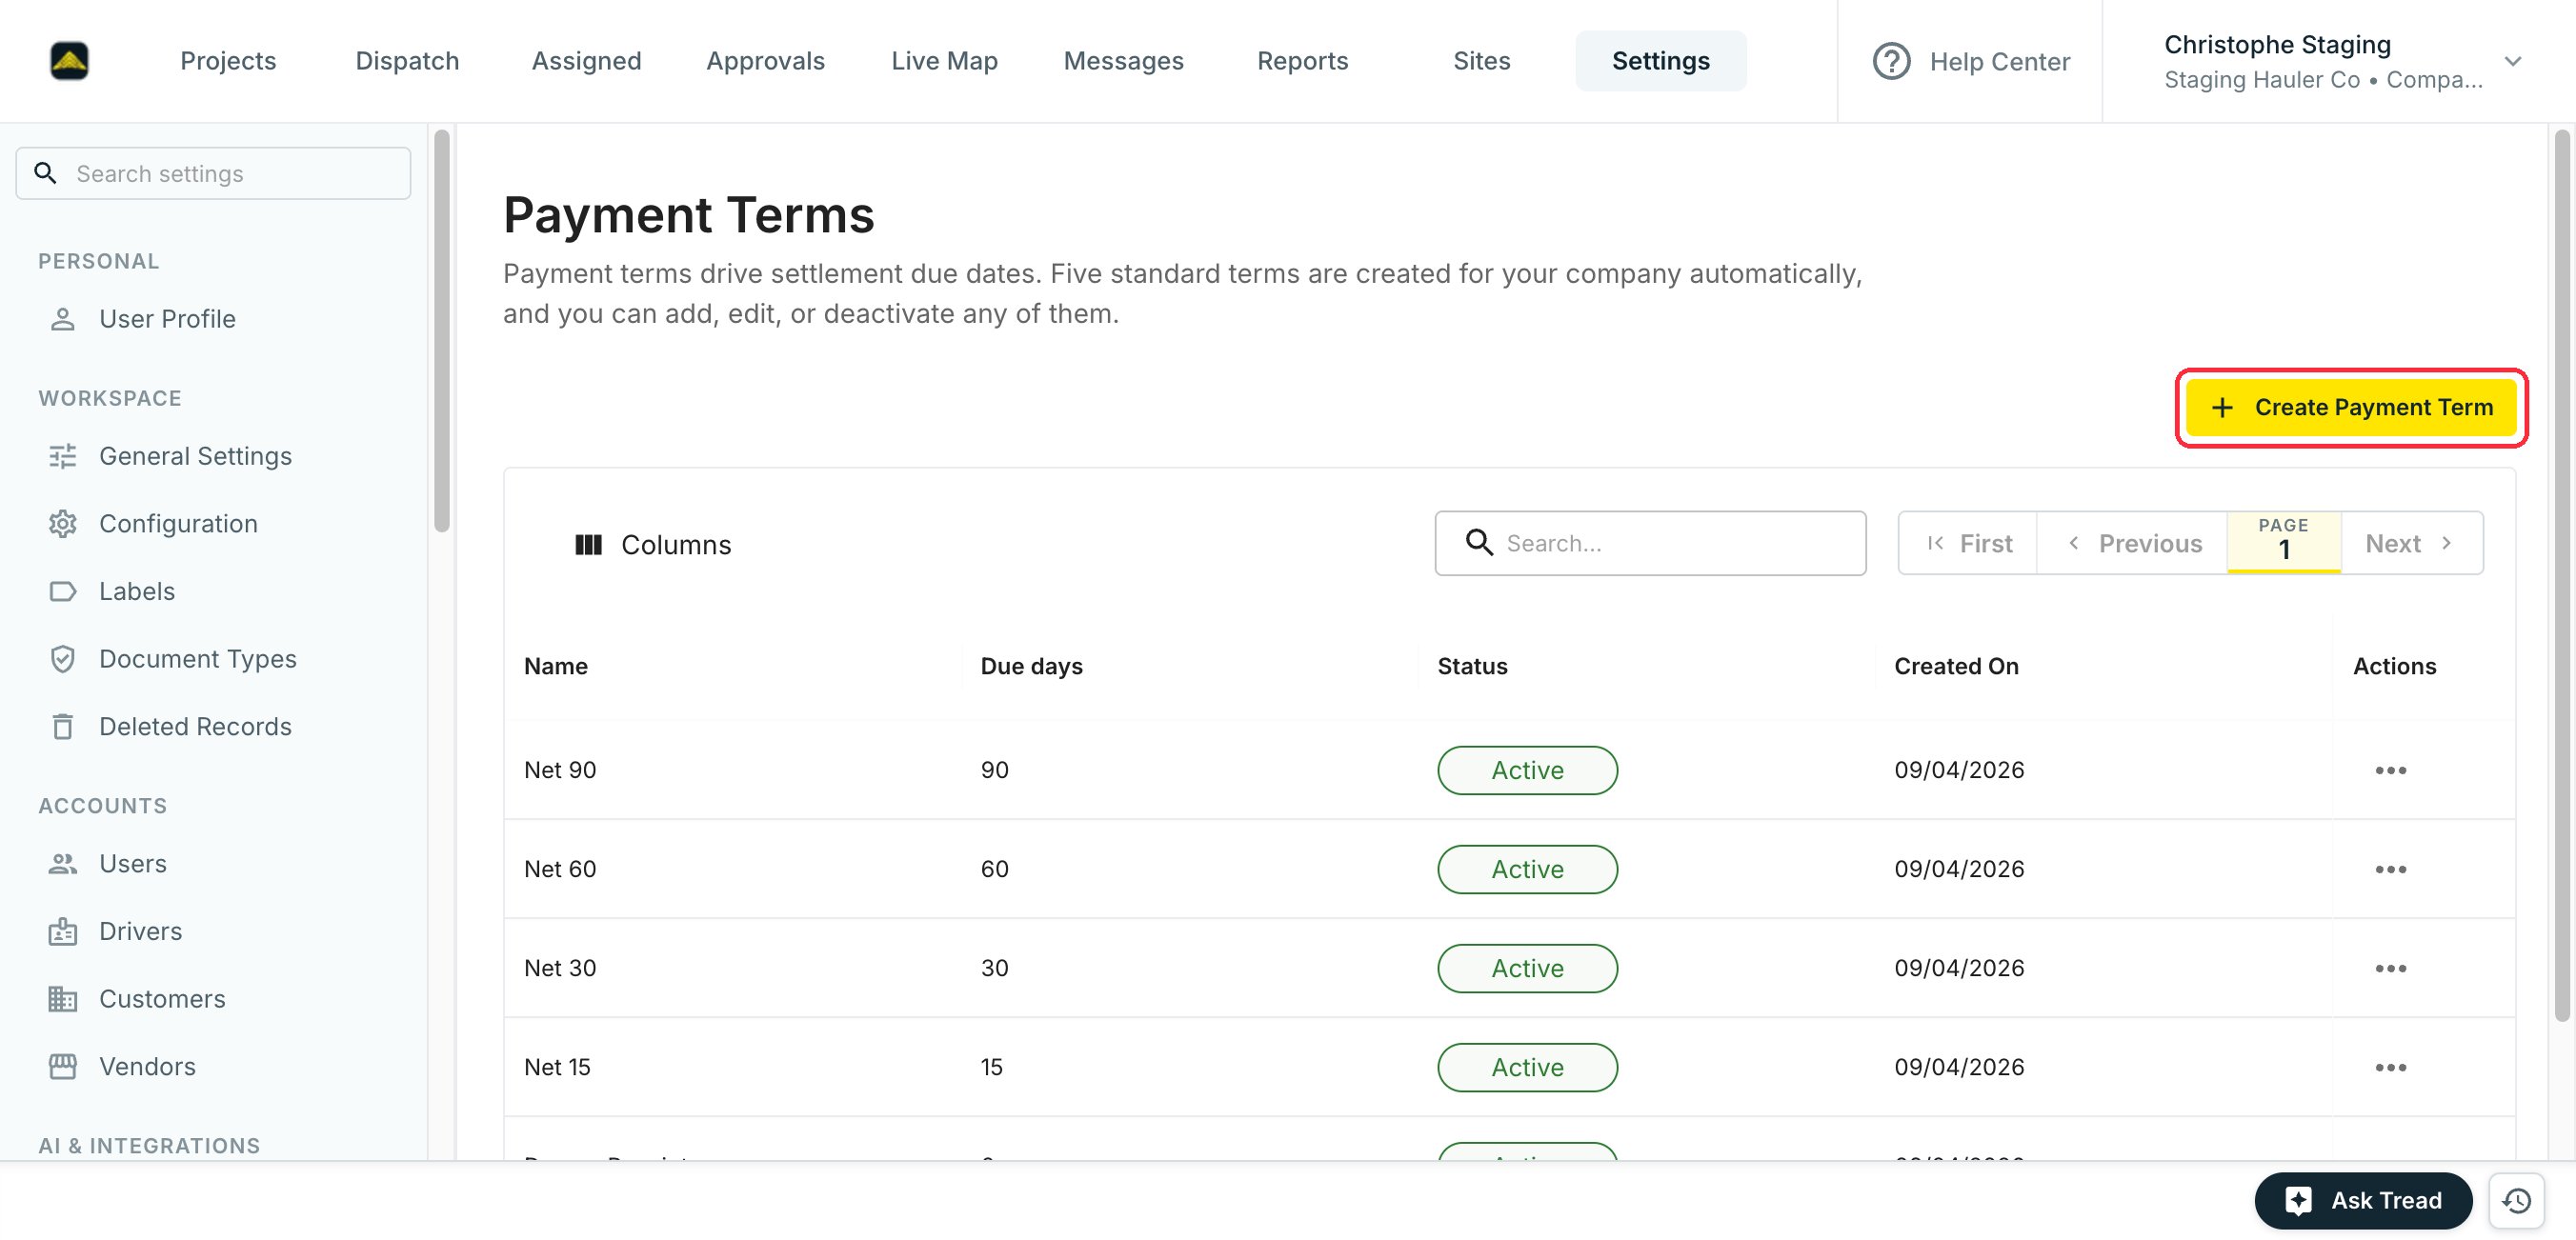 Click **Create Payment Term**. Enter a **Name** and the **Due days** — a whole number of days after the settlement is created. Use 0 for due on receipt. Two active terms can't share a name.
 Use the **•••** menu on a row to **Edit** or **Deactivate** it. A deactivated term disappears from the settlement picker, but settlements already using it keep it. You can reactivate it any time.
## Set a company default
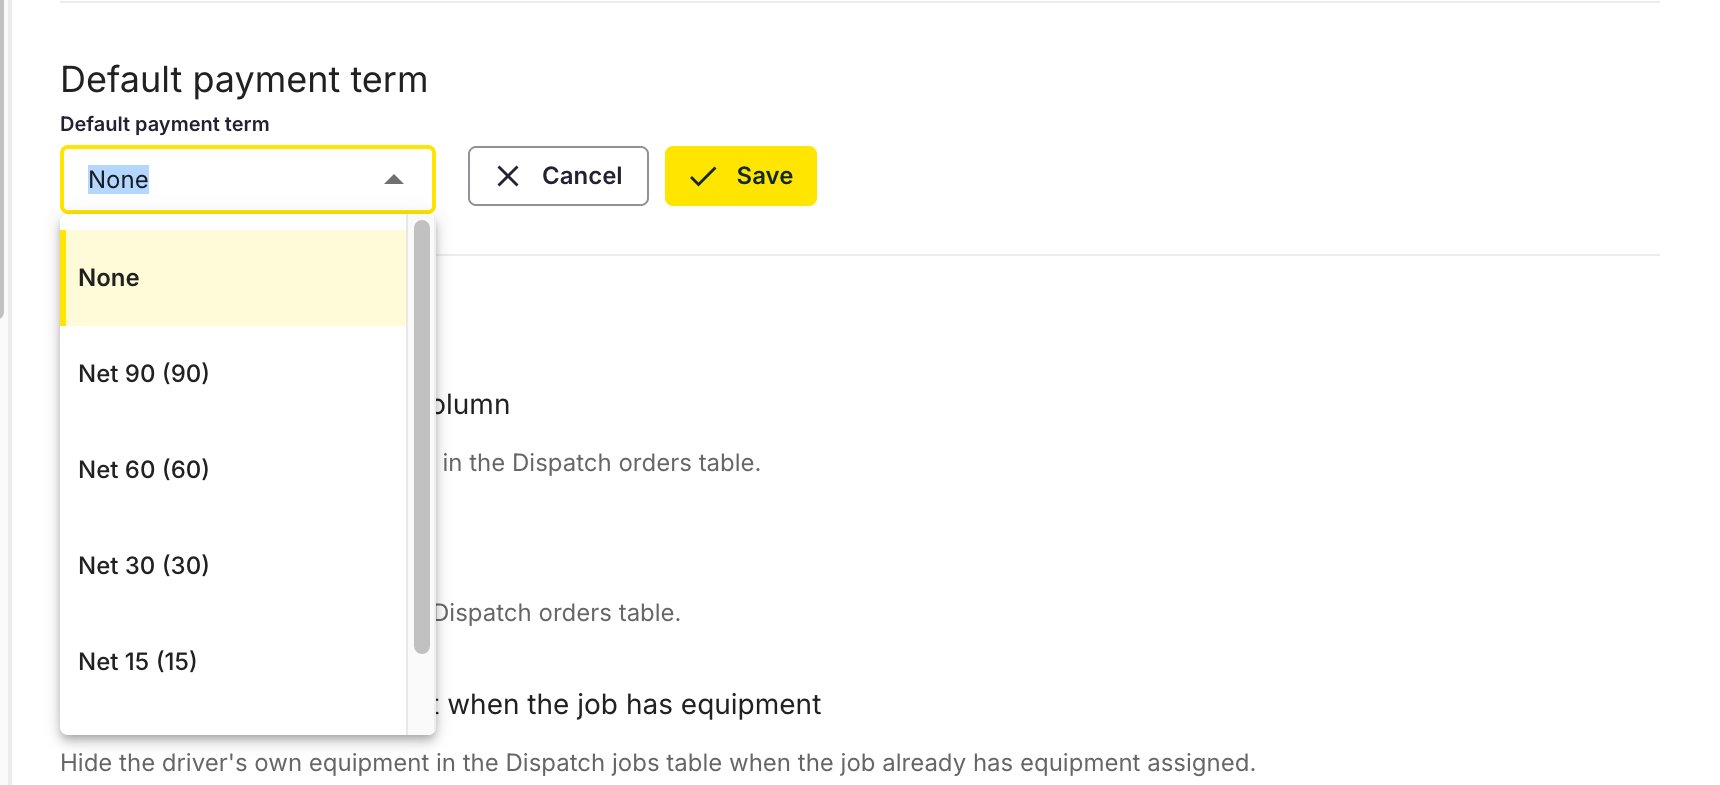
Go to **Settings → Configuration**, find **Default payment term**, click **Edit**, pick a term, and click **Save**. Every new settlement gets this term and its due date automatically. You can still change the term on any individual settlement.
Use the **•••** menu on a row to **Edit** or **Deactivate** it. A deactivated term disappears from the settlement picker, but settlements already using it keep it. You can reactivate it any time.
## Set a company default
Go to **Settings → Configuration**, find **Default payment term**, click **Edit**, pick a term, and click **Save**. Every new settlement gets this term and its due date automatically. You can still change the term on any individual settlement.
 ## Pick a term on a settlement
Go to **Approvals → Receivables** (or **Payables**) and switch to **Settlements**. Click the arrow on a settlement row to expand it.
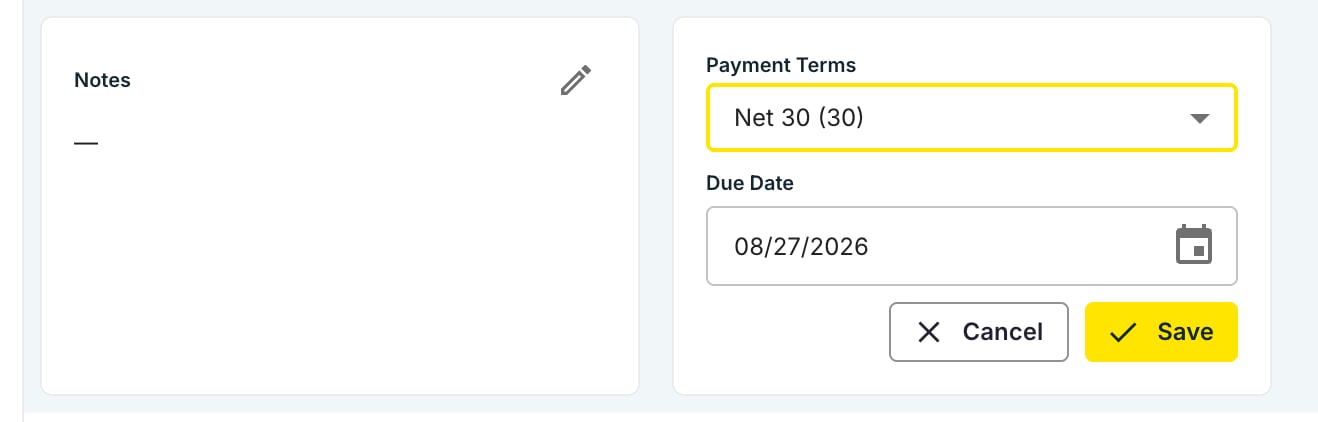
In the **Payment Terms** card, click the pencil, then pick a term from the list.
## Pick a term on a settlement
Go to **Approvals → Receivables** (or **Payables**) and switch to **Settlements**. Click the arrow on a settlement row to expand it.
In the **Payment Terms** card, click the pencil, then pick a term from the list.
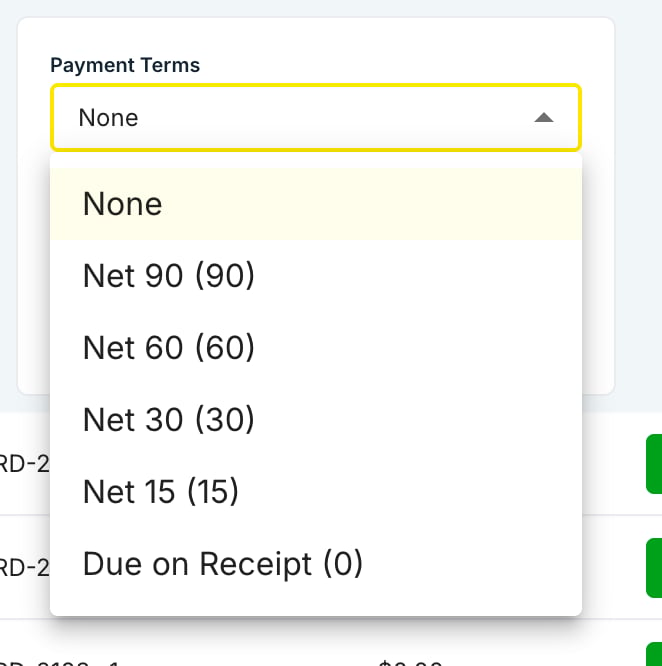 Tread fills in **Due Date** from the settlement's created date plus the term's days. Change the date by hand if you need to — the date you type is what's saved. Click **Save**.
 Once a settlement is **approved**, its payment term, due date, and notes are locked. If you void and re-bill a settlement, the new settlement keeps the same term and gets a fresh due date.
The **Due Date** prints on the settlement PDF whenever it is set. For QuickBooks-connected companies, the PDF also shows a **Payment Terms** column.
## Map terms to QuickBooks
If your company is connected to [QuickBooks](/integrations/quickbooks), open **Settings → Integrations → Rutter**, click your connection, and open the **Payment terms** tab. Pick the QuickBooks term for each Tread term. Only QuickBooks terms due a fixed number of days after the invoice date can be mapped, and each QuickBooks term can back exactly one Tread term.
## Common pitfalls
* **You can't deactivate a term.** It is the company default. Change the default in **Settings → Configuration** first.
* **The due date looks too early.** Tread counts from the settlement's *created* date, not from today. Adjust the date by hand if you need a different one.
* **A settlement has no term.** Settlements created before you set a default keep working as before. Pick a term on them individually, or leave them as they are.
Once a settlement is **approved**, its payment term, due date, and notes are locked. If you void and re-bill a settlement, the new settlement keeps the same term and gets a fresh due date.
The **Due Date** prints on the settlement PDF whenever it is set. For QuickBooks-connected companies, the PDF also shows a **Payment Terms** column.
## Map terms to QuickBooks
If your company is connected to [QuickBooks](/integrations/quickbooks), open **Settings → Integrations → Rutter**, click your connection, and open the **Payment terms** tab. Pick the QuickBooks term for each Tread term. Only QuickBooks terms due a fixed number of days after the invoice date can be mapped, and each QuickBooks term can back exactly one Tread term.
## Common pitfalls
* **You can't deactivate a term.** It is the company default. Change the default in **Settings → Configuration** first.
* **The due date looks too early.** Tread counts from the settlement's *created* date, not from today. Adjust the date by hand if you need a different one.
* **A settlement has no term.** Settlements created before you set a default keep working as before. Pick a term on them individually, or leave them as they are.