> ## Documentation Index
> Fetch the complete documentation index at: https://docs.tread.ai/llms.txt
> Use this file to discover all available pages before exploring further.

# Edit & Delete Equipment from a Vendor's Account

> Correct a vendor's truck details, or remove a truck the vendor no longer owns.

Edit a [vendor's](/onboarding/master-data/vendors) truck when a number or type is wrong. Delete it when the vendor no longer runs it.

## Edit equipment
<Steps>
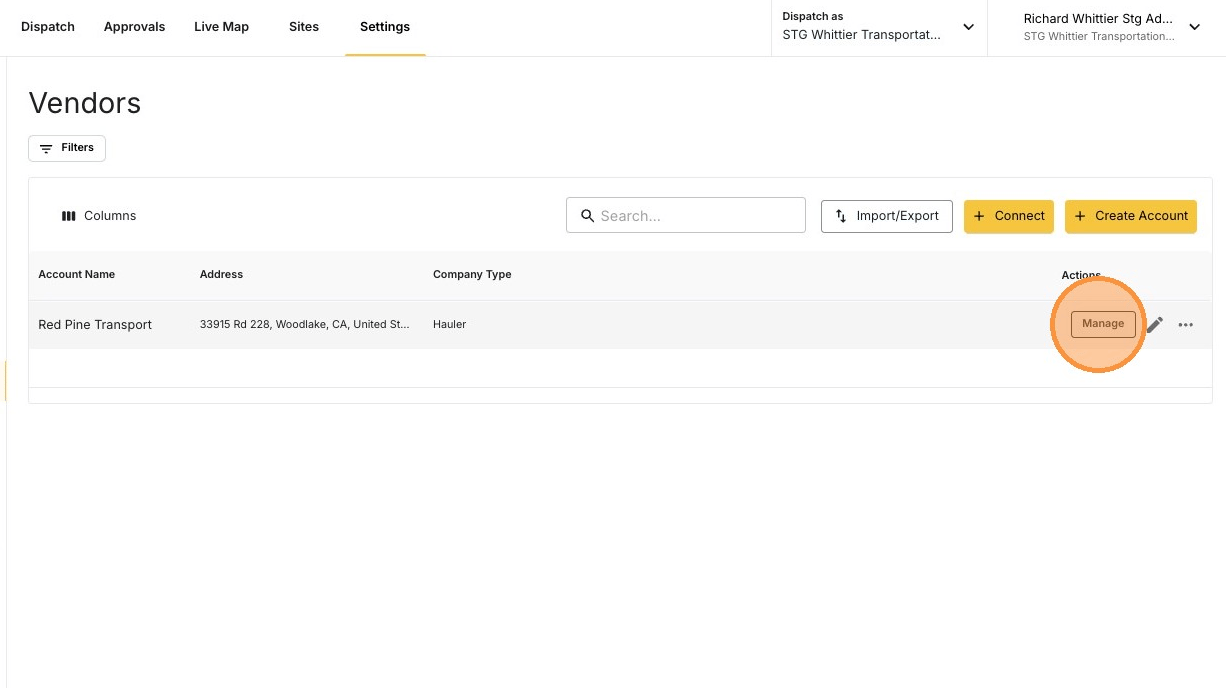
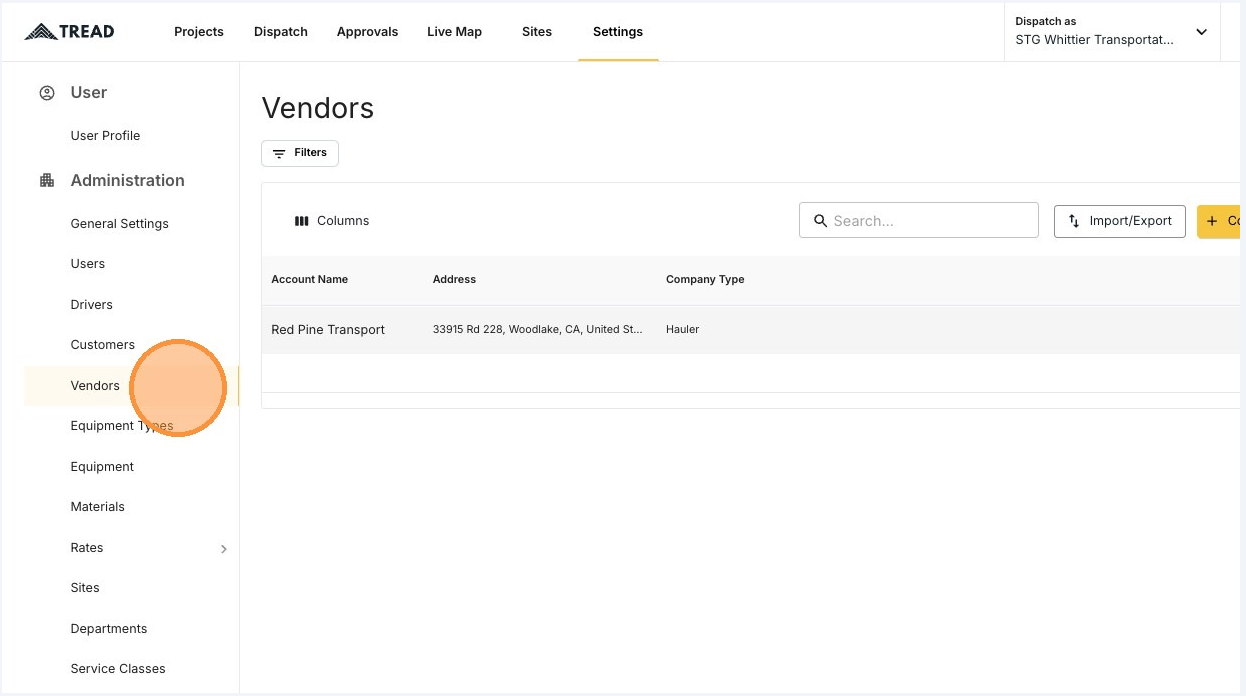
  <Step title="Open Settings → Vendors">
    <Frame>
      <img src="https://mintcdn.com/treadtechnologiesinc/z-gXukxyENJ5baPn/images/workflows/vendor-management/edit-equipment-01.png?fit=max&auto=format&n=z-gXukxyENJ5baPn&q=85&s=65160f774324065b0267cfbdd1eb1c0d" alt="The Vendors page under Settings" width="1246" height="696" data-path="images/workflows/vendor-management/edit-equipment-01.png" />
    </Frame>
  </Step>

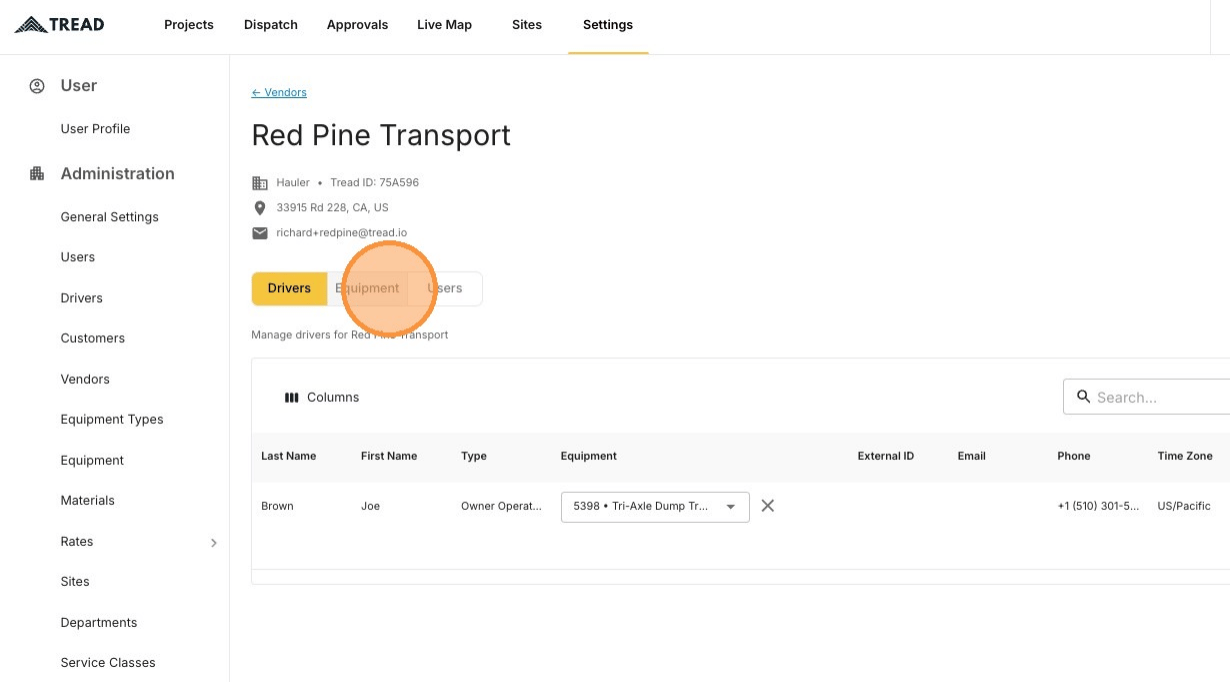
  <Step title="Click MANAGE on the vendor">
    <Frame>
      <img src="https://mintcdn.com/treadtechnologiesinc/z-gXukxyENJ5baPn/images/workflows/vendor-management/edit-equipment-02.png?fit=max&auto=format&n=z-gXukxyENJ5baPn&q=85&s=30dab759a063a77046bbf00138506c19" alt="The MANAGE button on a vendor row" width="1226" height="688" data-path="images/workflows/vendor-management/edit-equipment-02.png" />
    </Frame>
  </Step>

  <Step title="Open the Equipment tab">
    <Frame>
      <img src="https://mintcdn.com/treadtechnologiesinc/z-gXukxyENJ5baPn/images/workflows/vendor-management/edit-equipment-03.png?fit=max&auto=format&n=z-gXukxyENJ5baPn&q=85&s=59cf9ec79adac4ecef3779d32c83ce6d" alt="The Equipment tab on a vendor's management page" width="1230" height="682" data-path="images/workflows/vendor-management/edit-equipment-03.png" />
    </Frame>
  </Step>

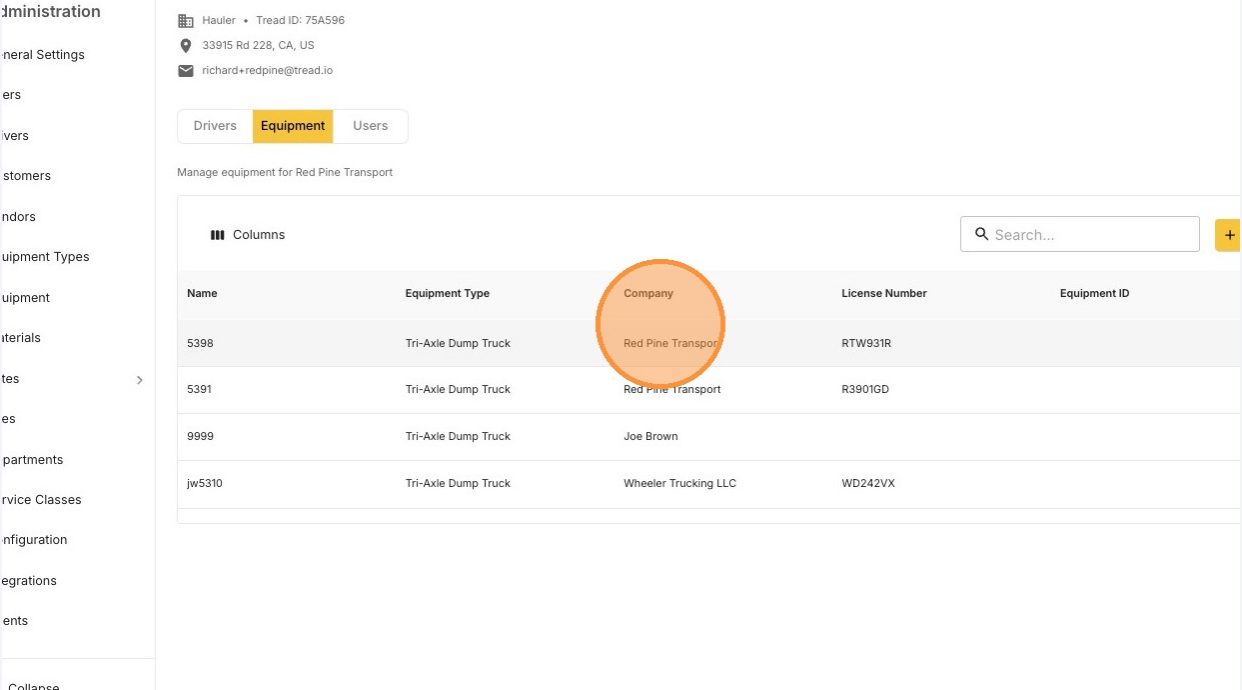
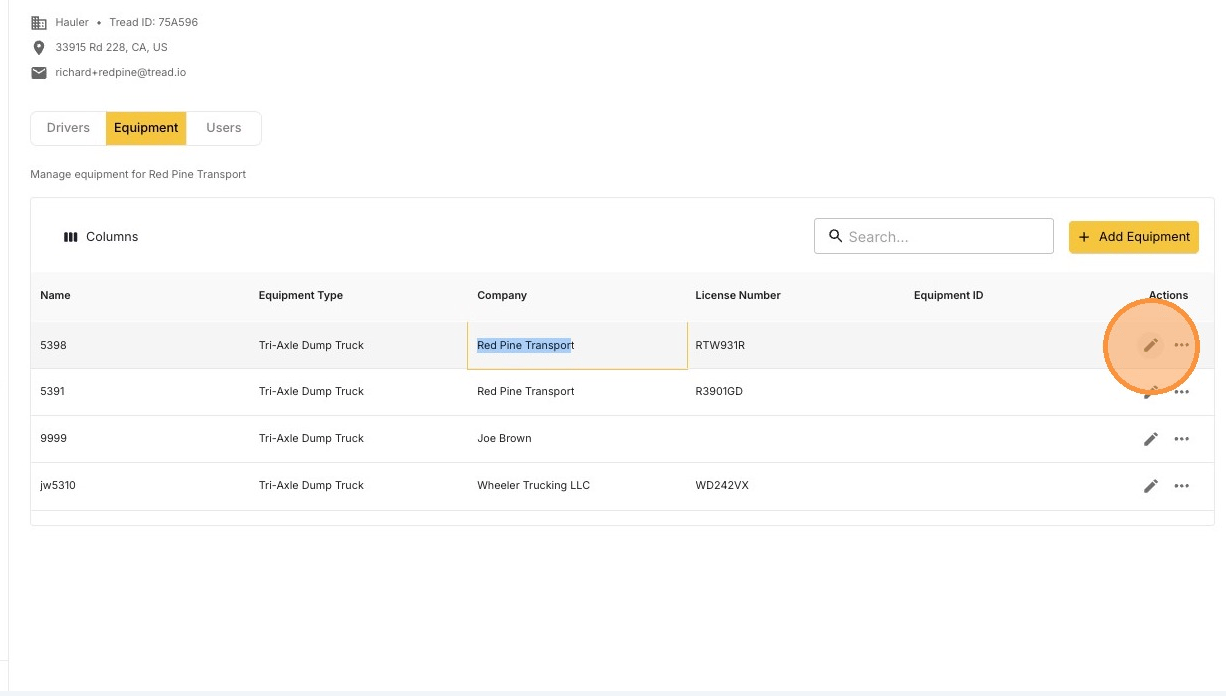
  <Step title="Find the vendor's own rows in the Company column">
    You can only edit equipment where the **Company** column shows this vendor's name. Other rows belong to another account.
    <Frame>
      <img src="https://mintcdn.com/treadtechnologiesinc/z-gXukxyENJ5baPn/images/workflows/vendor-management/edit-equipment-04.png?fit=max&auto=format&n=z-gXukxyENJ5baPn&q=85&s=9703151b9c3bf5ce9d4aaf4a628a9a08" alt="The Company column identifying which equipment rows belong to this vendor" width="1242" height="690" data-path="images/workflows/vendor-management/edit-equipment-04.png" />
    </Frame>
  </Step>

  <Step title="Click the pencil icon">
    <Frame>
      <img src="https://mintcdn.com/treadtechnologiesinc/z-gXukxyENJ5baPn/images/workflows/vendor-management/edit-equipment-05.png?fit=max&auto=format&n=z-gXukxyENJ5baPn&q=85&s=621a8ca8afeb15c7873a1961d2e74899" alt="The pencil icon on an equipment row" width="1226" height="696" data-path="images/workflows/vendor-management/edit-equipment-05.png" />
    </Frame>
  </Step>

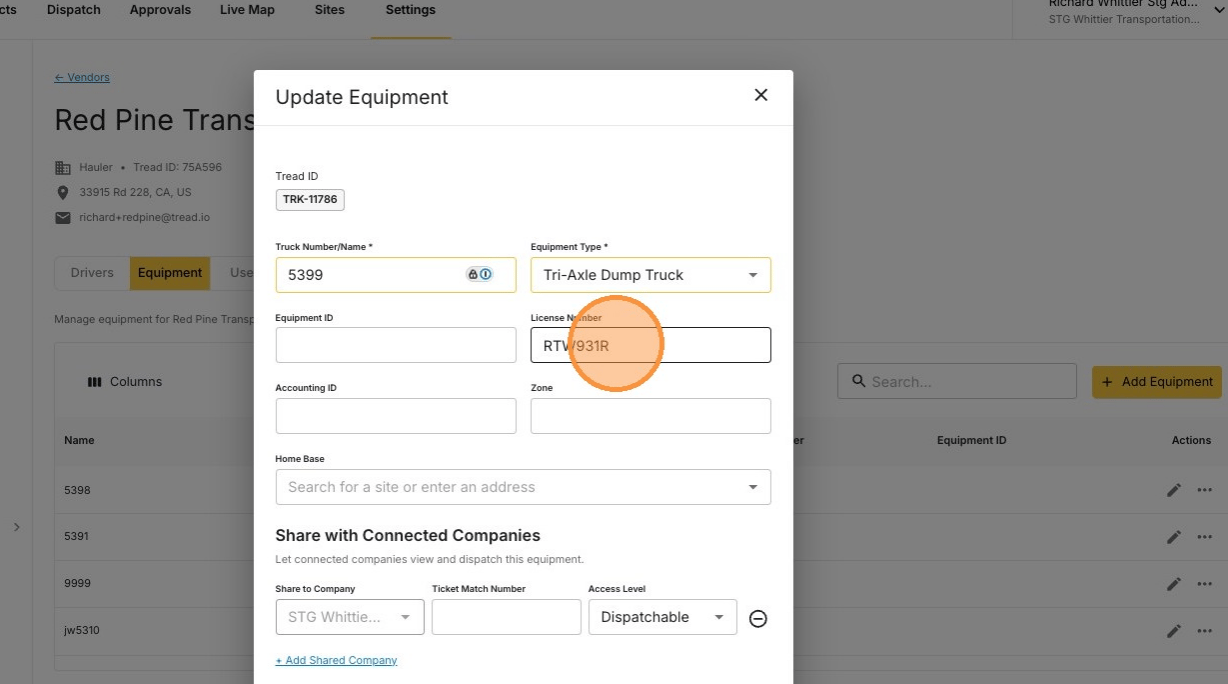
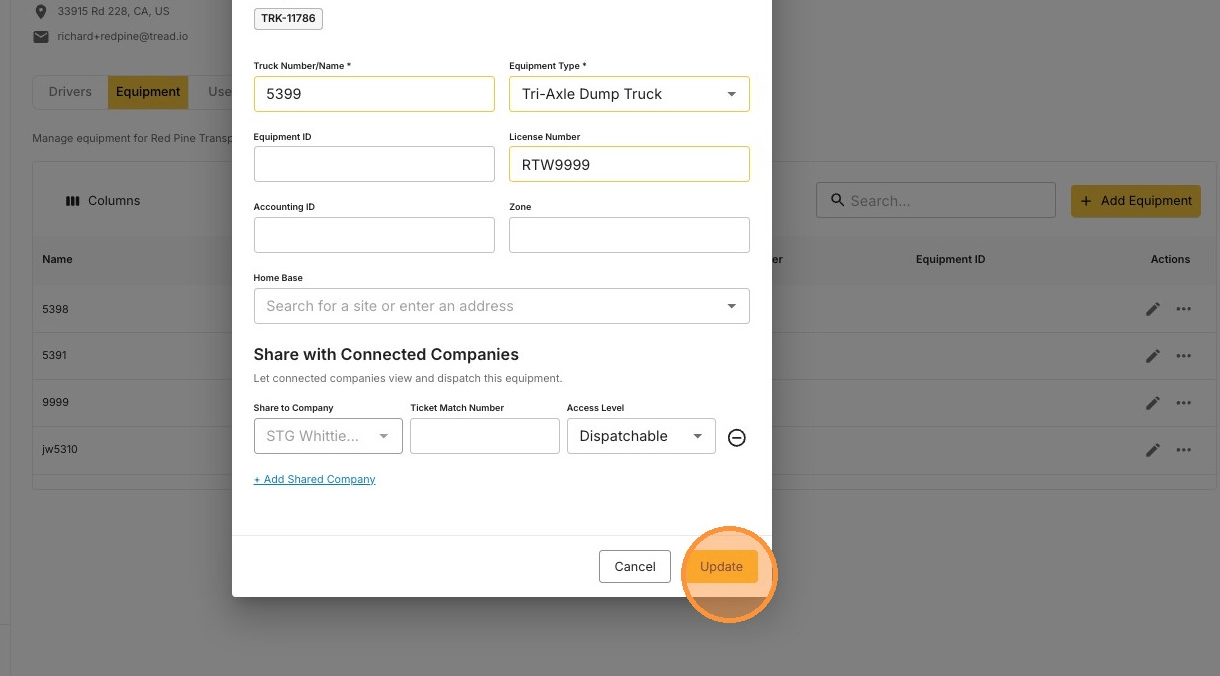
  <Step title="Update the details and click Update">
    <Frame>
      <img src="https://mintcdn.com/treadtechnologiesinc/z-gXukxyENJ5baPn/images/workflows/vendor-management/edit-equipment-06.png?fit=max&auto=format&n=z-gXukxyENJ5baPn&q=85&s=954696d8c1df7de1ddbd968a19ae7106" alt="Editing the equipment details" width="1228" height="684" data-path="images/workflows/vendor-management/edit-equipment-06.png" />
    </Frame>

    <Frame>
      <img src="https://mintcdn.com/treadtechnologiesinc/z-gXukxyENJ5baPn/images/workflows/vendor-management/edit-equipment-07.png?fit=max&auto=format&n=z-gXukxyENJ5baPn&q=85&s=46847267291682670fd41b2e26212775" alt="The updated equipment saved to the vendor's account" width="1220" height="676" data-path="images/workflows/vendor-management/edit-equipment-07.png" />
    </Frame>
  </Step>
</Steps>

## Delete equipment

<Steps>
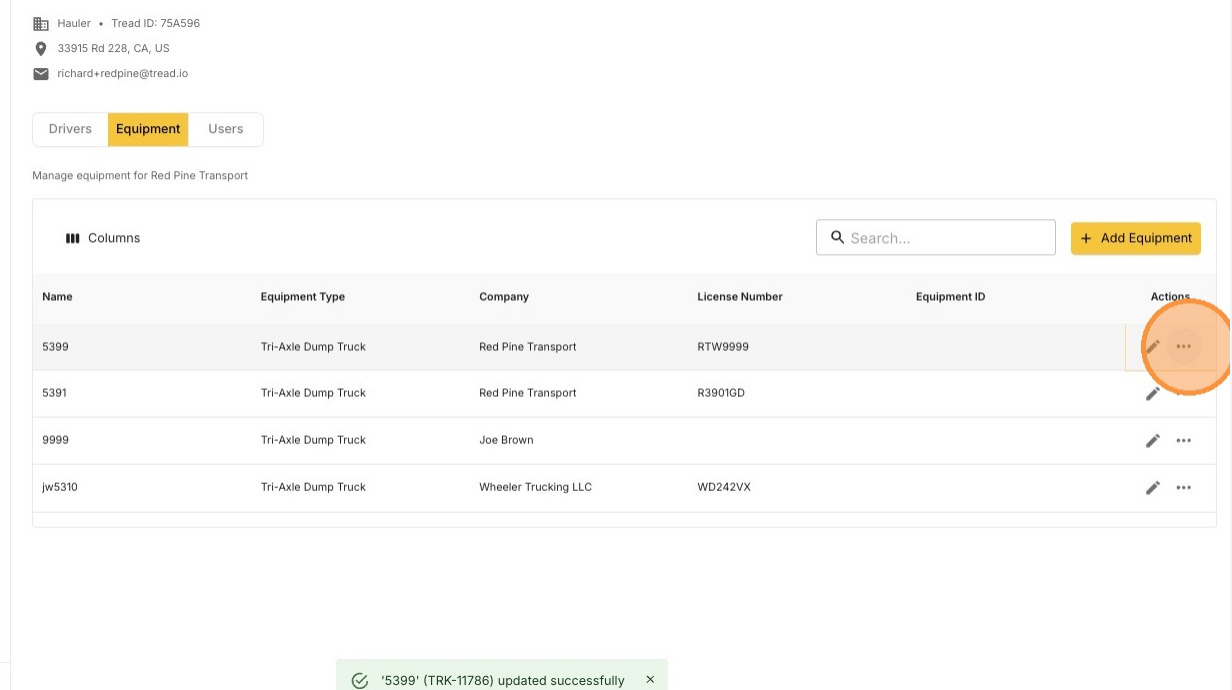
  <Step title="Click the ••• icon on the truck">
    <Frame>
      <img src="https://mintcdn.com/treadtechnologiesinc/z-gXukxyENJ5baPn/images/workflows/vendor-management/edit-equipment-08.png?fit=max&auto=format&n=z-gXukxyENJ5baPn&q=85&s=18a07a6ed32a8326b2cd3465799238a6" alt="The three-dot actions menu on an equipment row" width="1232" height="690" data-path="images/workflows/vendor-management/edit-equipment-08.png" />
    </Frame>
  </Step>

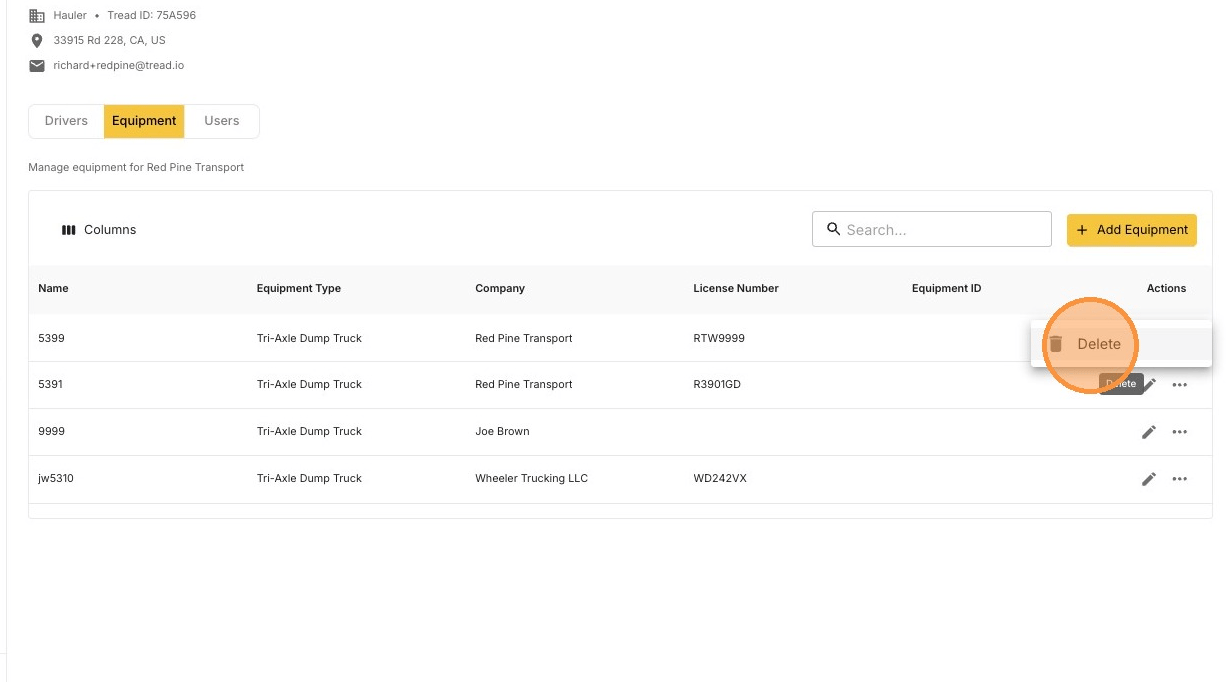
  <Step title="Click Delete">
    <Frame>
      <img src="https://mintcdn.com/treadtechnologiesinc/z-gXukxyENJ5baPn/images/workflows/vendor-management/edit-equipment-09.png?fit=max&auto=format&n=z-gXukxyENJ5baPn&q=85&s=1bc6ca30462e9847e3d7ca74e7e1934d" alt="The Delete action in the equipment row menu" width="1226" height="682" data-path="images/workflows/vendor-management/edit-equipment-09.png" />
    </Frame>
  </Step>

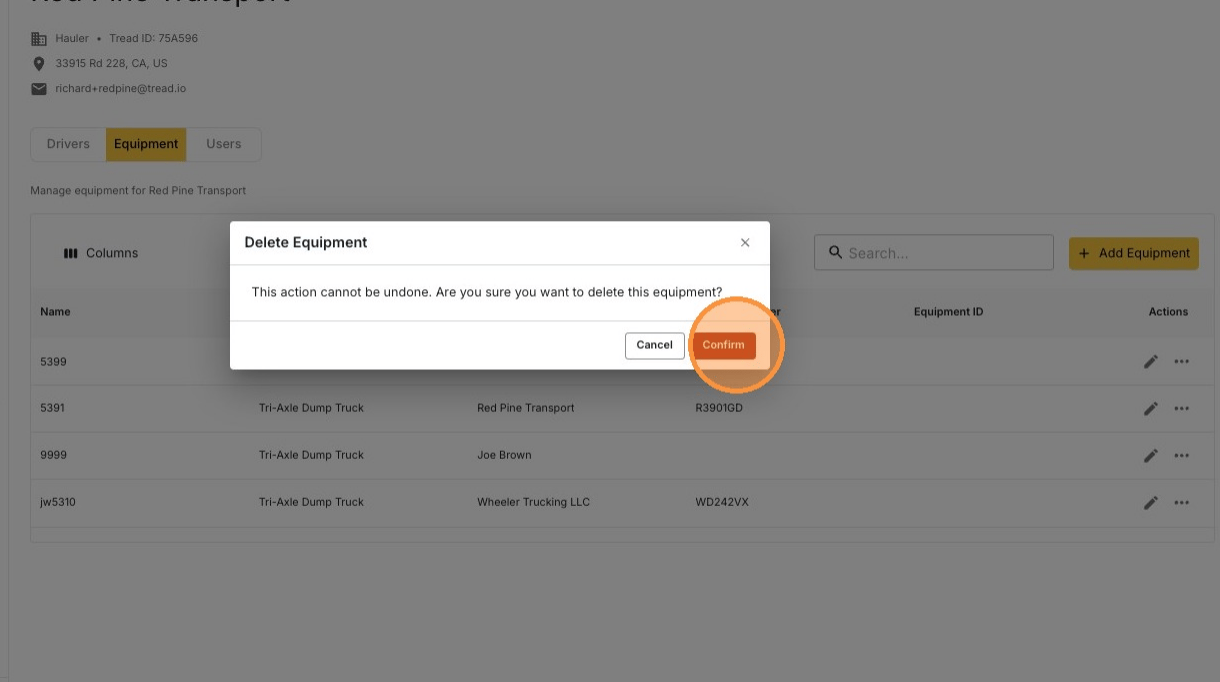
  <Step title="Click Confirm">
    <Frame>
      <img src="https://mintcdn.com/treadtechnologiesinc/z-gXukxyENJ5baPn/images/workflows/vendor-management/edit-equipment-10.png?fit=max&auto=format&n=z-gXukxyENJ5baPn&q=85&s=3553431f5d39af40ef65f05e568633ba" alt="Confirming deletion of the equipment" width="1220" height="682" data-path="images/workflows/vendor-management/edit-equipment-10.png" />
    </Frame>
  </Step>
</Steps>

## Related

* [Add Equipment to a Vendor's Account](/workflows/vendor-management/add-equipment)
* [Edit & Remove Drivers from a Vendor's Account](/workflows/vendor-management/edit-drivers)
* [Equipment](/concepts/equipment)