> ## Documentation Index
> Fetch the complete documentation index at: https://docs.tread.ai/llms.txt
> Use this file to discover all available pages before exploring further.

# Add, Edit, or Deactivate a User in a Vendor's Account

> Manage who can sign in to a vendor's Tread account — a foreman, a dispatcher, or a company driver.

Add a user to a [vendor's](/onboarding/master-data/vendors) account when someone there needs to sign in to Tread. Deactivate a user when they leave.

## Add a user
<Steps>
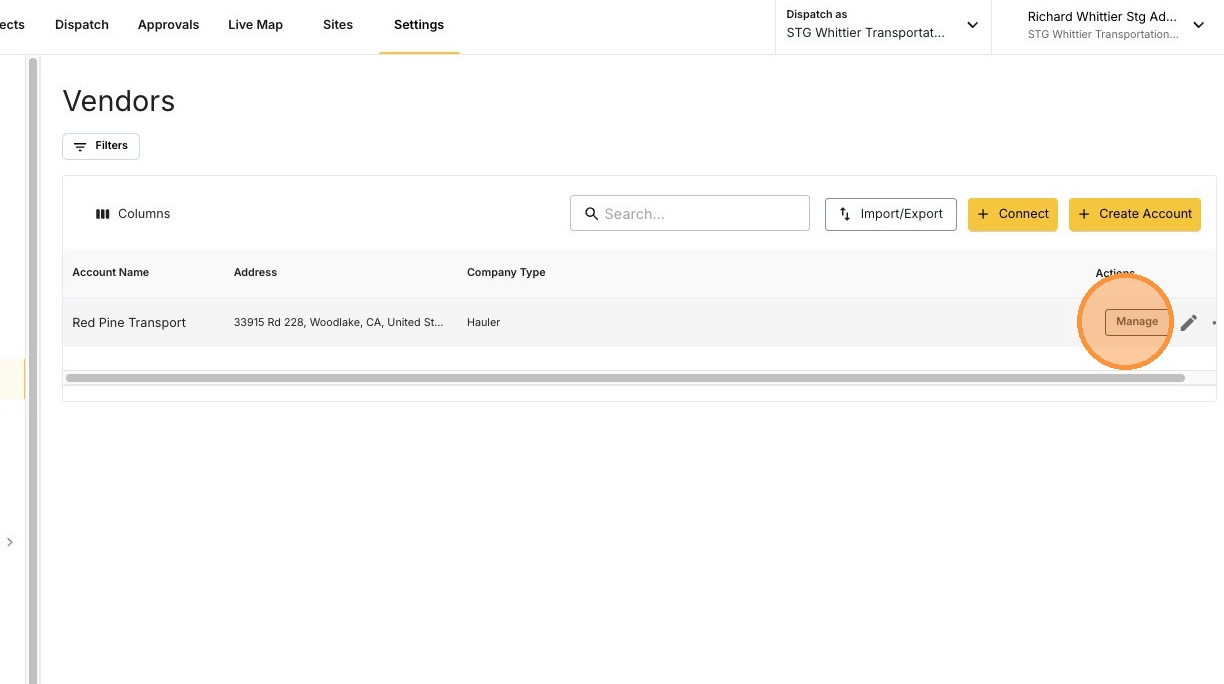
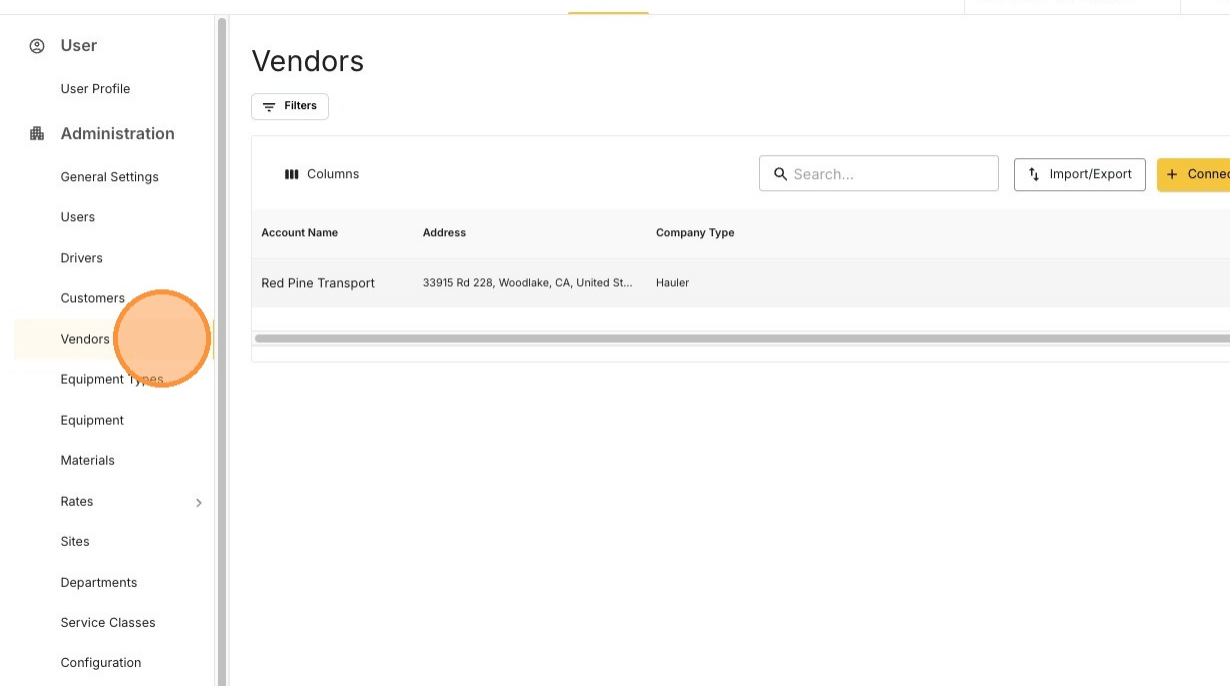
  <Step title="Open Settings → Vendors">
    <Frame>
      <img src="https://mintcdn.com/treadtechnologiesinc/z-gXukxyENJ5baPn/images/workflows/vendor-management/manage-users-01.png?fit=max&auto=format&n=z-gXukxyENJ5baPn&q=85&s=eea88e2630b8eea1cbb7d0bd7f5e11e3" alt="The Vendors page under Settings" width="1230" height="686" data-path="images/workflows/vendor-management/manage-users-01.png" />
    </Frame>
  </Step>

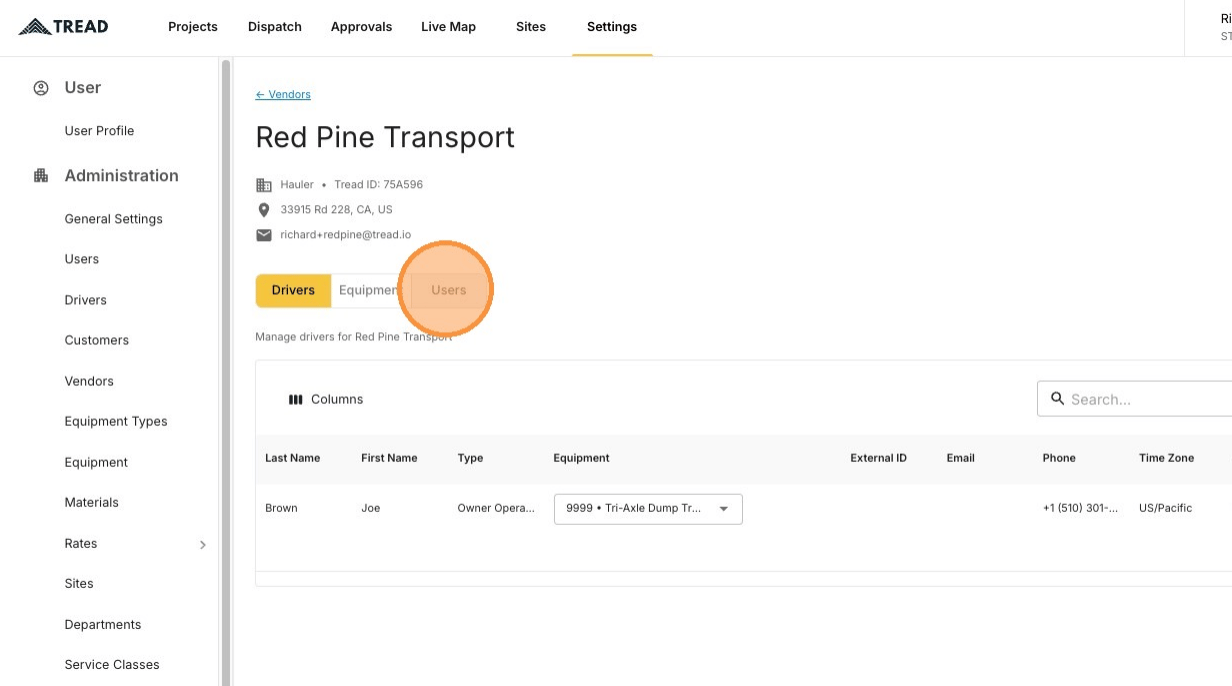
  <Step title="Click MANAGE">
    <Frame>
      <img src="https://mintcdn.com/treadtechnologiesinc/z-gXukxyENJ5baPn/images/workflows/vendor-management/manage-users-02.png?fit=max&auto=format&n=z-gXukxyENJ5baPn&q=85&s=1ec9bef990604aafbb17c17d0af87bbf" alt="The MANAGE button on a vendor row" width="1224" height="684" data-path="images/workflows/vendor-management/manage-users-02.png" />
    </Frame>
  </Step>

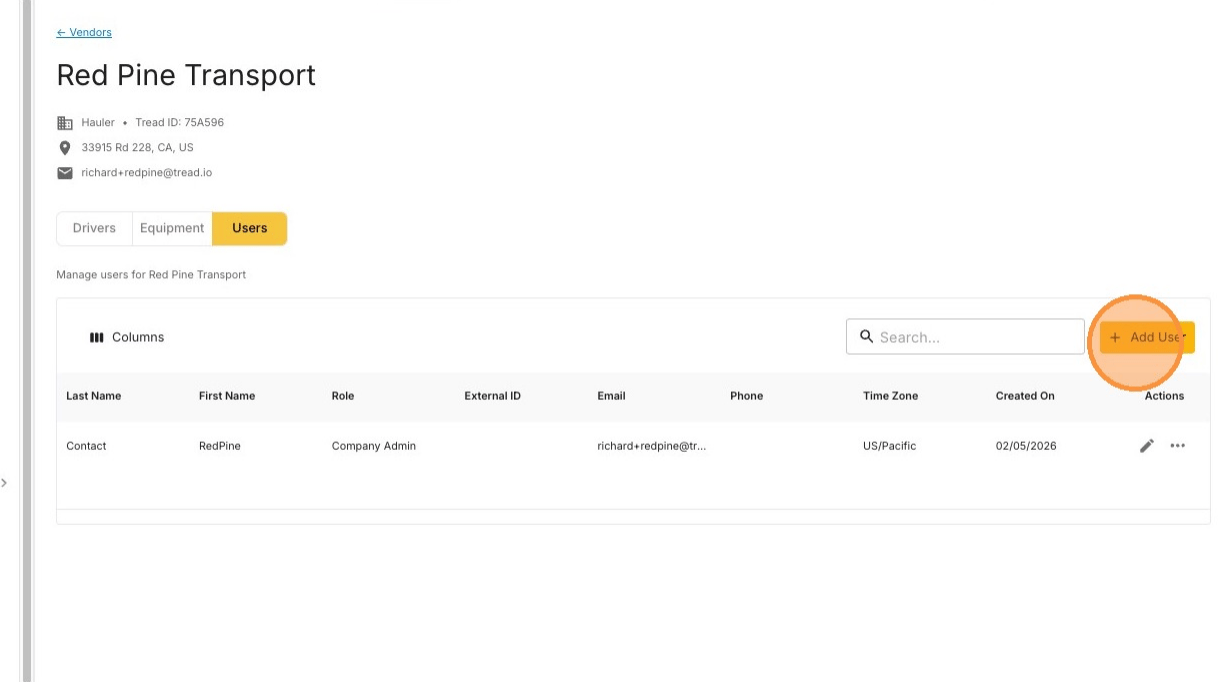
  <Step title="Open the Users tab">
    <Frame>
      <img src="https://mintcdn.com/treadtechnologiesinc/z-gXukxyENJ5baPn/images/workflows/vendor-management/manage-users-03.png?fit=max&auto=format&n=z-gXukxyENJ5baPn&q=85&s=40e3388f84e64d22ea31d26c7bd2bf23" alt="The Users tab on a vendor's management page" width="1232" height="686" data-path="images/workflows/vendor-management/manage-users-03.png" />
    </Frame>
  </Step>

  <Step title="Click Add User">
    <Frame>
      <img src="https://mintcdn.com/treadtechnologiesinc/z-gXukxyENJ5baPn/images/workflows/vendor-management/manage-users-04.png?fit=max&auto=format&n=z-gXukxyENJ5baPn&q=85&s=77467c8248c84e9bb084e5b5fa539605" alt="The Add User button on the vendor's Users tab" width="1222" height="682" data-path="images/workflows/vendor-management/manage-users-04.png" />
    </Frame>
  </Step>

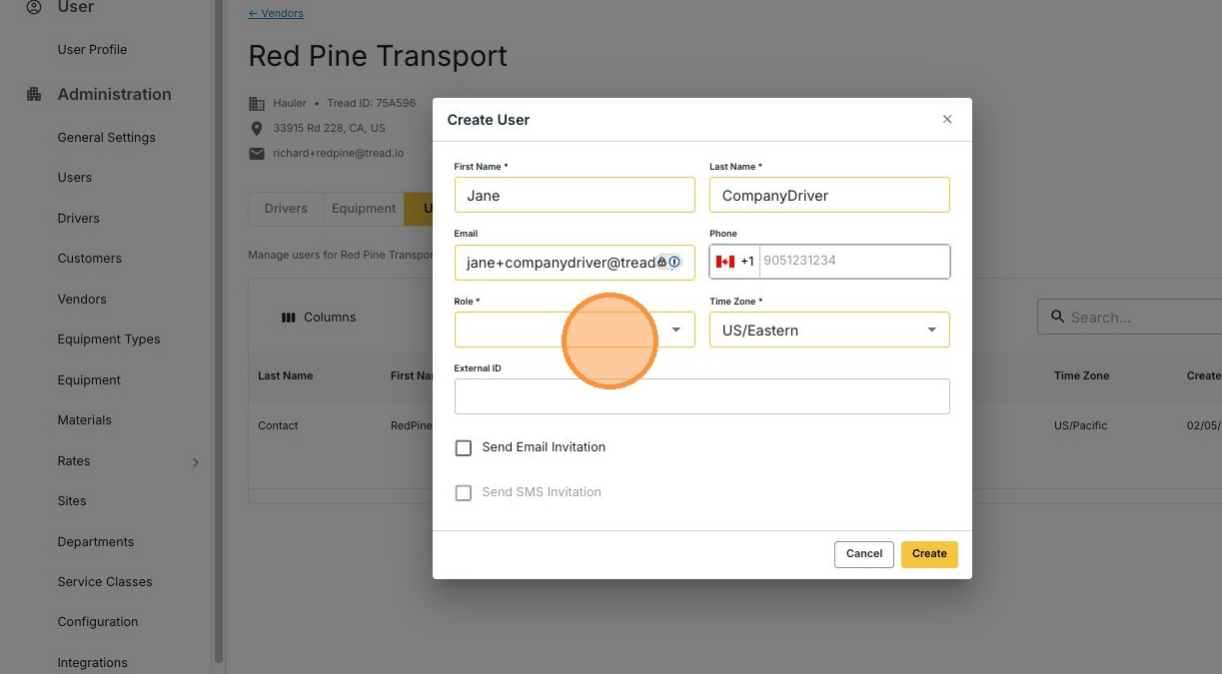
  <Step title="Enter the person's information">
    <Frame>
      <img src="https://mintcdn.com/treadtechnologiesinc/z-gXukxyENJ5baPn/images/workflows/vendor-management/manage-users-05.png?fit=max&auto=format&n=z-gXukxyENJ5baPn&q=85&s=29df742b73abccf67aebce991a65bfef" alt="The new user form" width="1222" height="674" data-path="images/workflows/vendor-management/manage-users-05.png" />
    </Frame>
  </Step>

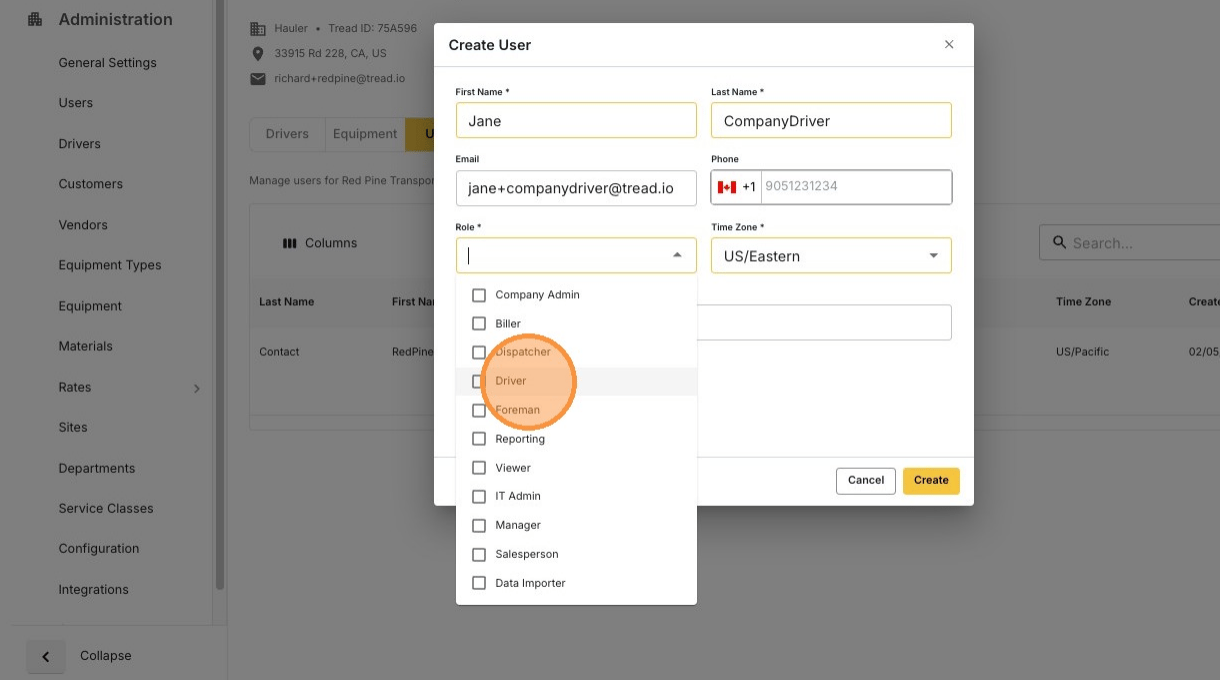
  <Step title="Select the person's role">
    <Frame>
      <img src="https://mintcdn.com/treadtechnologiesinc/z-gXukxyENJ5baPn/images/workflows/vendor-management/manage-users-06.png?fit=max&auto=format&n=z-gXukxyENJ5baPn&q=85&s=9680ba2f5631dac1271a2e06791f4593" alt="Selecting roles for the new user" width="1220" height="680" data-path="images/workflows/vendor-management/manage-users-06.png" />
    </Frame>

    <Warning>
      Only pick **Driver** if this person is a company (W2) driver for the vendor. See [Roles & Permissions](/concepts/roles-permissions).
    </Warning>
  </Step>

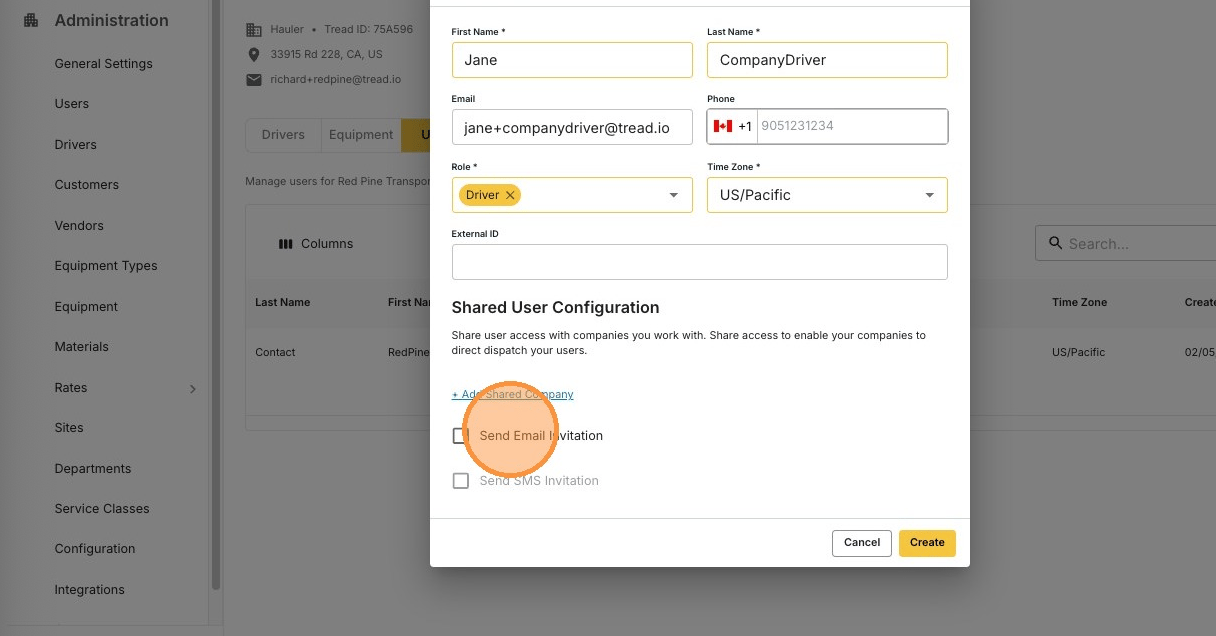
  <Step title="Send the invitation">
    Add an email address or phone number first, then send the invite by email or SMS.
    <Frame>
      <img src="https://mintcdn.com/treadtechnologiesinc/z-gXukxyENJ5baPn/images/workflows/vendor-management/manage-users-07.png?fit=max&auto=format&n=z-gXukxyENJ5baPn&q=85&s=d056122f941ae095964e7d14dae396a8" alt="Sending an email or SMS invitation to the new user" width="1216" height="636" data-path="images/workflows/vendor-management/manage-users-07.png" />
    </Frame>
  </Step>

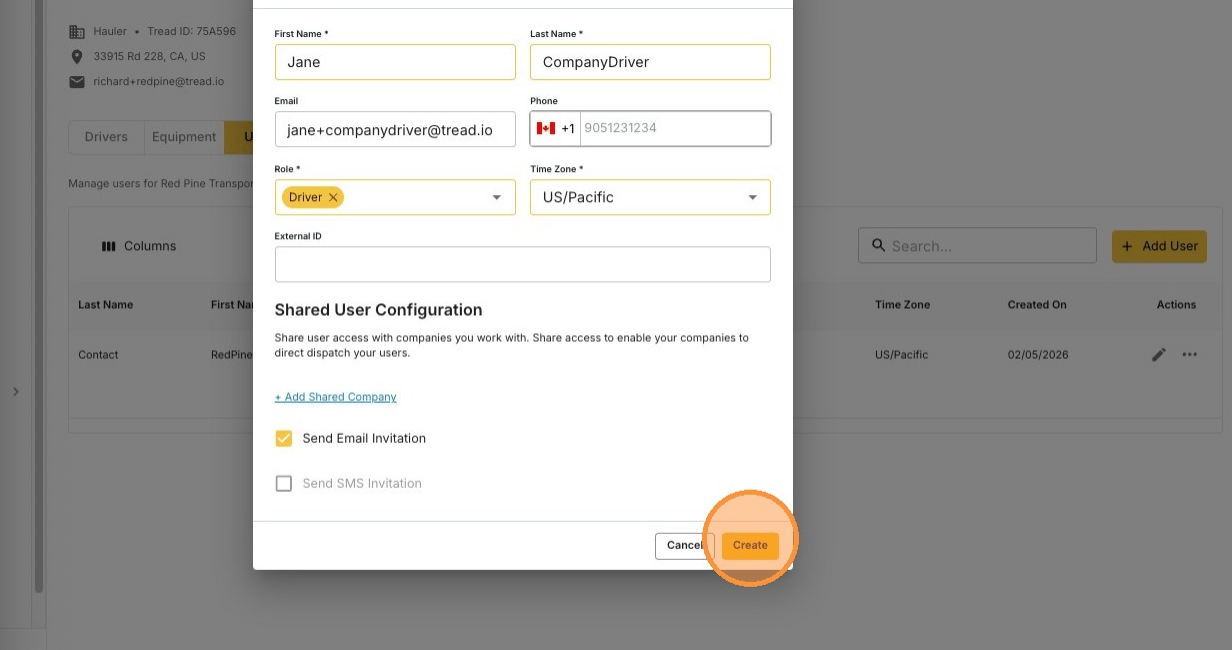
  <Step title="Click Create">
    <Frame>
      <img src="https://mintcdn.com/treadtechnologiesinc/z-gXukxyENJ5baPn/images/workflows/vendor-management/manage-users-08.png?fit=max&auto=format&n=z-gXukxyENJ5baPn&q=85&s=25dc2965be202e9bee9c40862ce51f74" alt="The Create button on the new user form" width="1232" height="650" data-path="images/workflows/vendor-management/manage-users-08.png" />
    </Frame>
  </Step>
</Steps>

## Edit a user

<Steps>
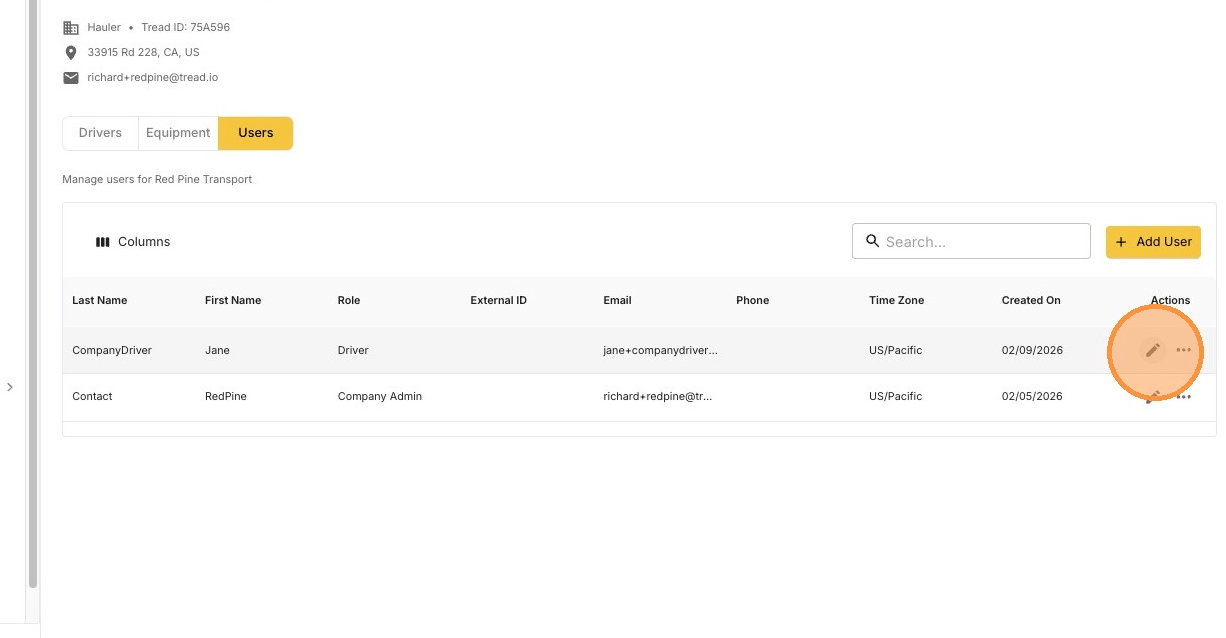
  <Step title="Click the pencil icon">
    <Frame>
      <img src="https://mintcdn.com/treadtechnologiesinc/z-gXukxyENJ5baPn/images/workflows/vendor-management/manage-users-09.png?fit=max&auto=format&n=z-gXukxyENJ5baPn&q=85&s=34583c631ec09949c83e03611778c4e3" alt="The pencil icon on a user row" width="1226" height="638" data-path="images/workflows/vendor-management/manage-users-09.png" />
    </Frame>
  </Step>

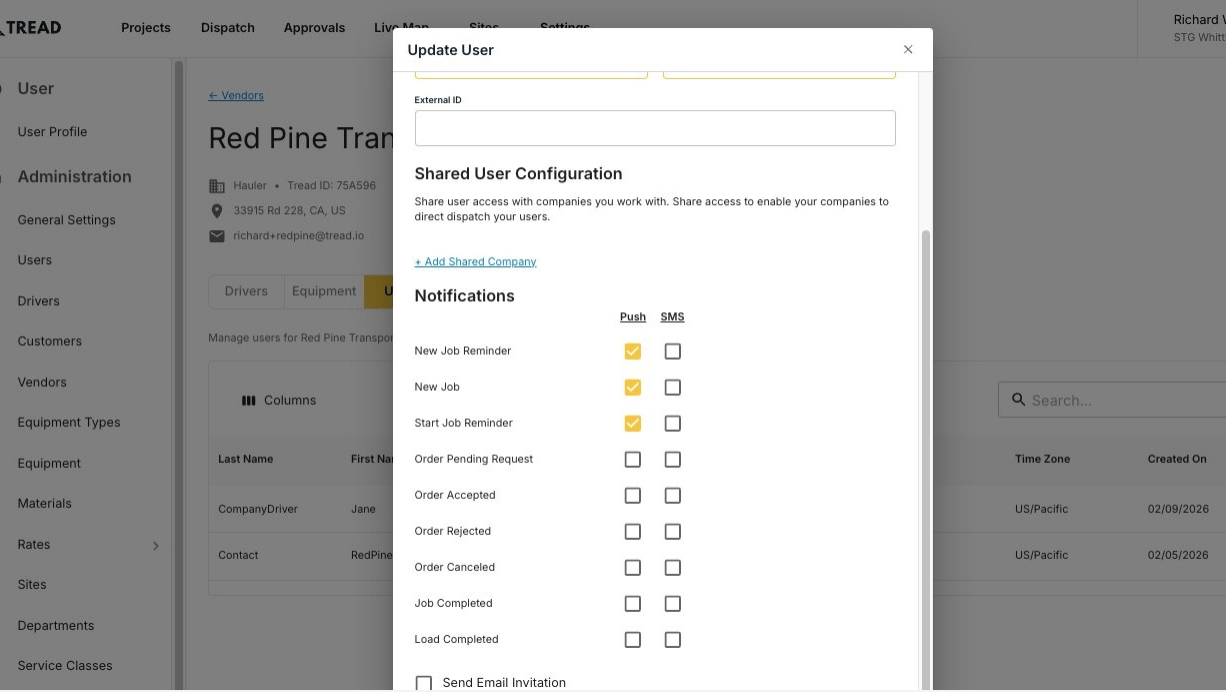
  <Step title="Update the details and click Update">
    <Frame>
      <img src="https://mintcdn.com/treadtechnologiesinc/z-gXukxyENJ5baPn/images/workflows/vendor-management/manage-users-10.png?fit=max&auto=format&n=z-gXukxyENJ5baPn&q=85&s=a1972a5253986cfce8141b77f4f27ec3" alt="Editing a vendor user's information" width="1226" height="692" data-path="images/workflows/vendor-management/manage-users-10.png" />
    </Frame>
  </Step>
</Steps>

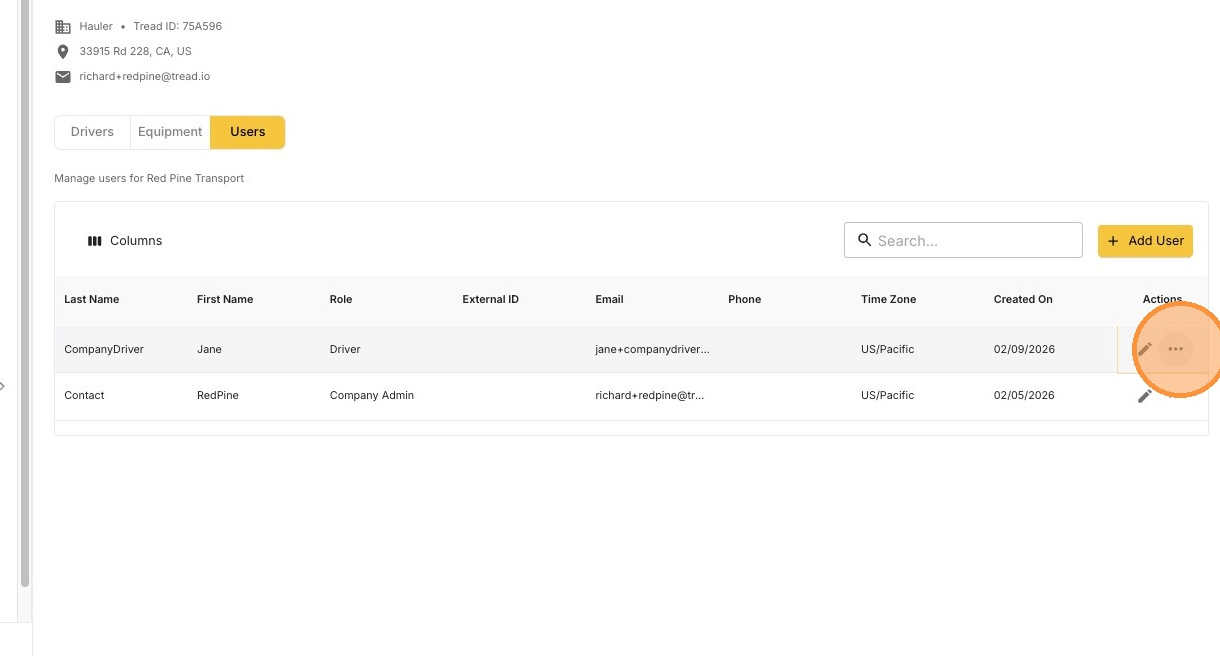
## Deactivate a user

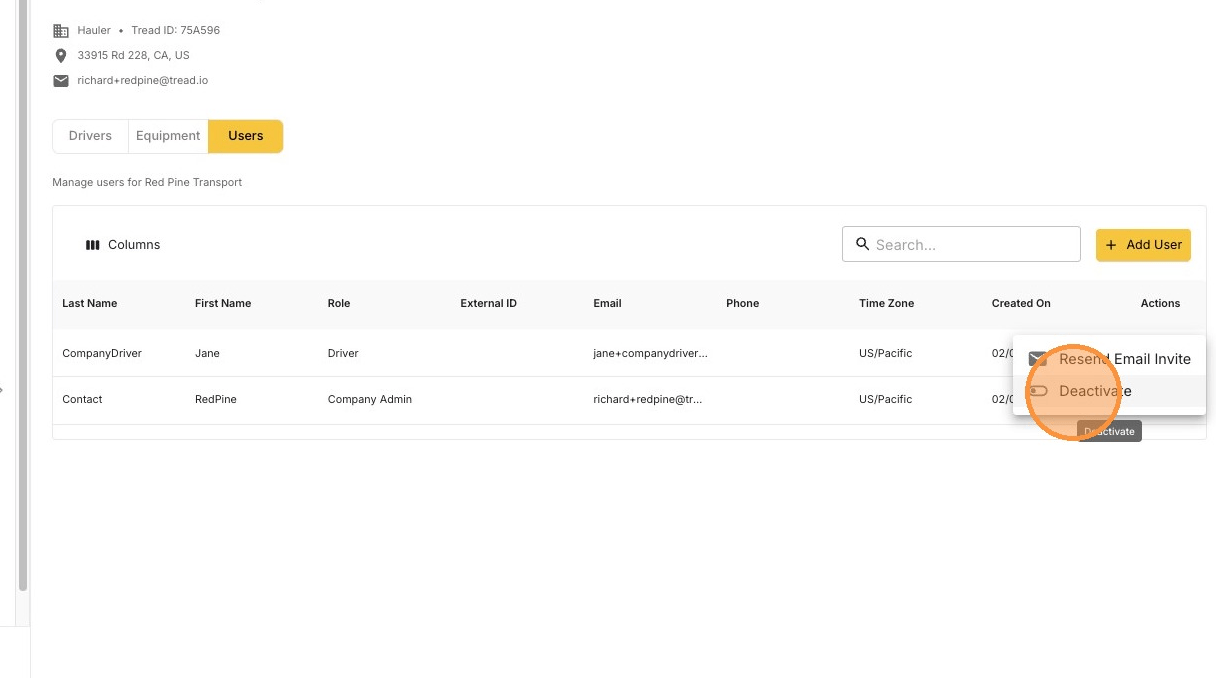
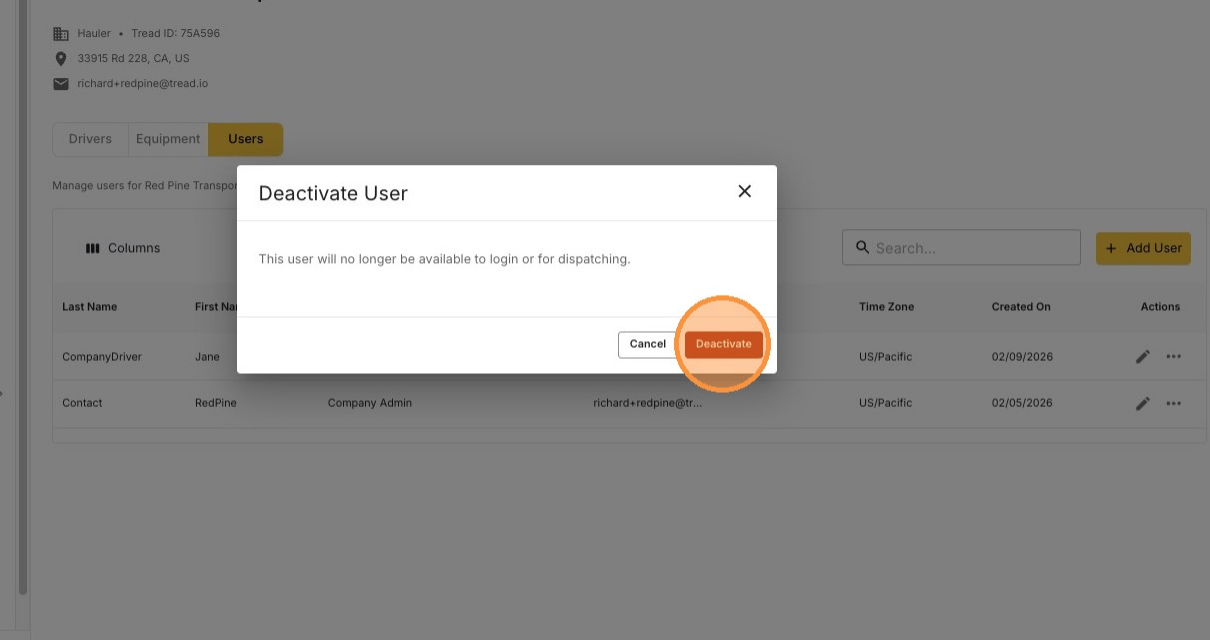
Deactivating removes the user from the vendor's account.
<Steps>
  <Step title="Find the user and click the ••• icon">
    <Frame>
      <img src="https://mintcdn.com/treadtechnologiesinc/z-gXukxyENJ5baPn/images/workflows/vendor-management/manage-users-11.png?fit=max&auto=format&n=z-gXukxyENJ5baPn&q=85&s=684436050a6fdf46726bec0257f4c3f2" alt="The three-dot actions menu on a user row" width="1220" height="656" data-path="images/workflows/vendor-management/manage-users-11.png" />
    </Frame>
  </Step>

  <Step title="Click Deactivate">
    <Frame>
      <img src="https://mintcdn.com/treadtechnologiesinc/z-gXukxyENJ5baPn/images/workflows/vendor-management/manage-users-12.png?fit=max&auto=format&n=z-gXukxyENJ5baPn&q=85&s=495d9cfb110fd9698192c959385a9955" alt="The Deactivate action in the user row menu" width="1216" height="678" data-path="images/workflows/vendor-management/manage-users-12.png" />
    </Frame>
  </Step>

  <Step title="Confirm the deactivation">
    <Frame>
      <img src="https://mintcdn.com/treadtechnologiesinc/z-gXukxyENJ5baPn/images/workflows/vendor-management/manage-users-13.png?fit=max&auto=format&n=z-gXukxyENJ5baPn&q=85&s=f0abc4604f531cf617d8a7b8a29a3bcb" alt="Confirming deactivation of the user" width="1210" height="640" data-path="images/workflows/vendor-management/manage-users-13.png" />
    </Frame>
  </Step>
</Steps>

## Related

* [Add Drivers to a Vendor's Account](/workflows/vendor-management/add-drivers)
* [Roles & Permissions](/concepts/roles-permissions)
* [Users (master data)](/onboarding/master-data/users)