> ## Documentation Index
> Fetch the complete documentation index at: https://docs.tread.ai/llms.txt
> Use this file to discover all available pages before exploring further.
# Vendor Management
> Add and edit a vendor's drivers, trucks, and users from your own account — without waiting on the vendor to do it.
Vendor Management lets you work inside a [vendor's](/onboarding/master-data/vendors) account for them. A vendor is an account you send dispatches to, instead of assigning your own driver. When a vendor is slow to add a new truck or driver, you add it yourself and dispatch the same day.
A vendor can be a multi-truck hauler, a broker, or a single Owner-Operator (O\&O).
## Where do I find it?
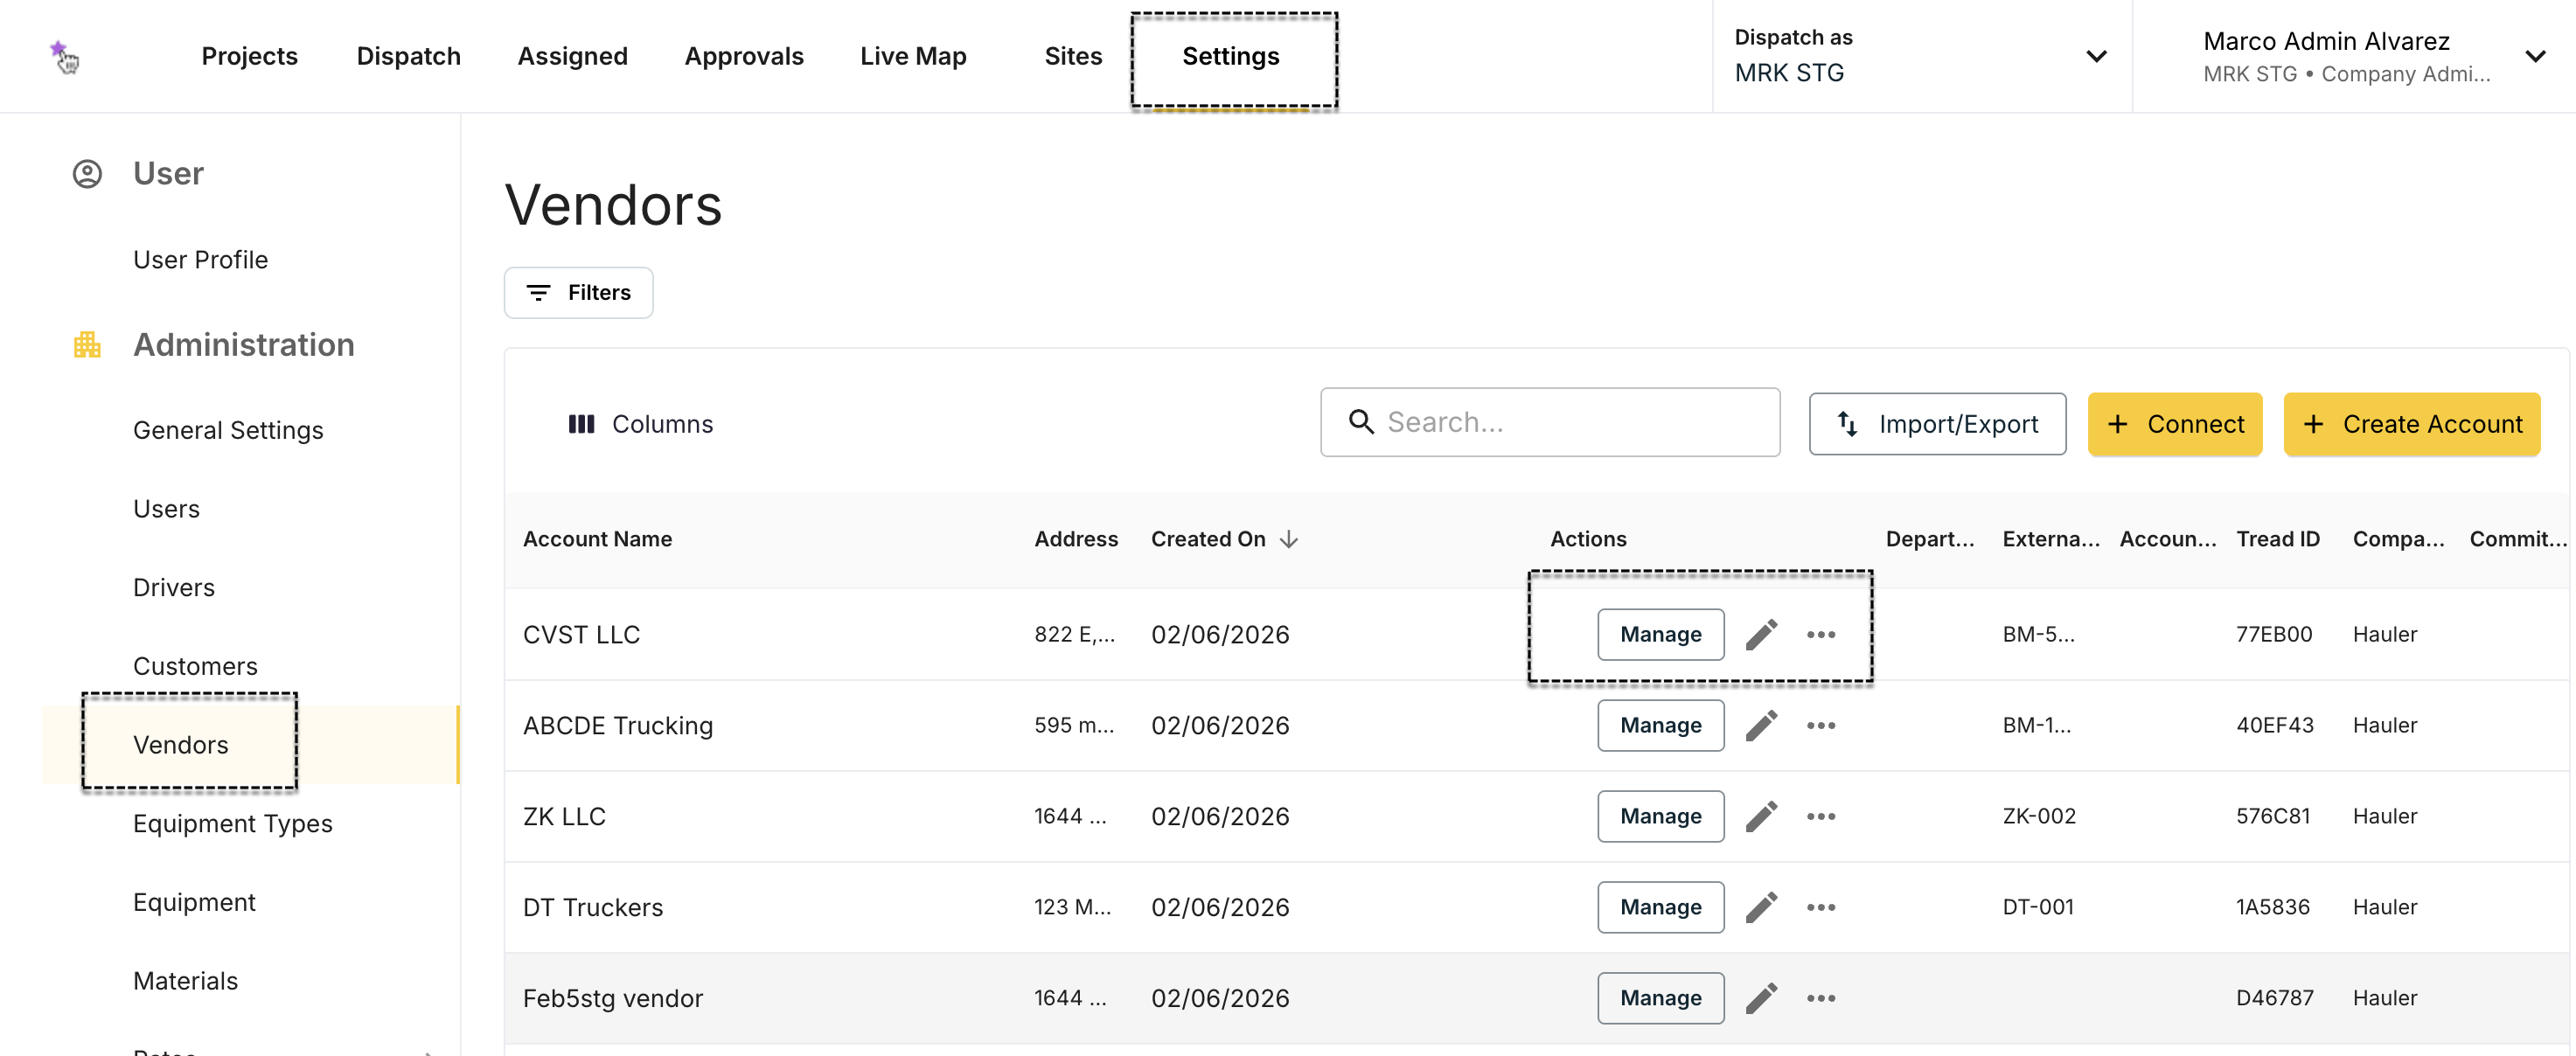
Find the vendor in the list, then look for a **MANAGE** button on their row.
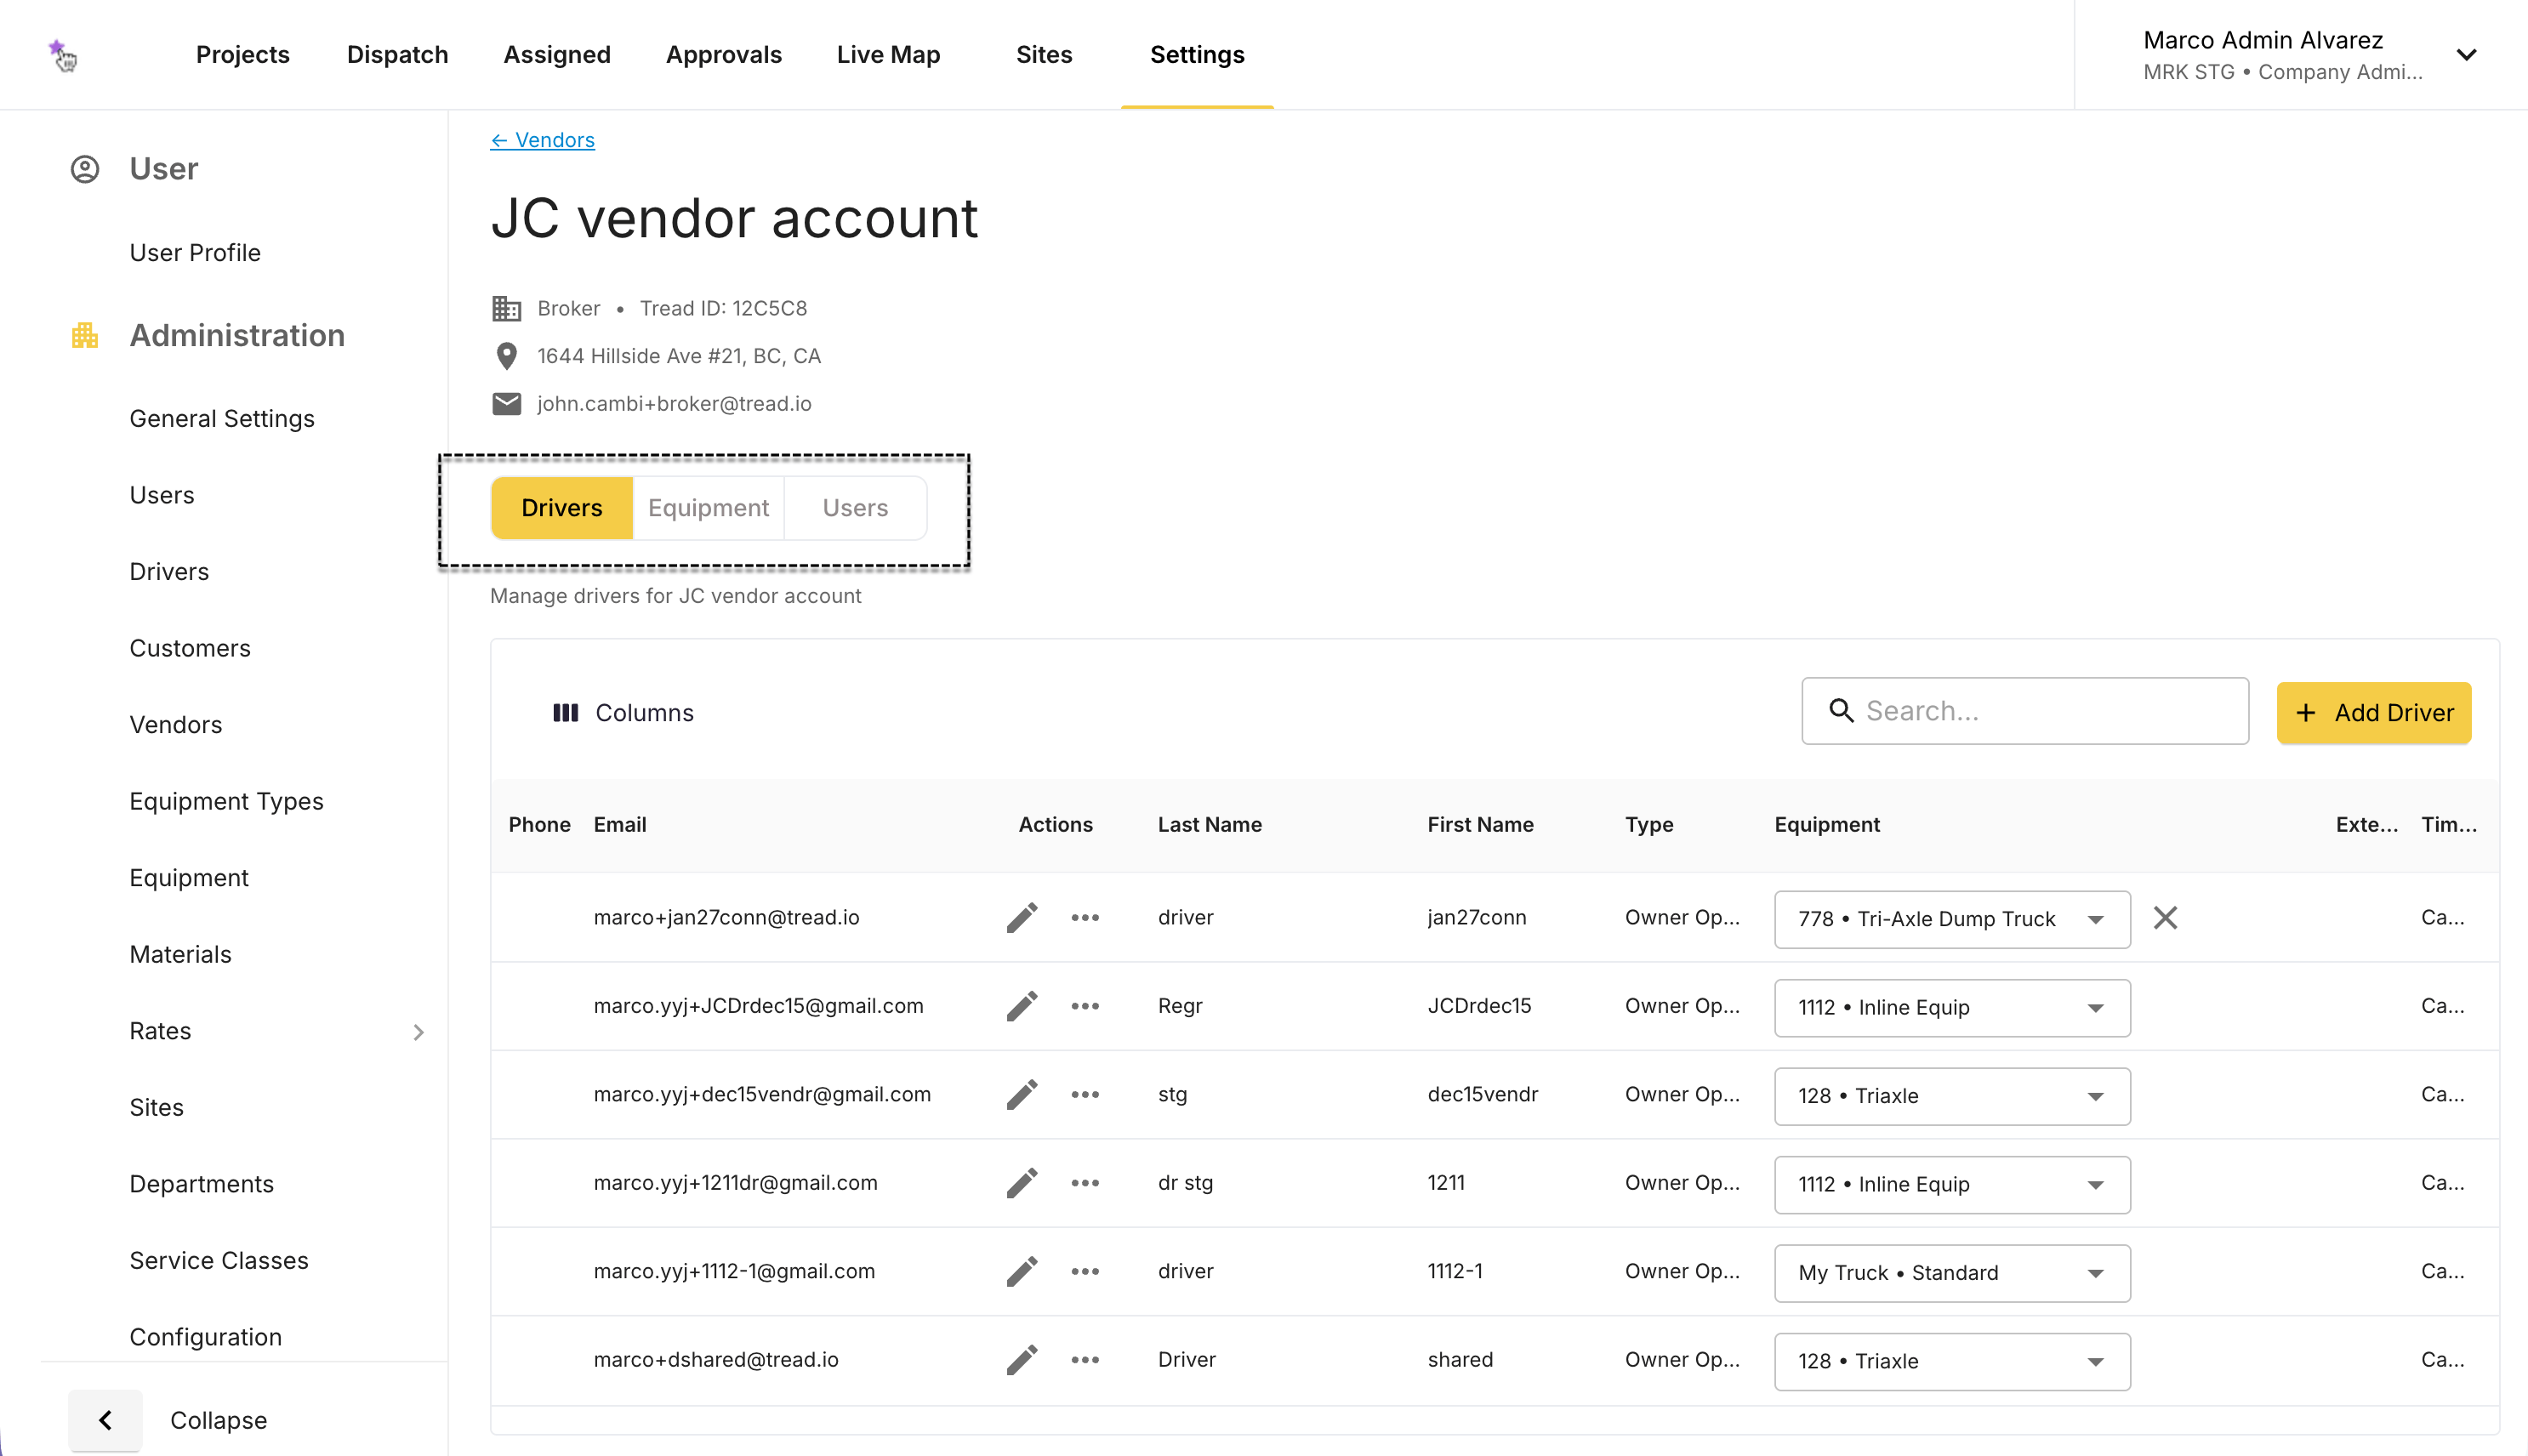
 You land on the vendor's page. It has three tabs: **Drivers**, **Equipment**, and **Users**.
 **Let us show you how:**
## Guides
Create a truck in the vendor's account and share it to yourself for dispatch.
Fix a truck number, or remove a truck the vendor no longer owns.
Give a vendor's new driver access to Tread.
Update a driver's details, or remove one who left.
Add, edit, or deactivate a user in the vendor's account.
## Can't find this feature?
If you don't see a **MANAGE** button, the vendor isn't set up for management yet. Email [support@tread.io](mailto:support@tread.io) with the list of vendors you need to manage.
## Related
* [Vendors (master data)](/onboarding/master-data/vendors)
* [Dispatching to Drivers and Vendors](/concepts/dispatching-drivers-vendors)
* [Vendors: Adding Drivers & Trucks](/workflows/vendors-adding-drivers-and-trucks) — for a vendor working in their own account
**Let us show you how:**
## Guides
Create a truck in the vendor's account and share it to yourself for dispatch.
Fix a truck number, or remove a truck the vendor no longer owns.
Give a vendor's new driver access to Tread.
Update a driver's details, or remove one who left.
Add, edit, or deactivate a user in the vendor's account.
## Can't find this feature?
If you don't see a **MANAGE** button, the vendor isn't set up for management yet. Email [support@tread.io](mailto:support@tread.io) with the list of vendors you need to manage.
## Related
* [Vendors (master data)](/onboarding/master-data/vendors)
* [Dispatching to Drivers and Vendors](/concepts/dispatching-drivers-vendors)
* [Vendors: Adding Drivers & Trucks](/workflows/vendors-adding-drivers-and-trucks) — for a vendor working in their own account