- Web
- Mobile
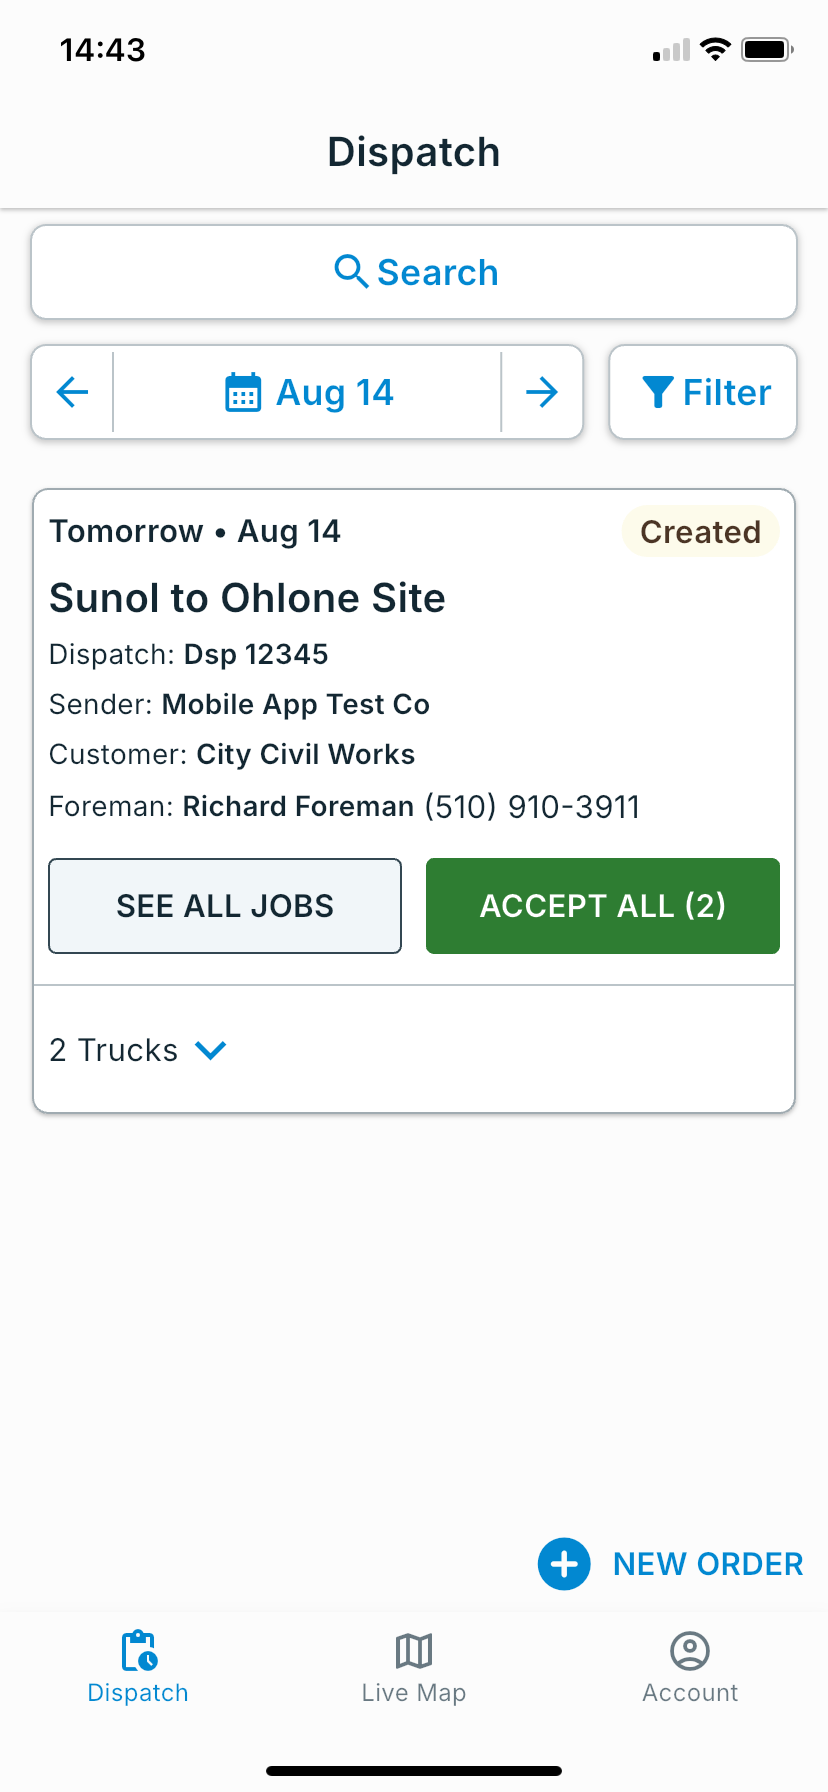
Accept the jobs from your customer
New jobs arrive with a status of Pending Acceptance. Click Accept on a row to take that job, or Accept All at the top of the order to take every pending row at once. Accepted jobs are ready to assign.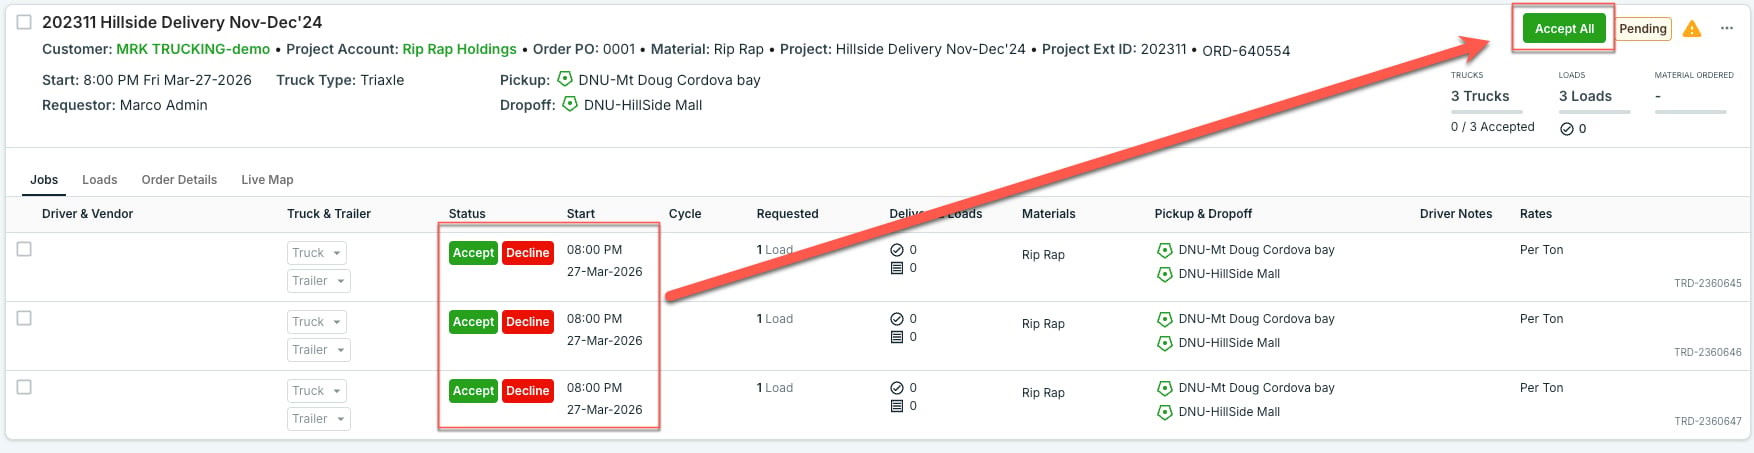
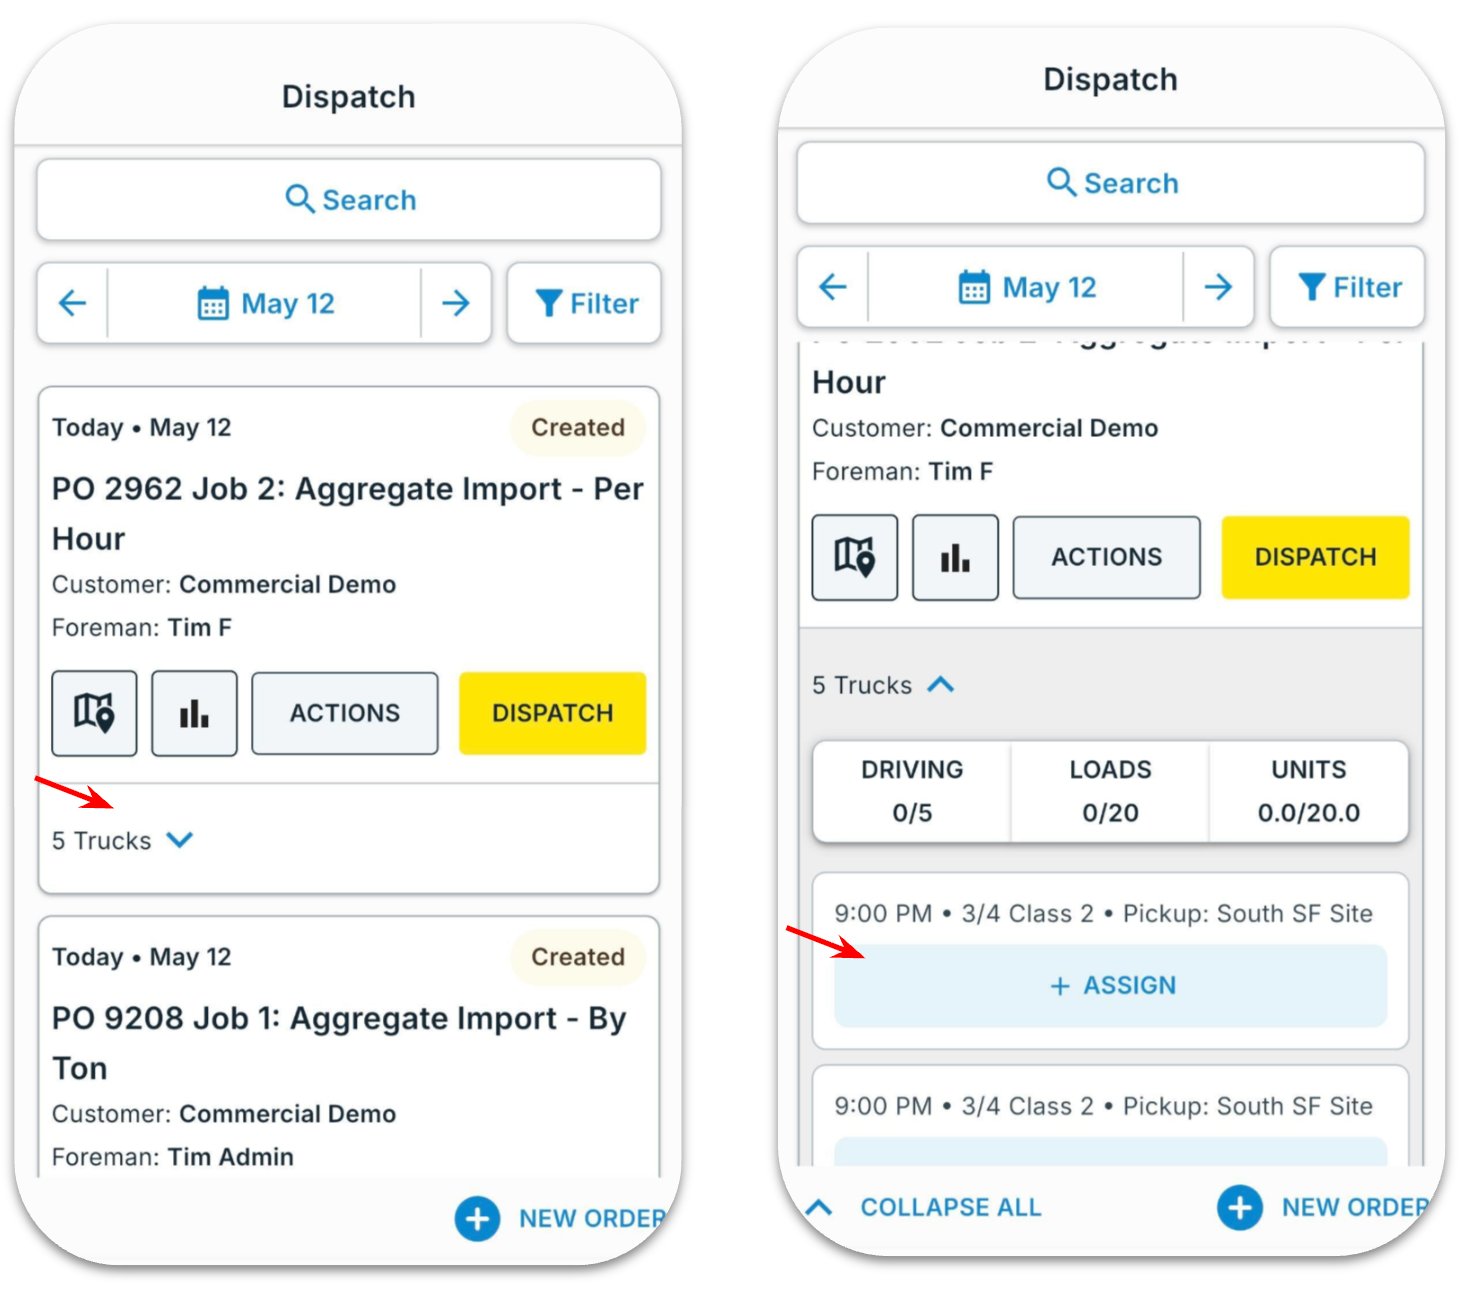
Assign drivers to each job
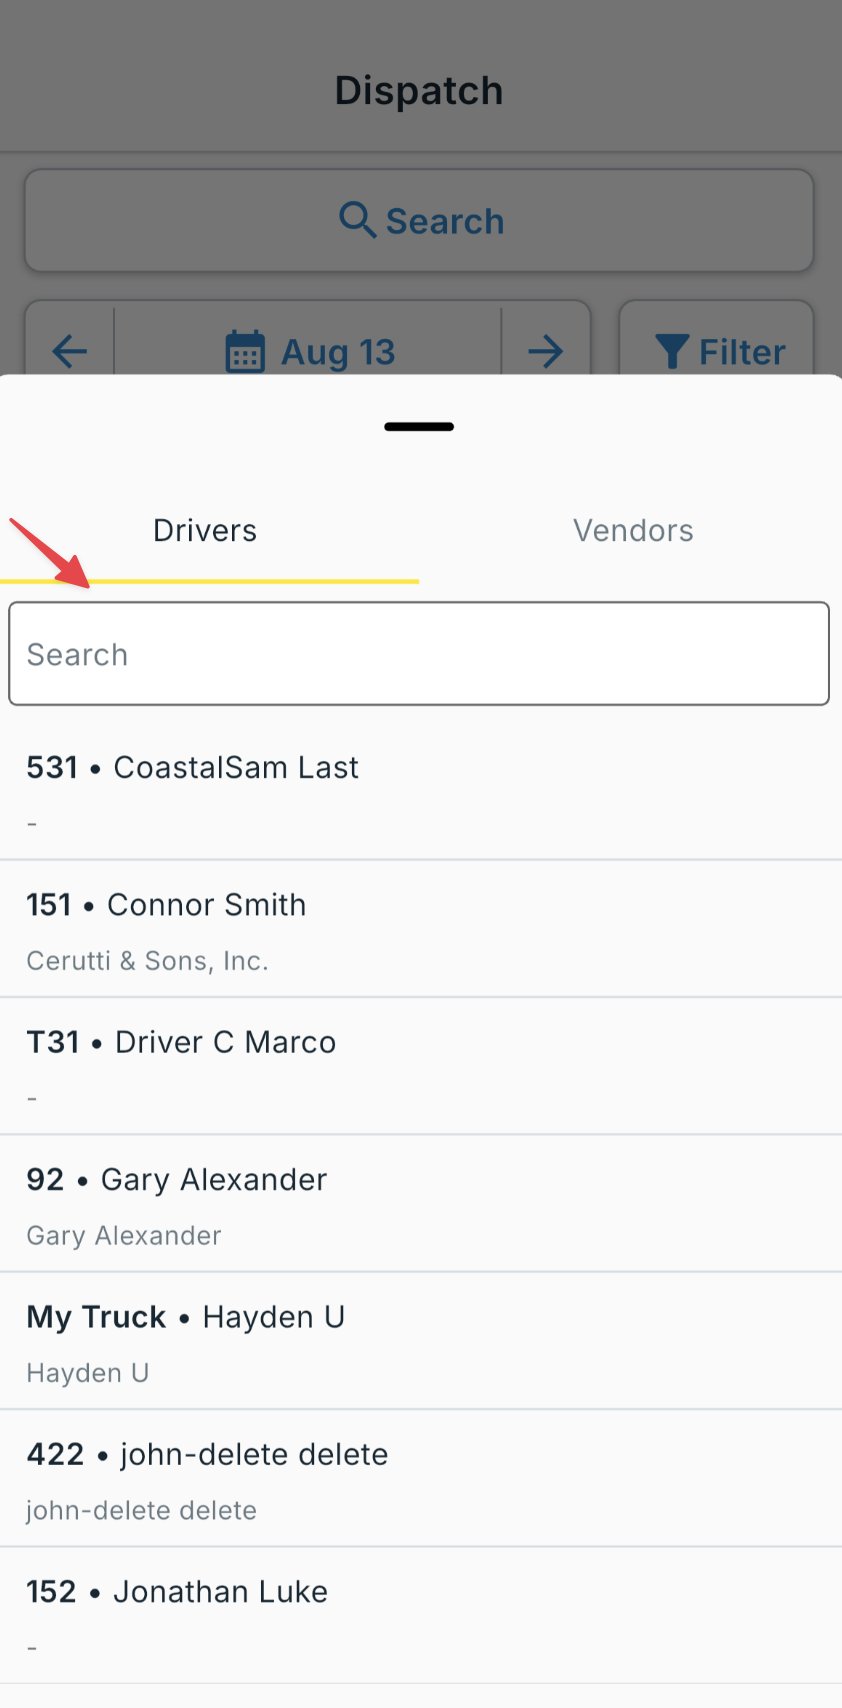
Click Assign on the job row — a panel opens with Driver and Vendor tabs.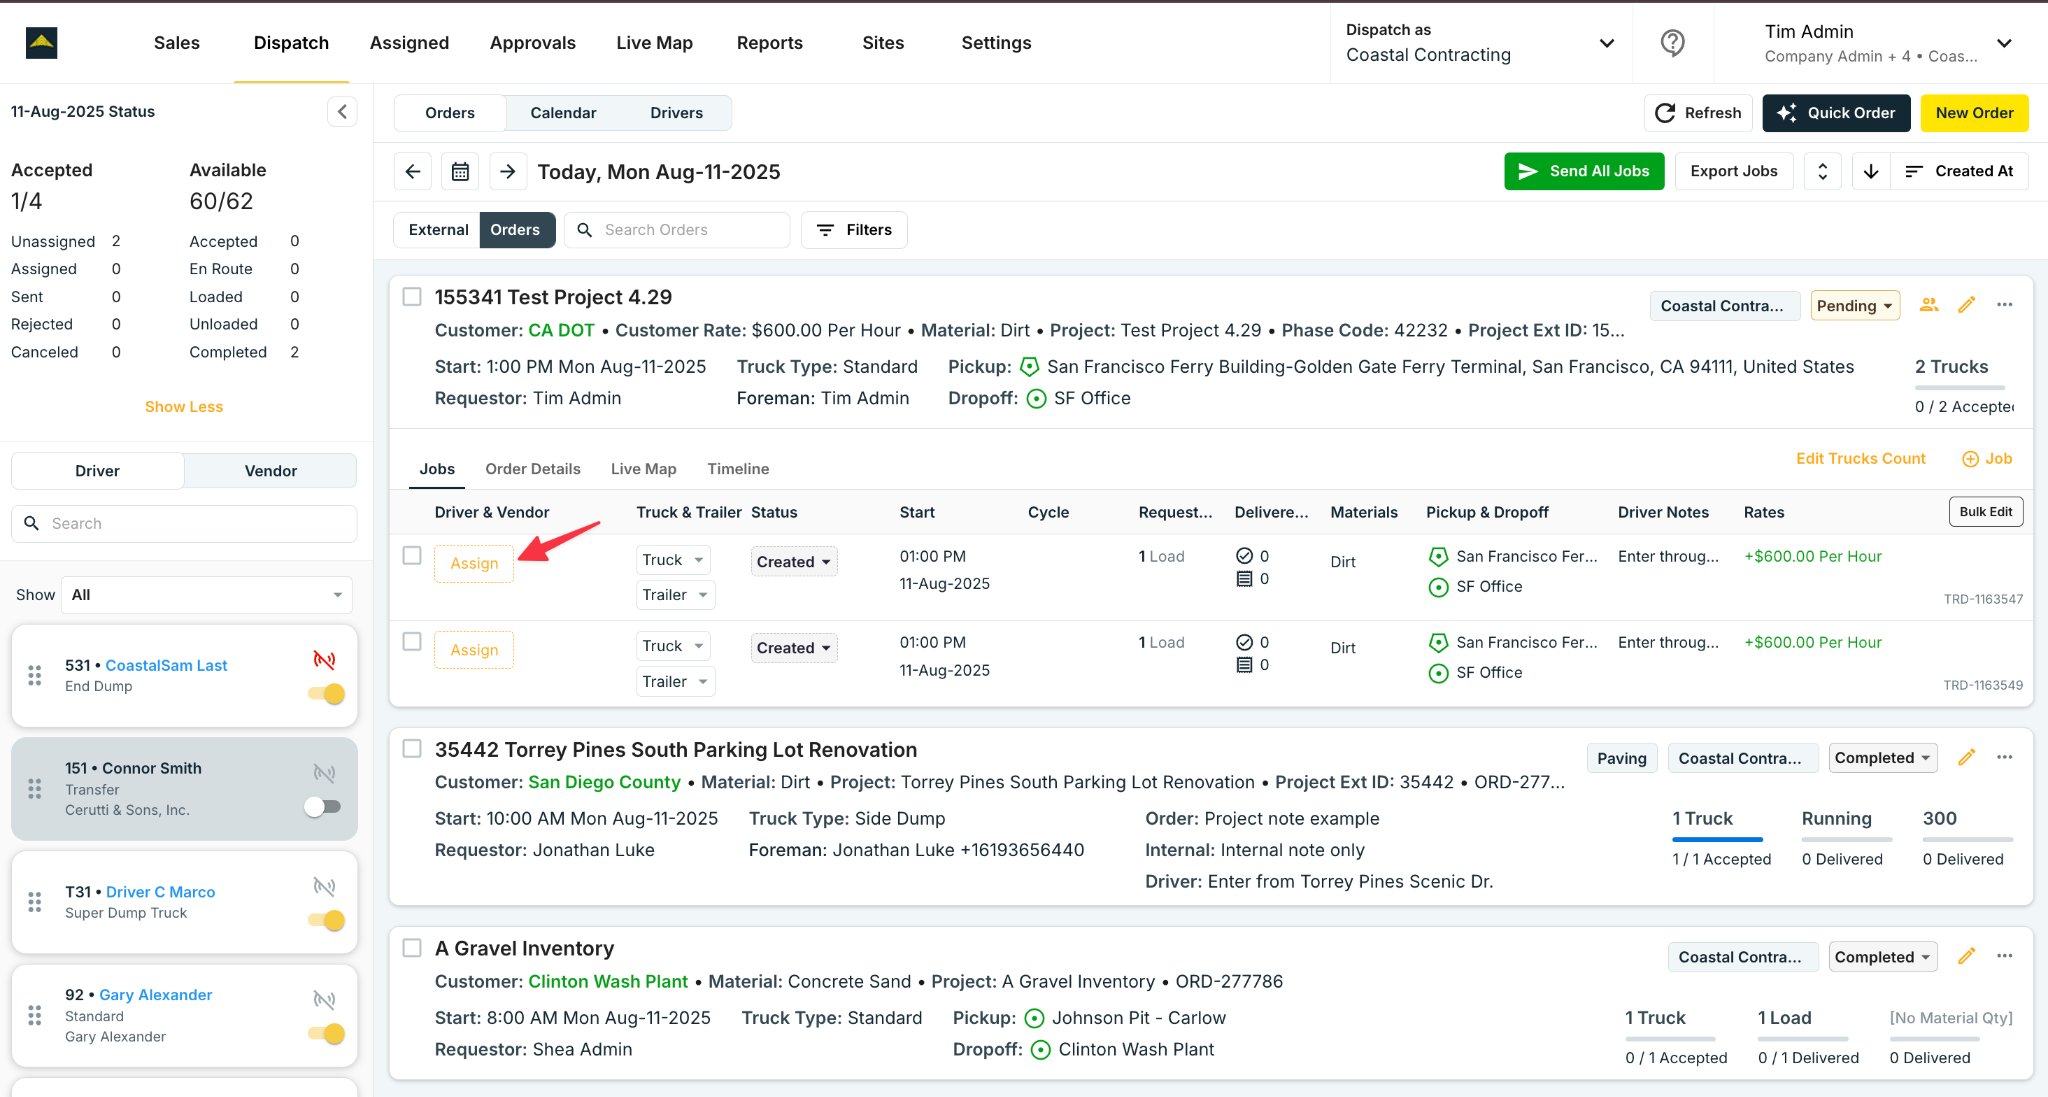
- Driver tab — assign one of your own drivers (Regular dispatch). Search by name or truck number.
- Vendor tab — hand the job to a hauling company that will sub-dispatch it (Hot dispatch), or assign a shared Owner-Operator truck (Direct dispatch).
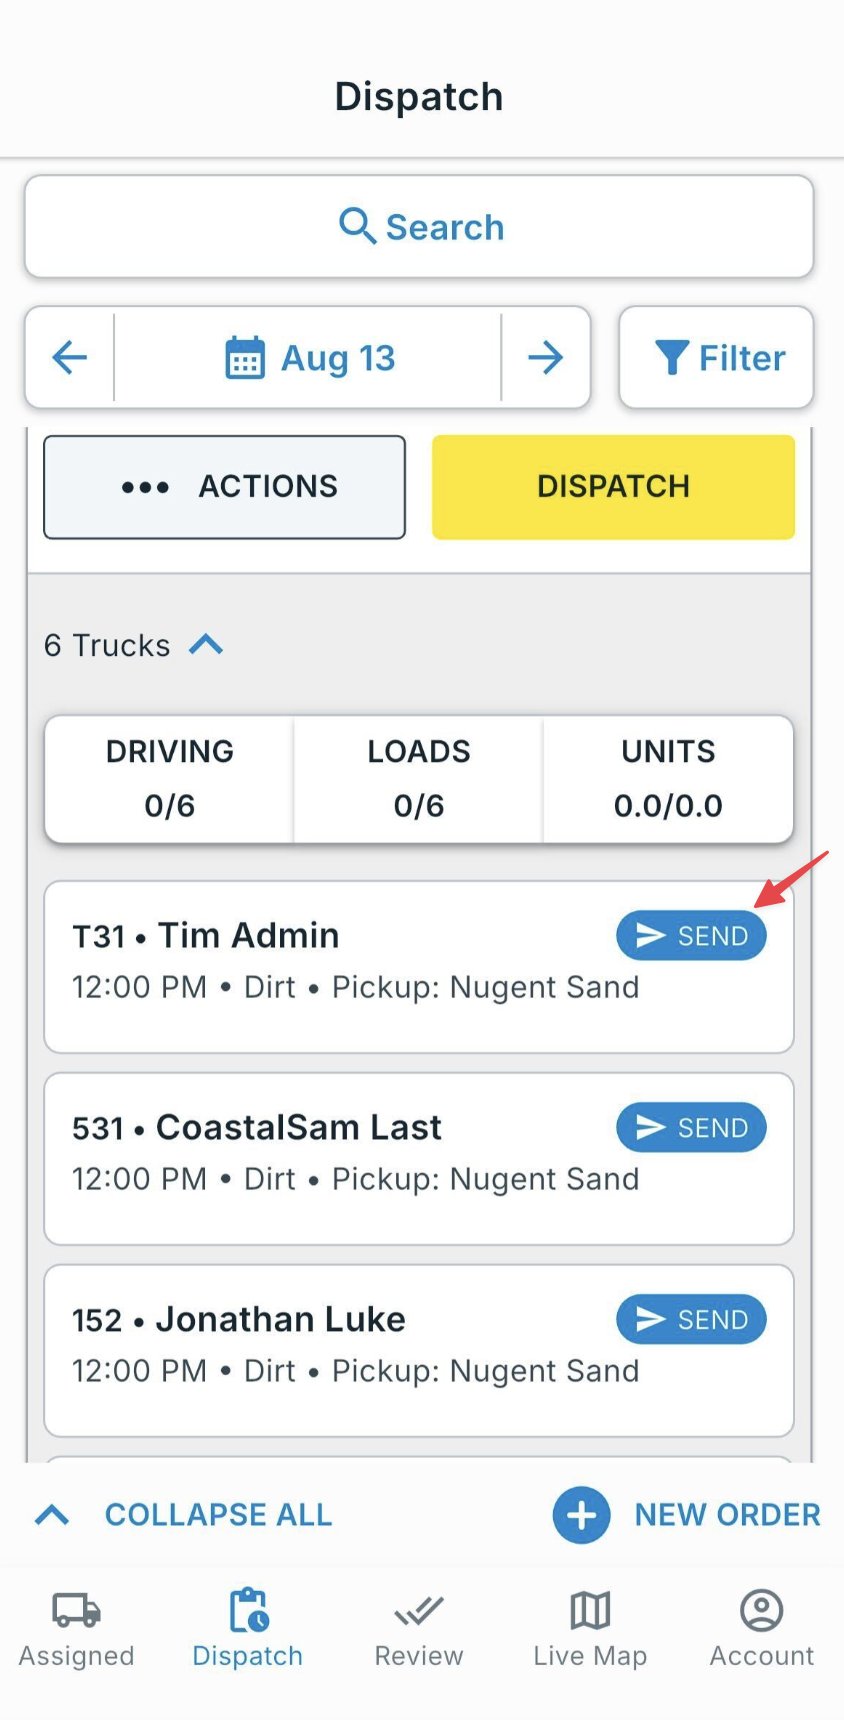
Send the jobs to drivers
Click Send on a single row to dispatch that driver, or Send All Jobs at the top to send every pending assignment at once. Drivers receive a push notification immediately.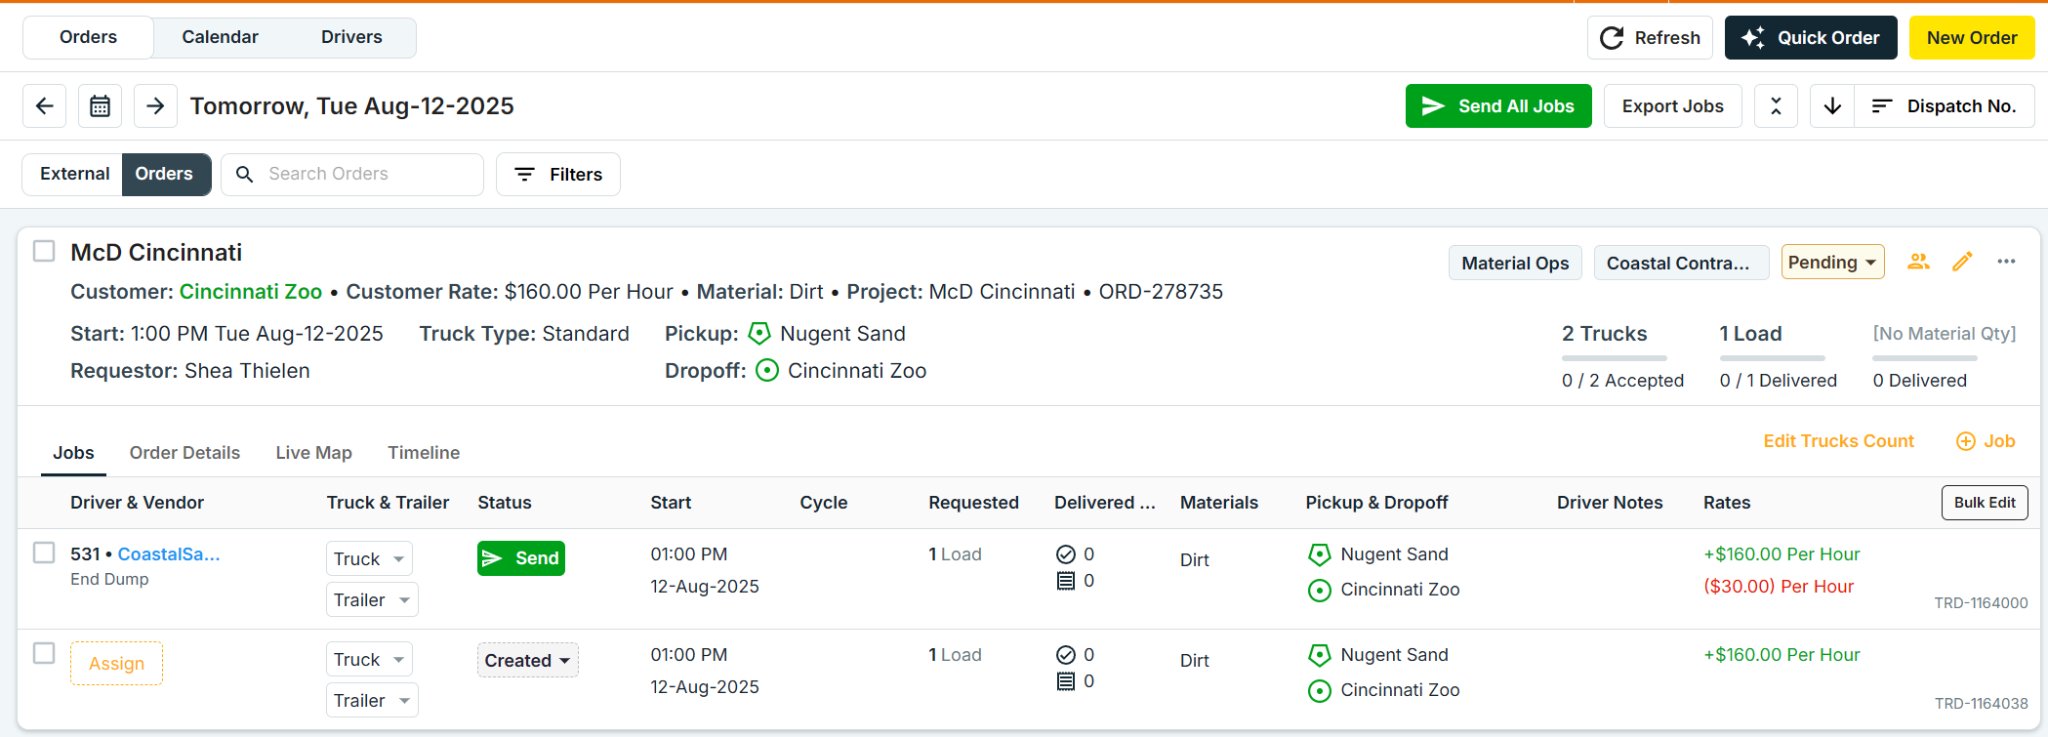
Track to completion
Once sent, follow each truck on the Live Map and watch the status bar move from Sent → Accepted → En Route → Loaded → Unloaded → Completed. See Track Drivers & Collect Tickets.
Tips & common pitfalls
- Driver didn’t get the load? Check the job status — if it’s stuck at Assigned (not Sent), you still need to hit Send. If it’s Sent but not Accepted, the driver may not have the app or location permissions (Train Your Drivers).
- Hot dispatch shows the driver’s name on your board only after the vendor’s dispatcher accepts and assigns one of their drivers.
Related
- Dispatch Overview — the board, modes, and prerequisites
- Dispatch Modes — Regular vs Hot vs Direct
- Track Drivers & Collect Tickets — after the load is sent
- Orders & Projects — what you’re dispatching