Prerequisites
- Company Admin access in Tread. If you don’t see these options, ask your Tread representative to enable the integration.
- Your QuickBooks administrator sign-in.
- Pop-ups allowed for the Tread app. The connection window opens as a pop-up.
- Tread supports one accounting connection per company.
Connect your QuickBooks account
One-time setup. Once linked, Tread pulls in your QuickBooks customers, vendors, items, and chart of accounts.1
Open Integrations
Go to Settings → Integrations, under AI & Integrations.
2
Manage the Rutter integration
On the Rutter: Accounting Integrations card, click Manage. Rutter is the service Tread uses to connect to QuickBooks.
3
Link your account
Click Link account. The connection window opens in a pop-up.
4
Authorize Tread
Click Continue, choose your QuickBooks product, and sign in with your QuickBooks administrator credentials. Follow the steps in the dialog.For QuickBooks Desktop, complete these steps on the server or machine where your company file is open.
5
Close the pop-up
At “Authentication Complete!”, close the pop-up. Your connection appears in the table and the first sync starts automatically.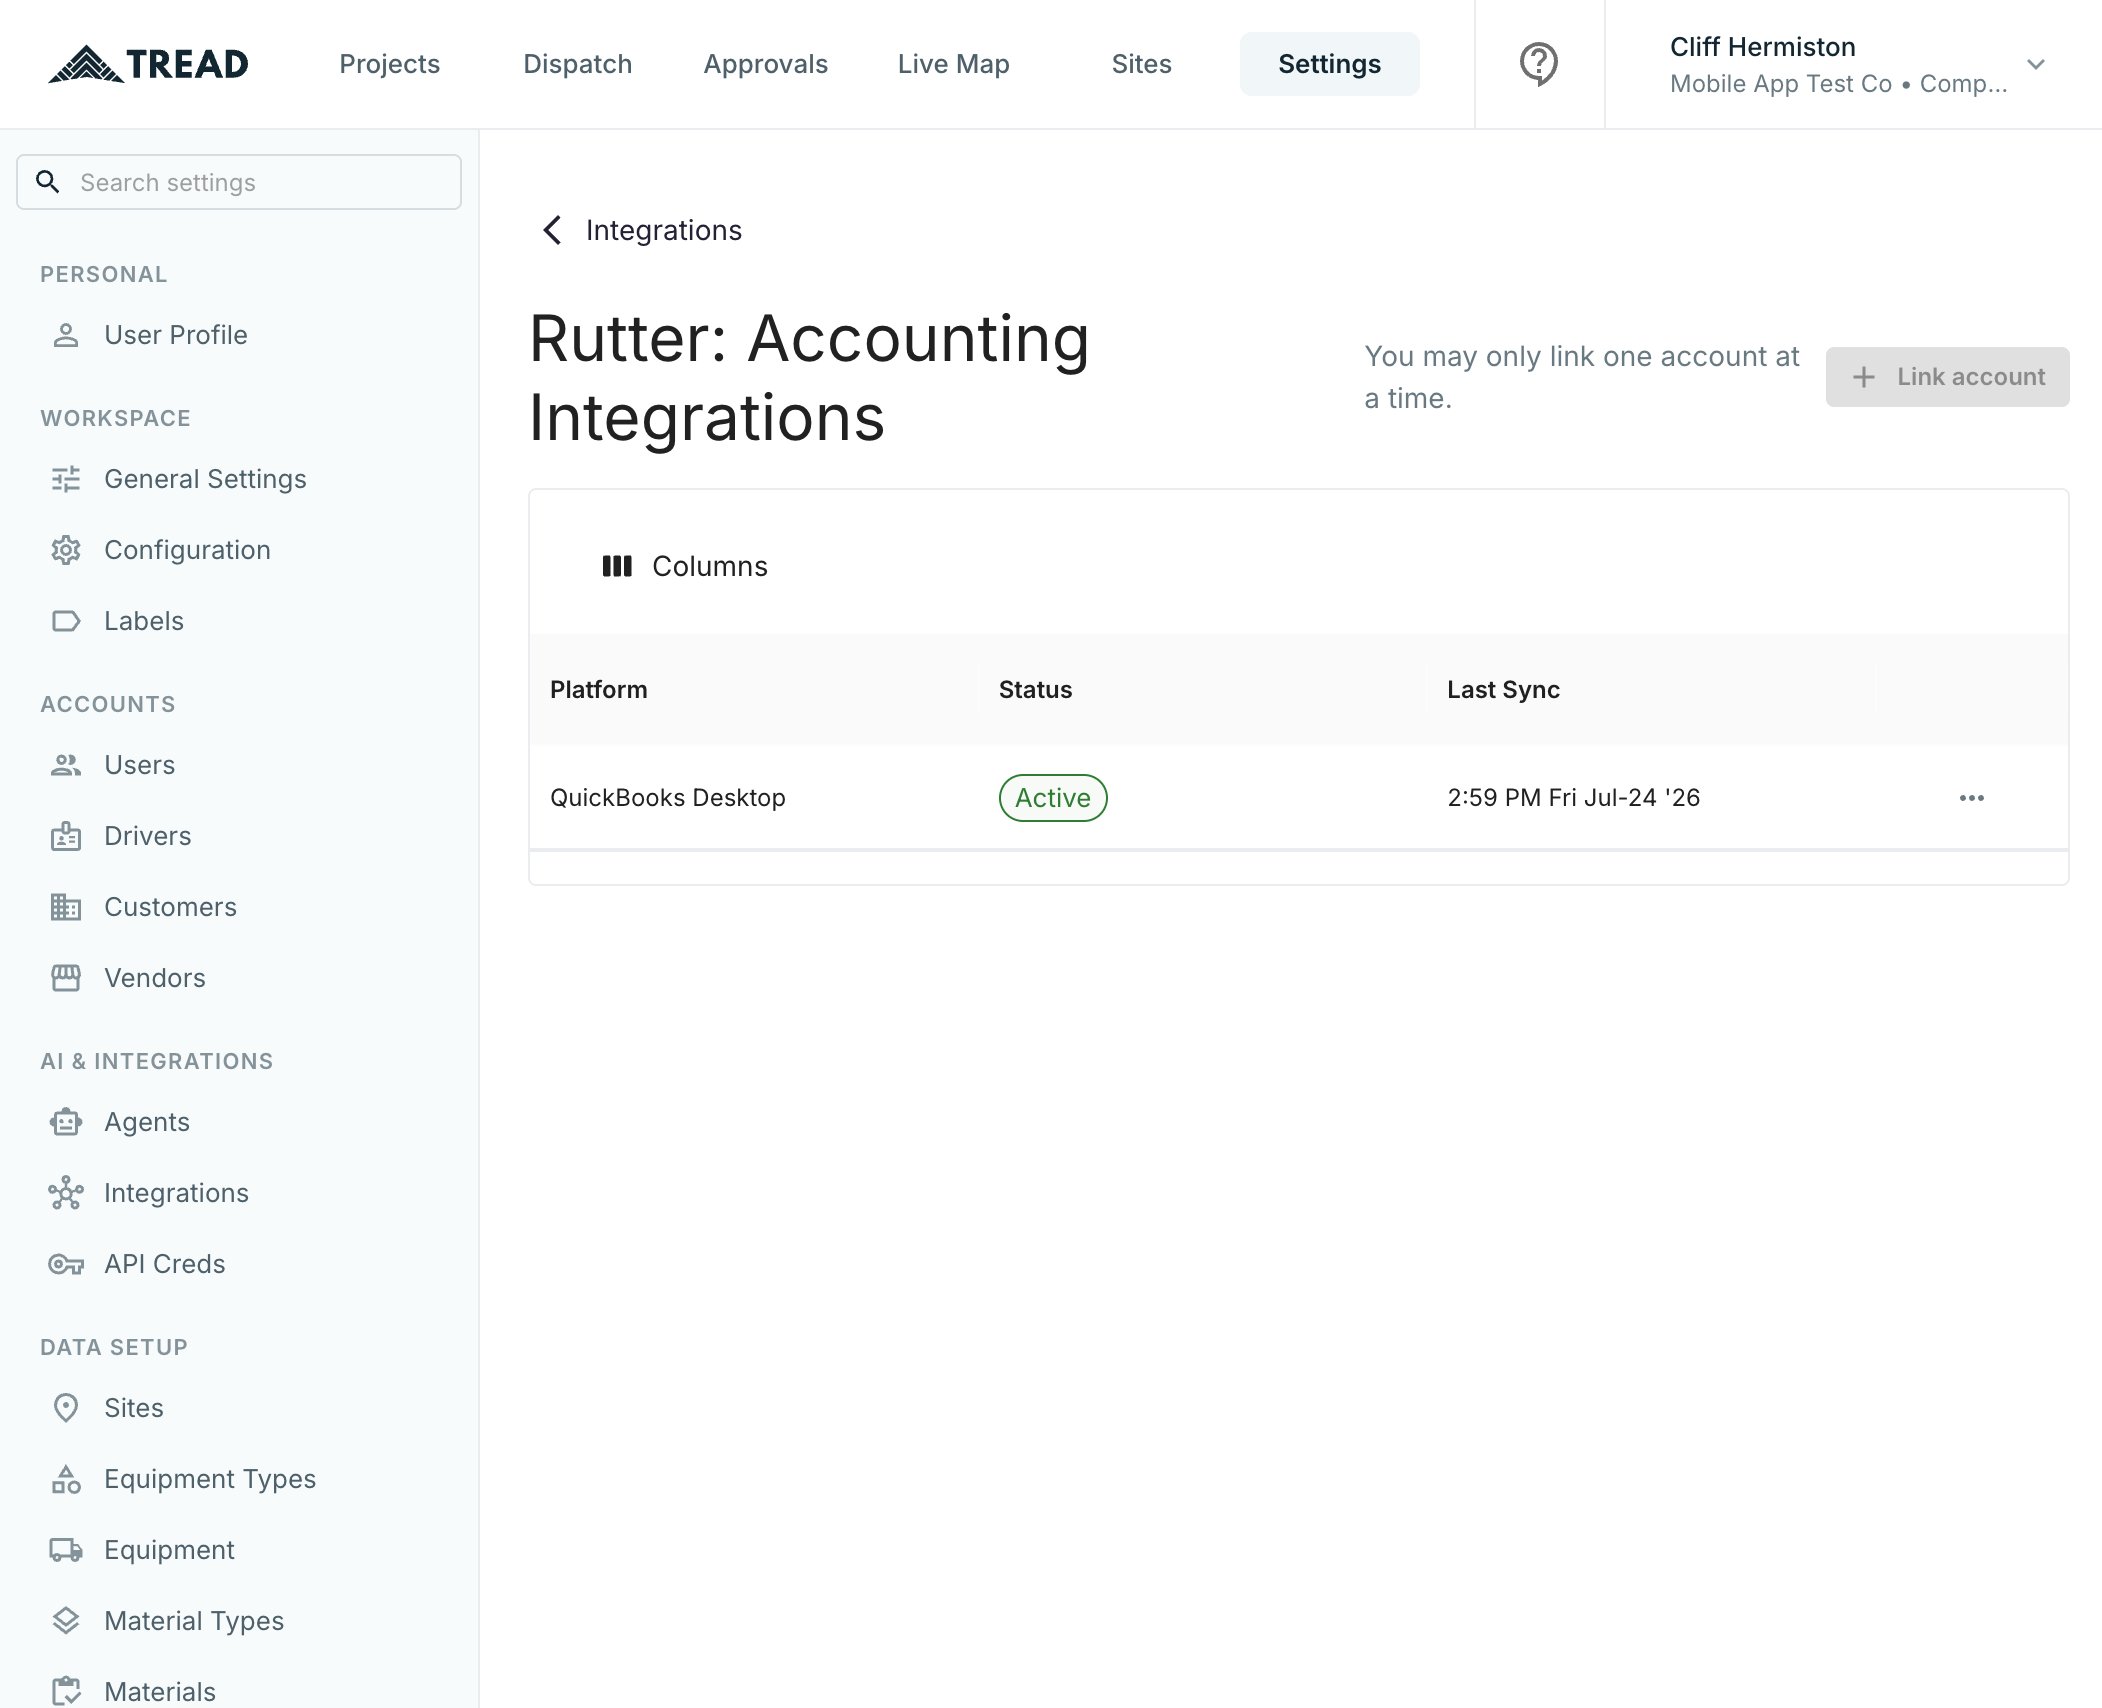
The first sync takes a 15-20 minutes on QuickBooks Online. QuickBooks Desktop syncs when your Web Connector runs — up to a day.
Match your QuickBooks data
Match each imported QuickBooks record to its Tread counterpart so exported invoices and bills land on the right records in QuickBooks. Open Settings → Integrations → Rutter and click your connection. You’ll see four tabs — Customer, Vendors, Items, Ledger — plus Refresh All Data to pull the latest records from QuickBooks anytime.Customer tab
In the Tread Name column, pick the matching Tread customer. The match saves immediately. Use + Create Account if the customer doesn’t exist in Tread yet. Each QuickBooks customer matches exactly one Tread customer.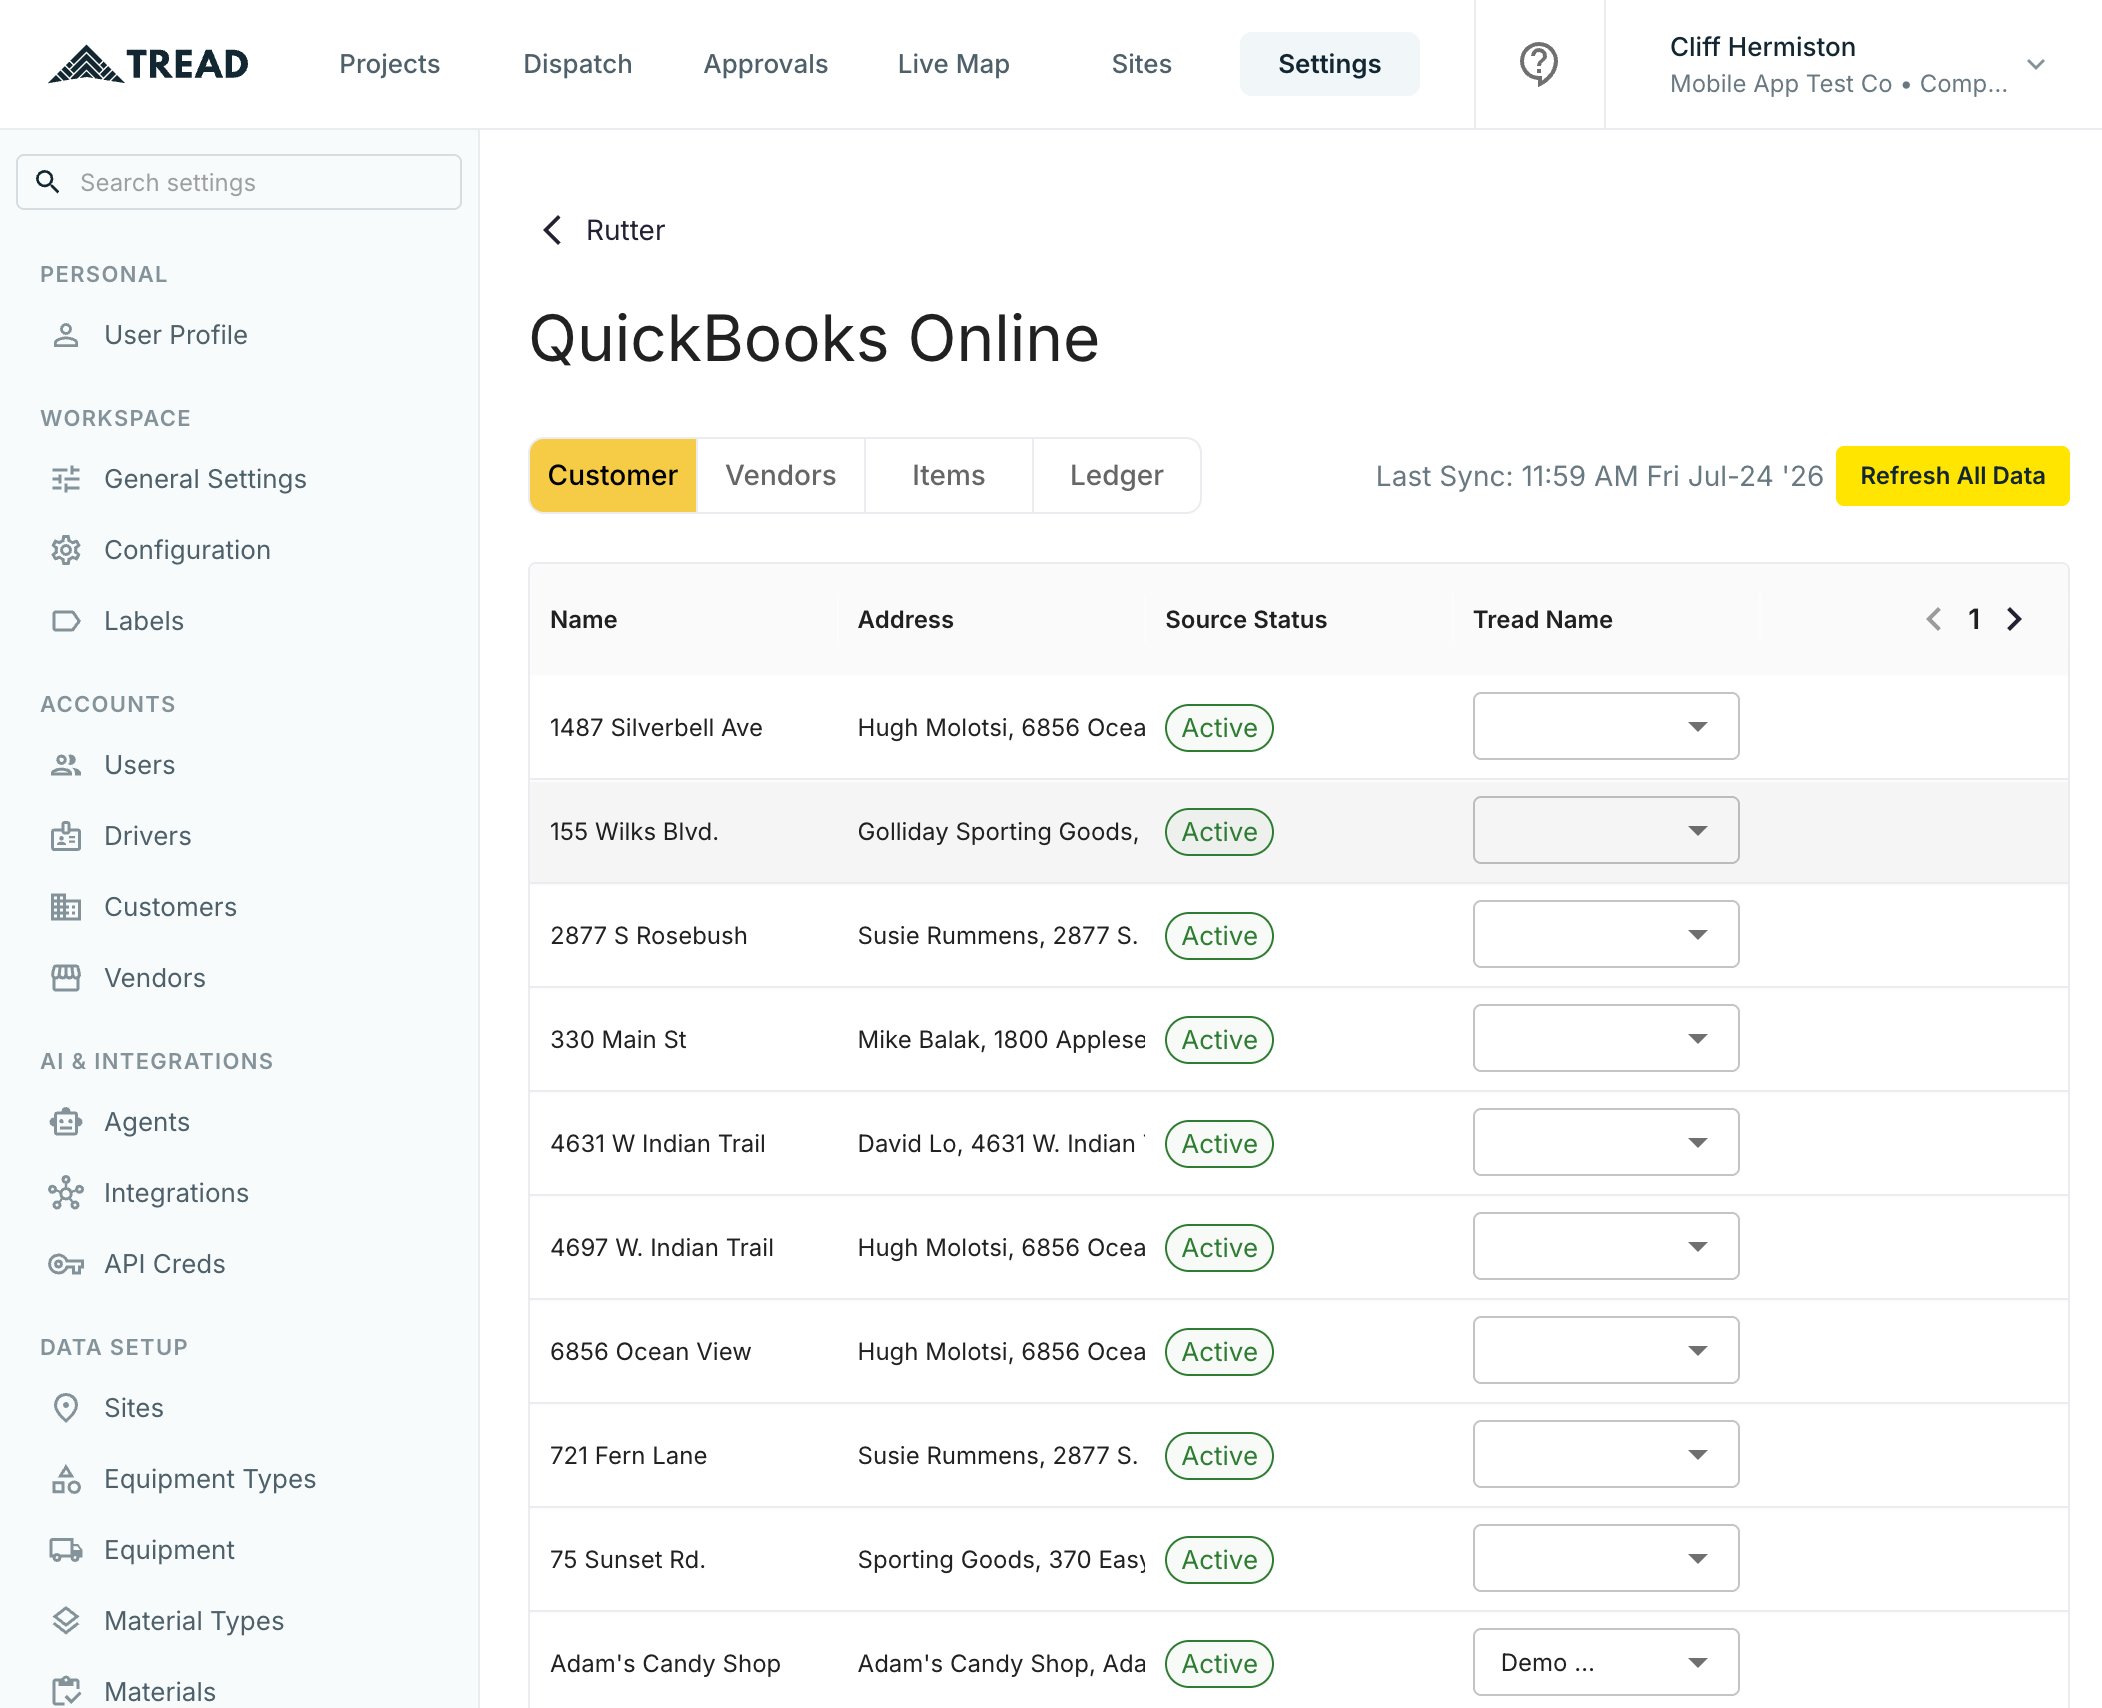
Vendors tab
Works the same way: match each QuickBooks vendor in the Tread Name column, or use + Create Vendor. A Vendor is an account you send dispatches to. Vendor matches let vendor Settlements export as bills.Items tab
Every charge on a Settlement needs a QuickBooks item to post against. Map each item to either a Line Item Type (Freight or Material) or an Add On (a fuel surcharge, for example) — one or the other, never both.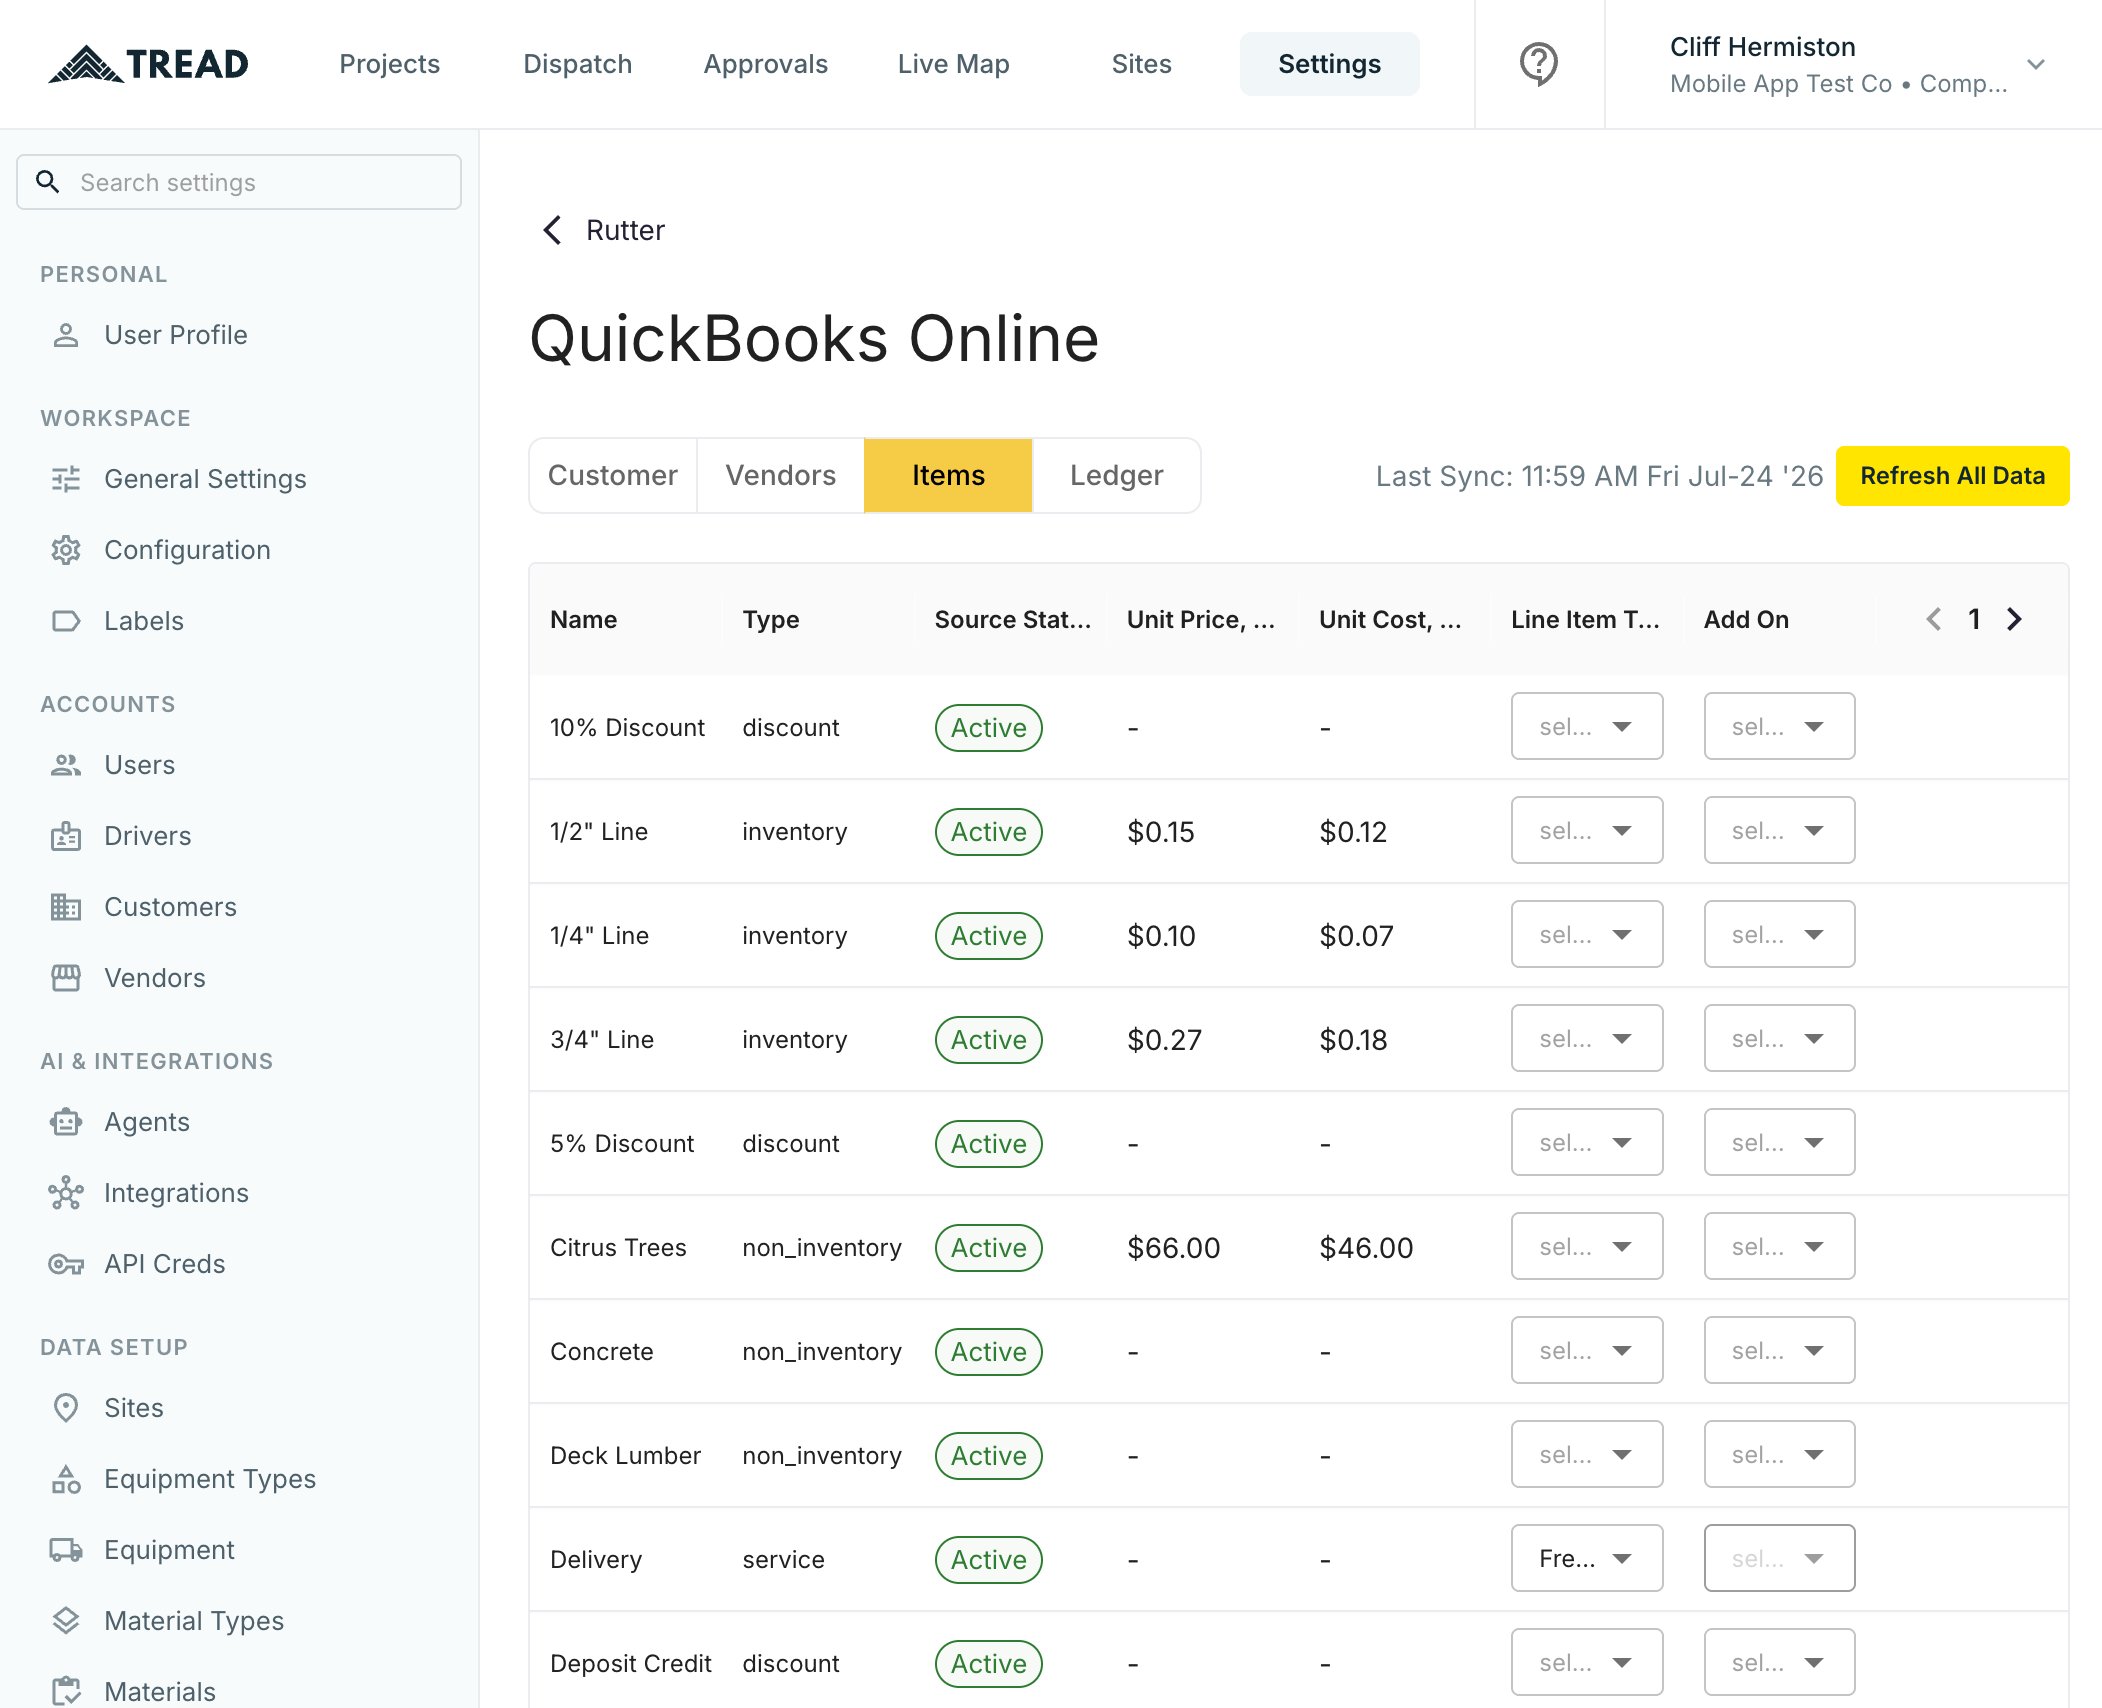
Ledger tab
Mark your Accounts Receivable account (used by invoices) and Accounts Payable account (used by bills). You set exactly one of each — the remaining rows are then disabled.Export Settlements to QuickBooks
Customer Settlements export as invoices. Vendor Settlements export as bills.1
Open Settlements
Go to Approvals → Receivables (or Payables) → Settlements.
2
Approve the Settlement
Pending Settlements can’t be exported — approve first.
3
Click Export
Click Export on the Settlement row.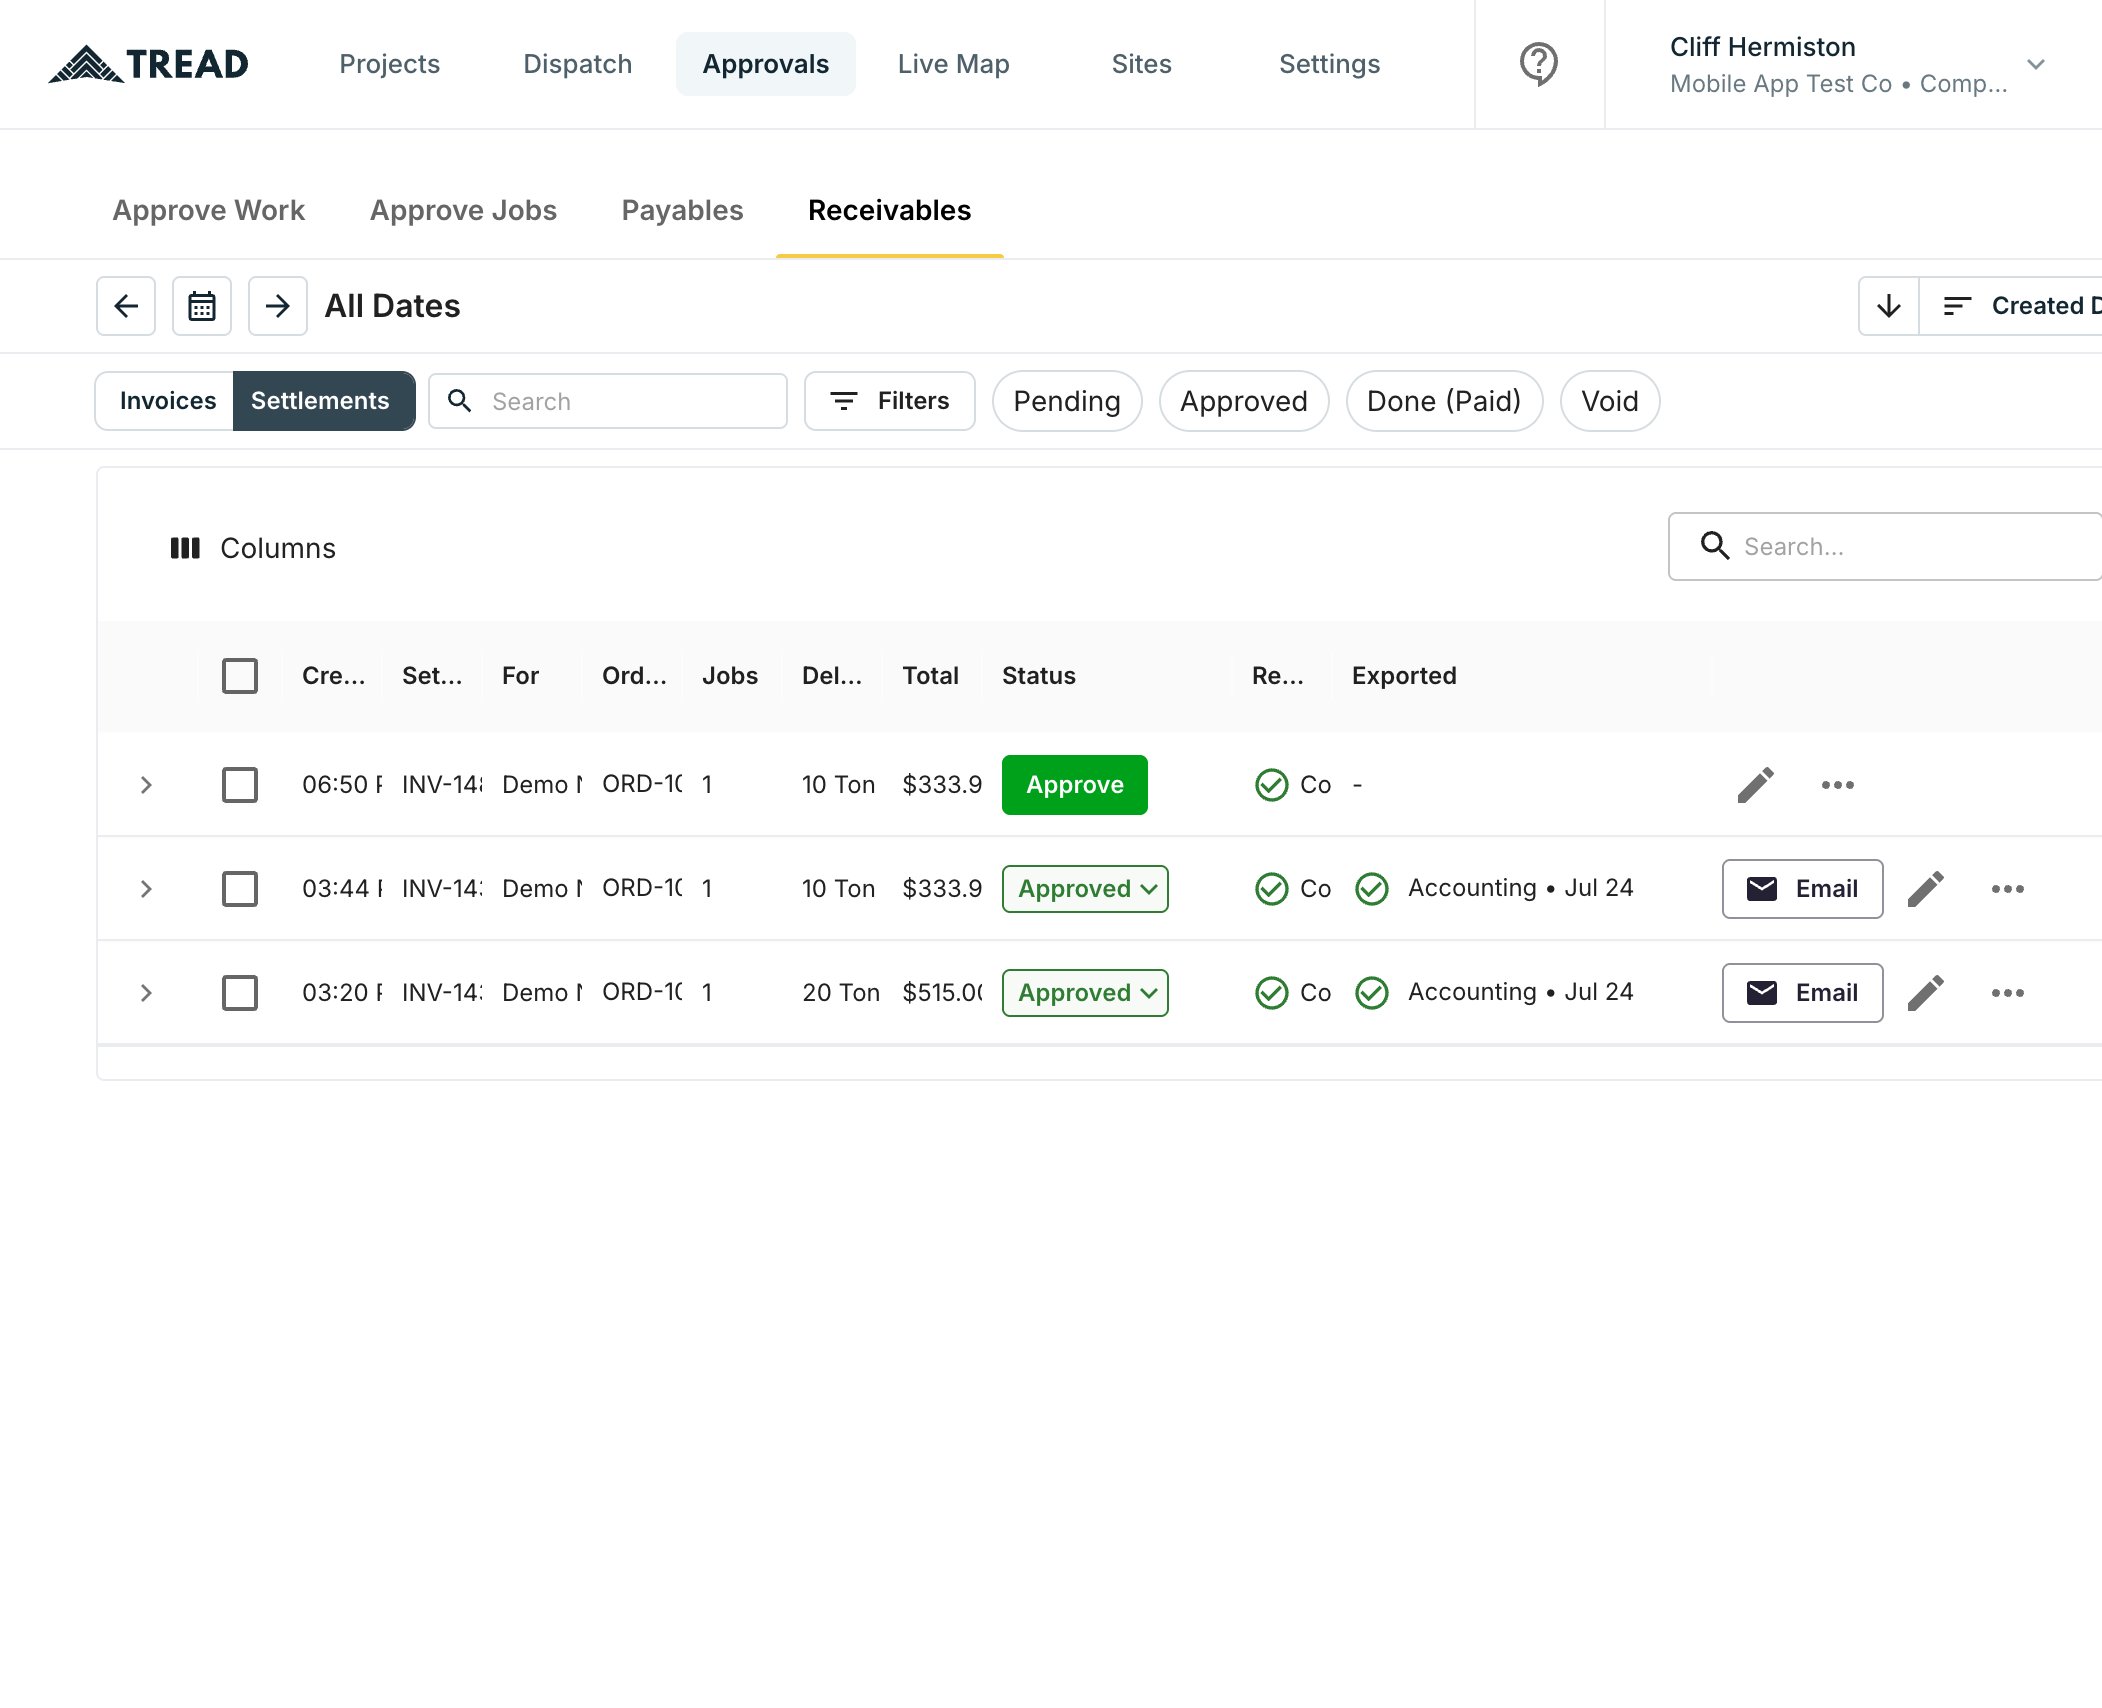
4
Confirm the export
Check the Settlement ID, customer, and total in the dialog. A Settlement can only be exported once.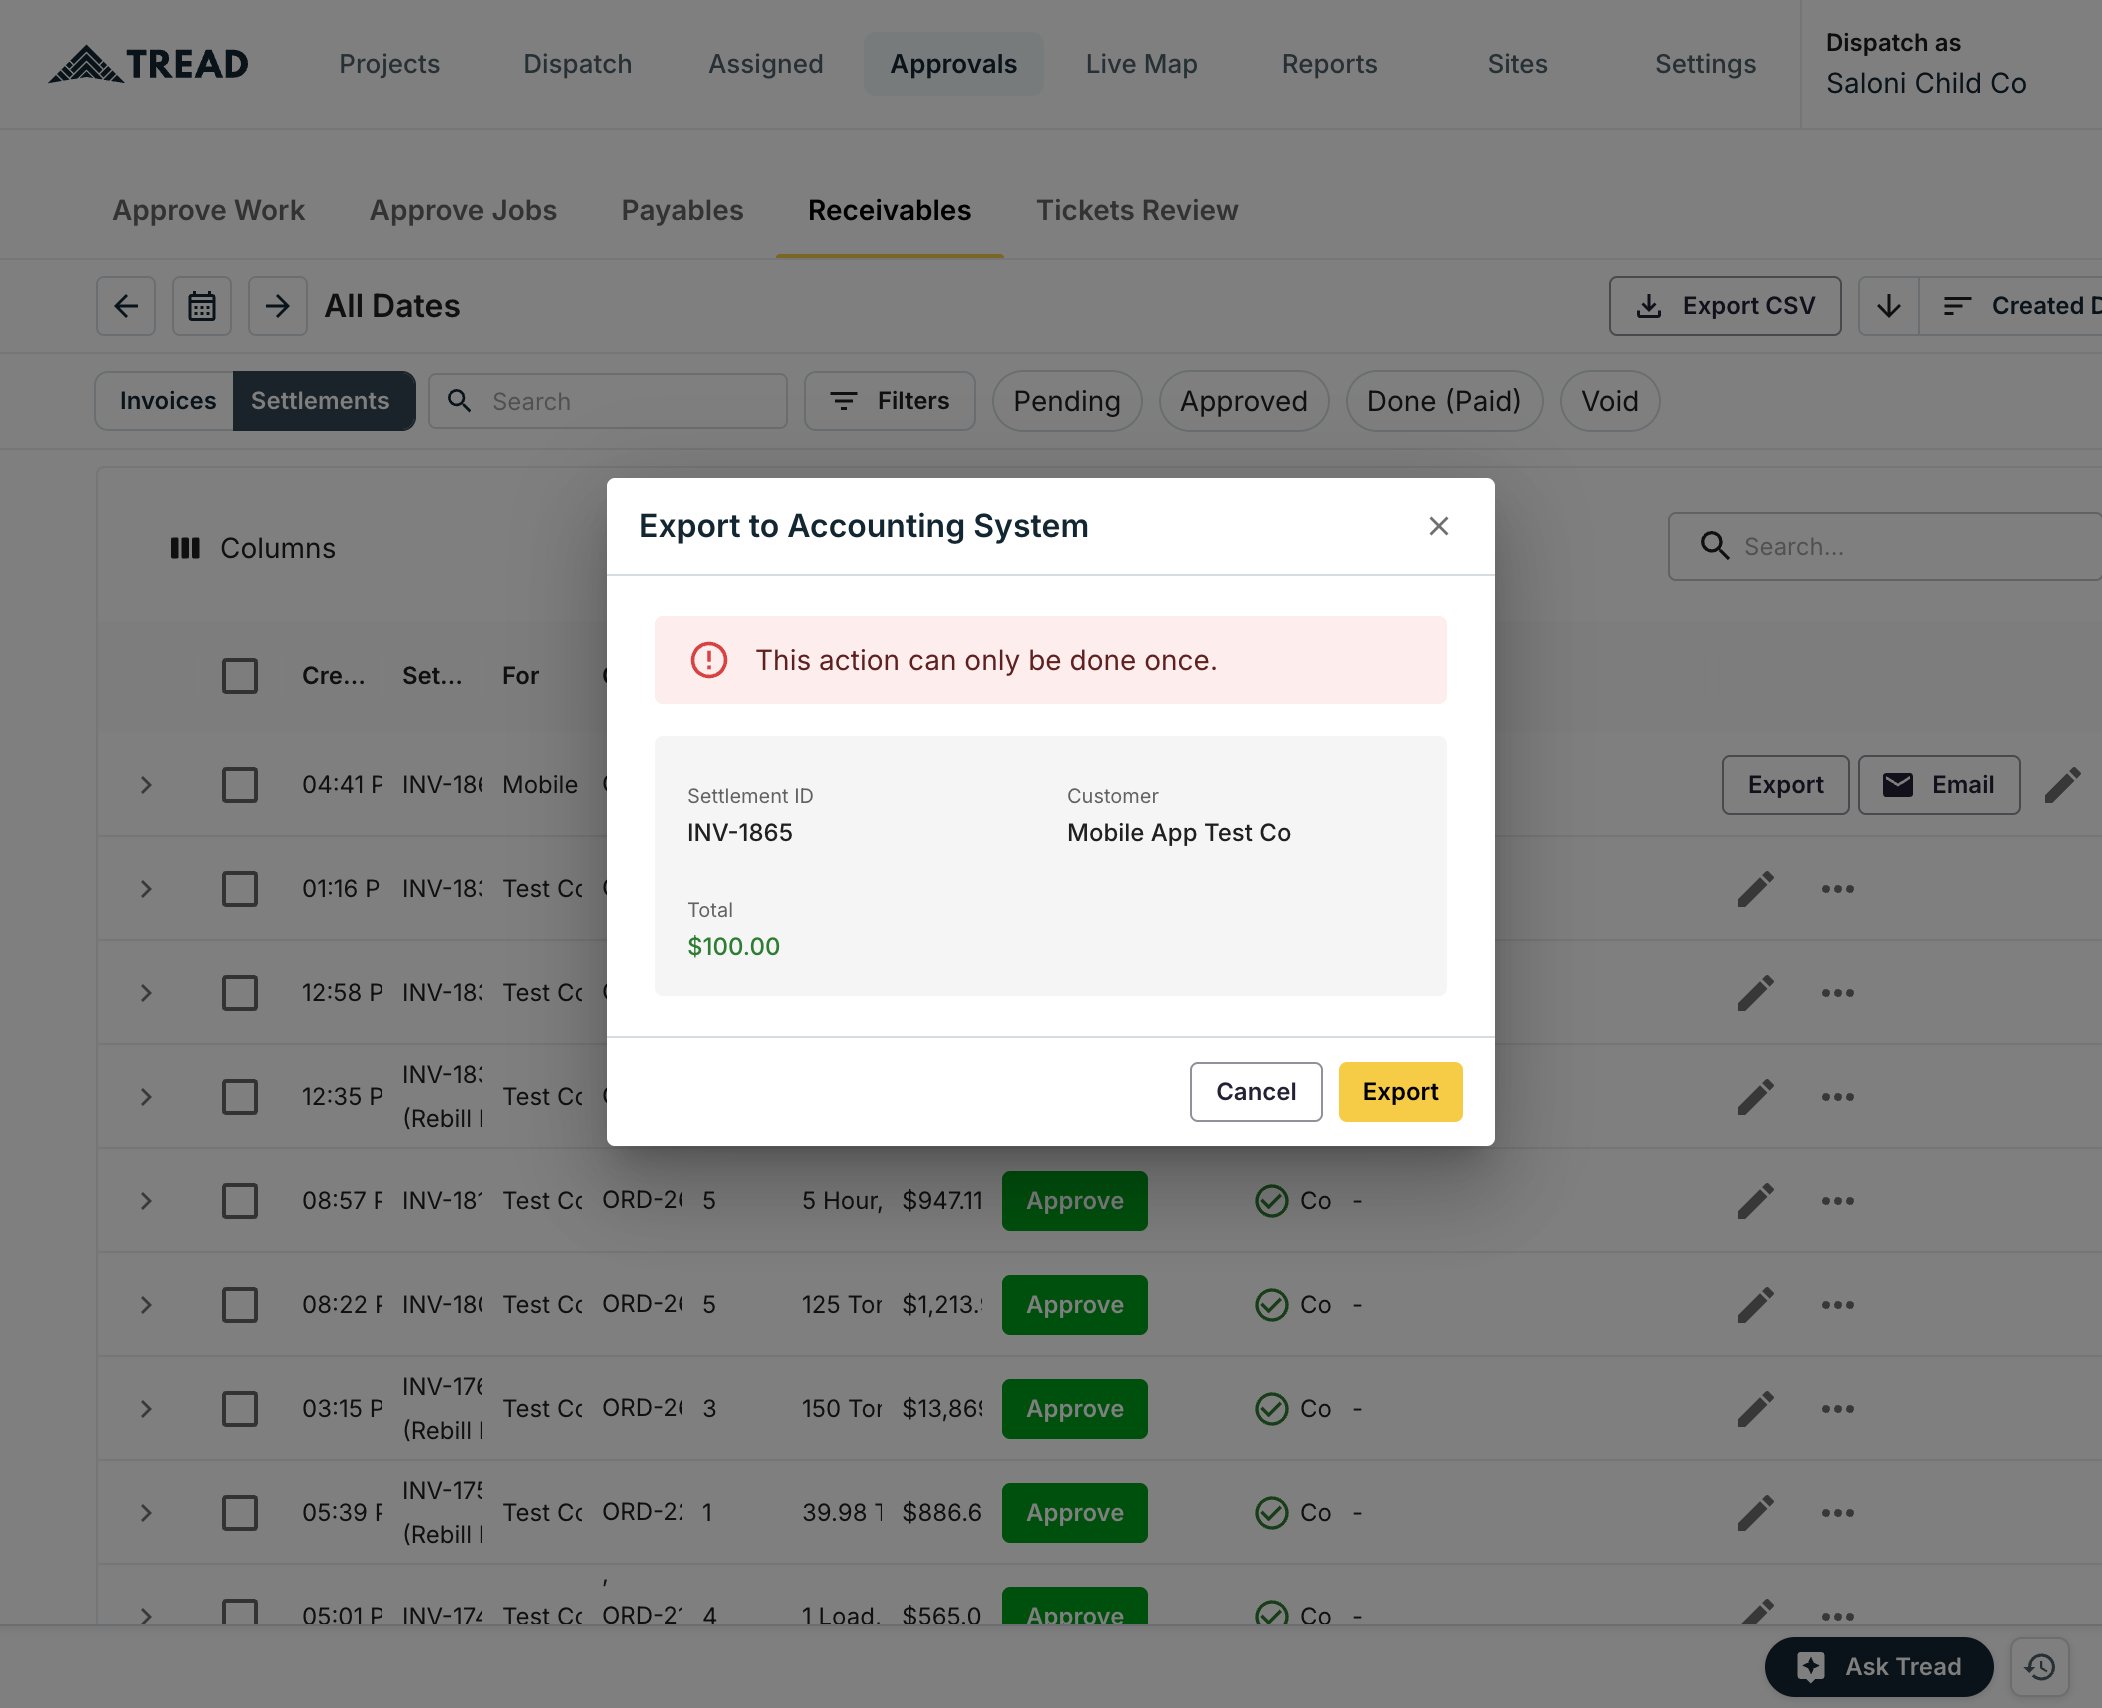
5
Watch the Exported column
It updates as QuickBooks accepts the document.
Reading the Exported column
Why an export fails
Almost always one of these seven. Fix the cause, then click Export again — failed exports can be retried.- The QuickBooks connection hasn’t finished syncing to Tread yet. Check Settings → Integrations → Rutter for a Last Sync time.
- The Settlement isn’t approved yet. Approve it first, then export.
- The Settlement’s customer or vendor isn’t matched to a QuickBooks customer or vendor yet (Customer / Vendors tab).
- A charge type on the Settlement isn’t mapped to a QuickBooks item yet — freight, material, and every add-on each need one (Items tab).
- Your A/R or A/P ledger isn’t matched to a QuickBooks chart-of-accounts account yet (Ledger tab).
- The Settlement has already been exported once. Exports are one-time — QuickBooks never receives a duplicate.
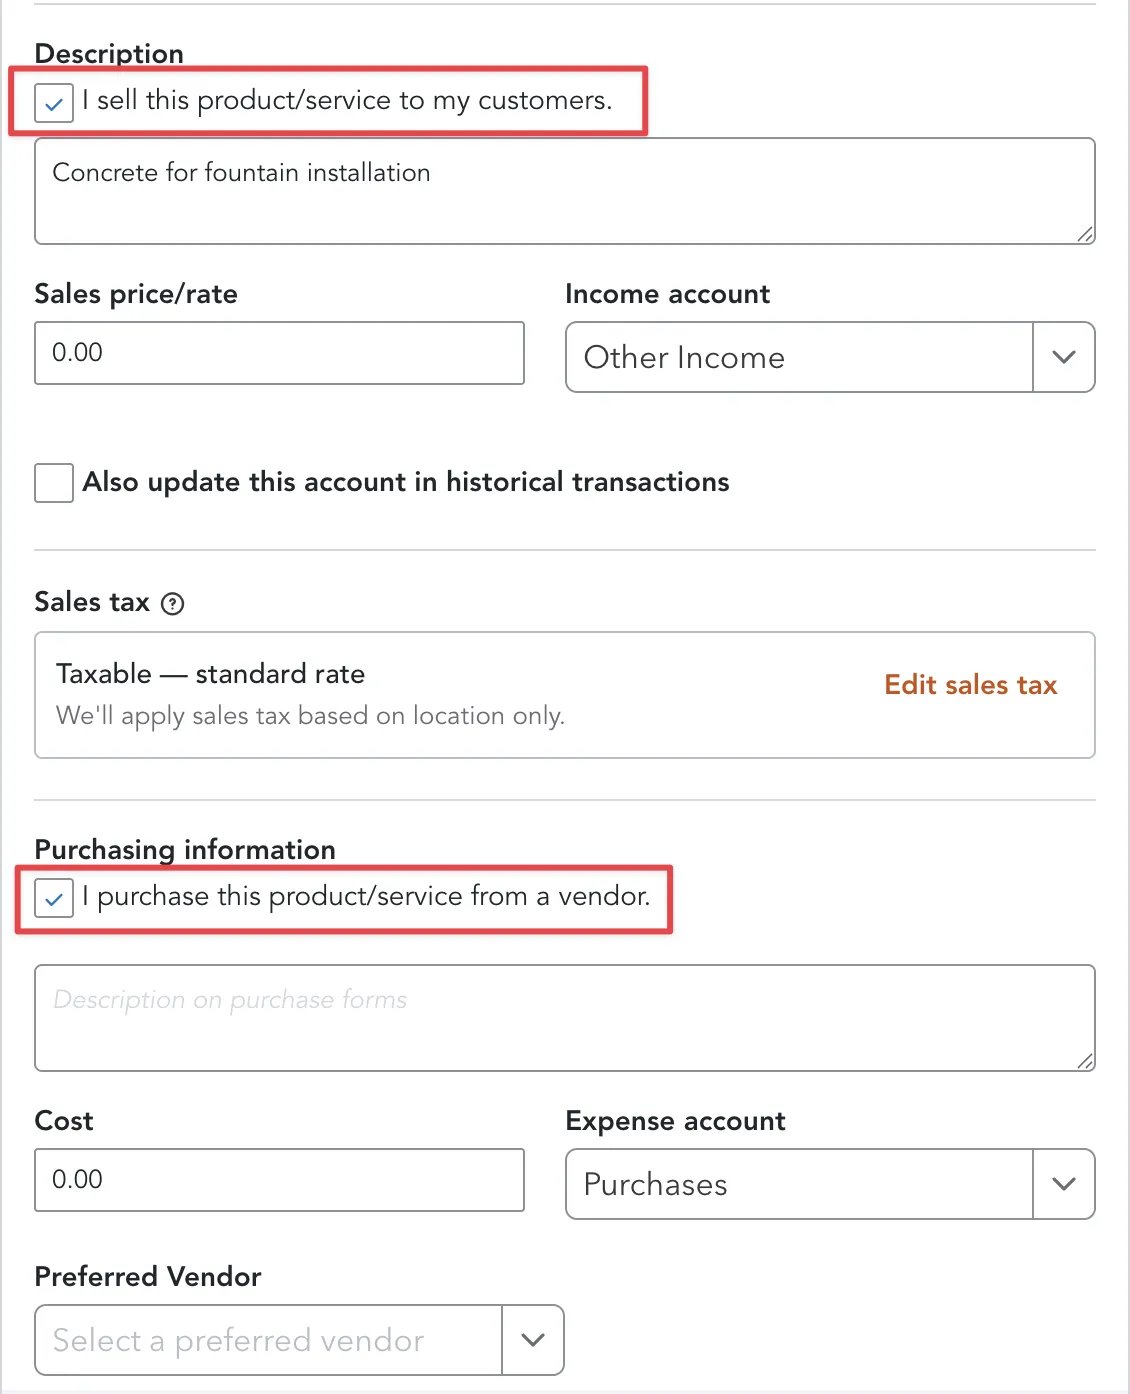
- An item isn’t defined correctly on the QuickBooks side. In QuickBooks Products and Services, items used on invoices need “I sell this product/service to my customers” checked. Items used on bills need “I purchase this product/service from a vendor” checked.