

Part A — Receivable Settlements (Customer Invoices)
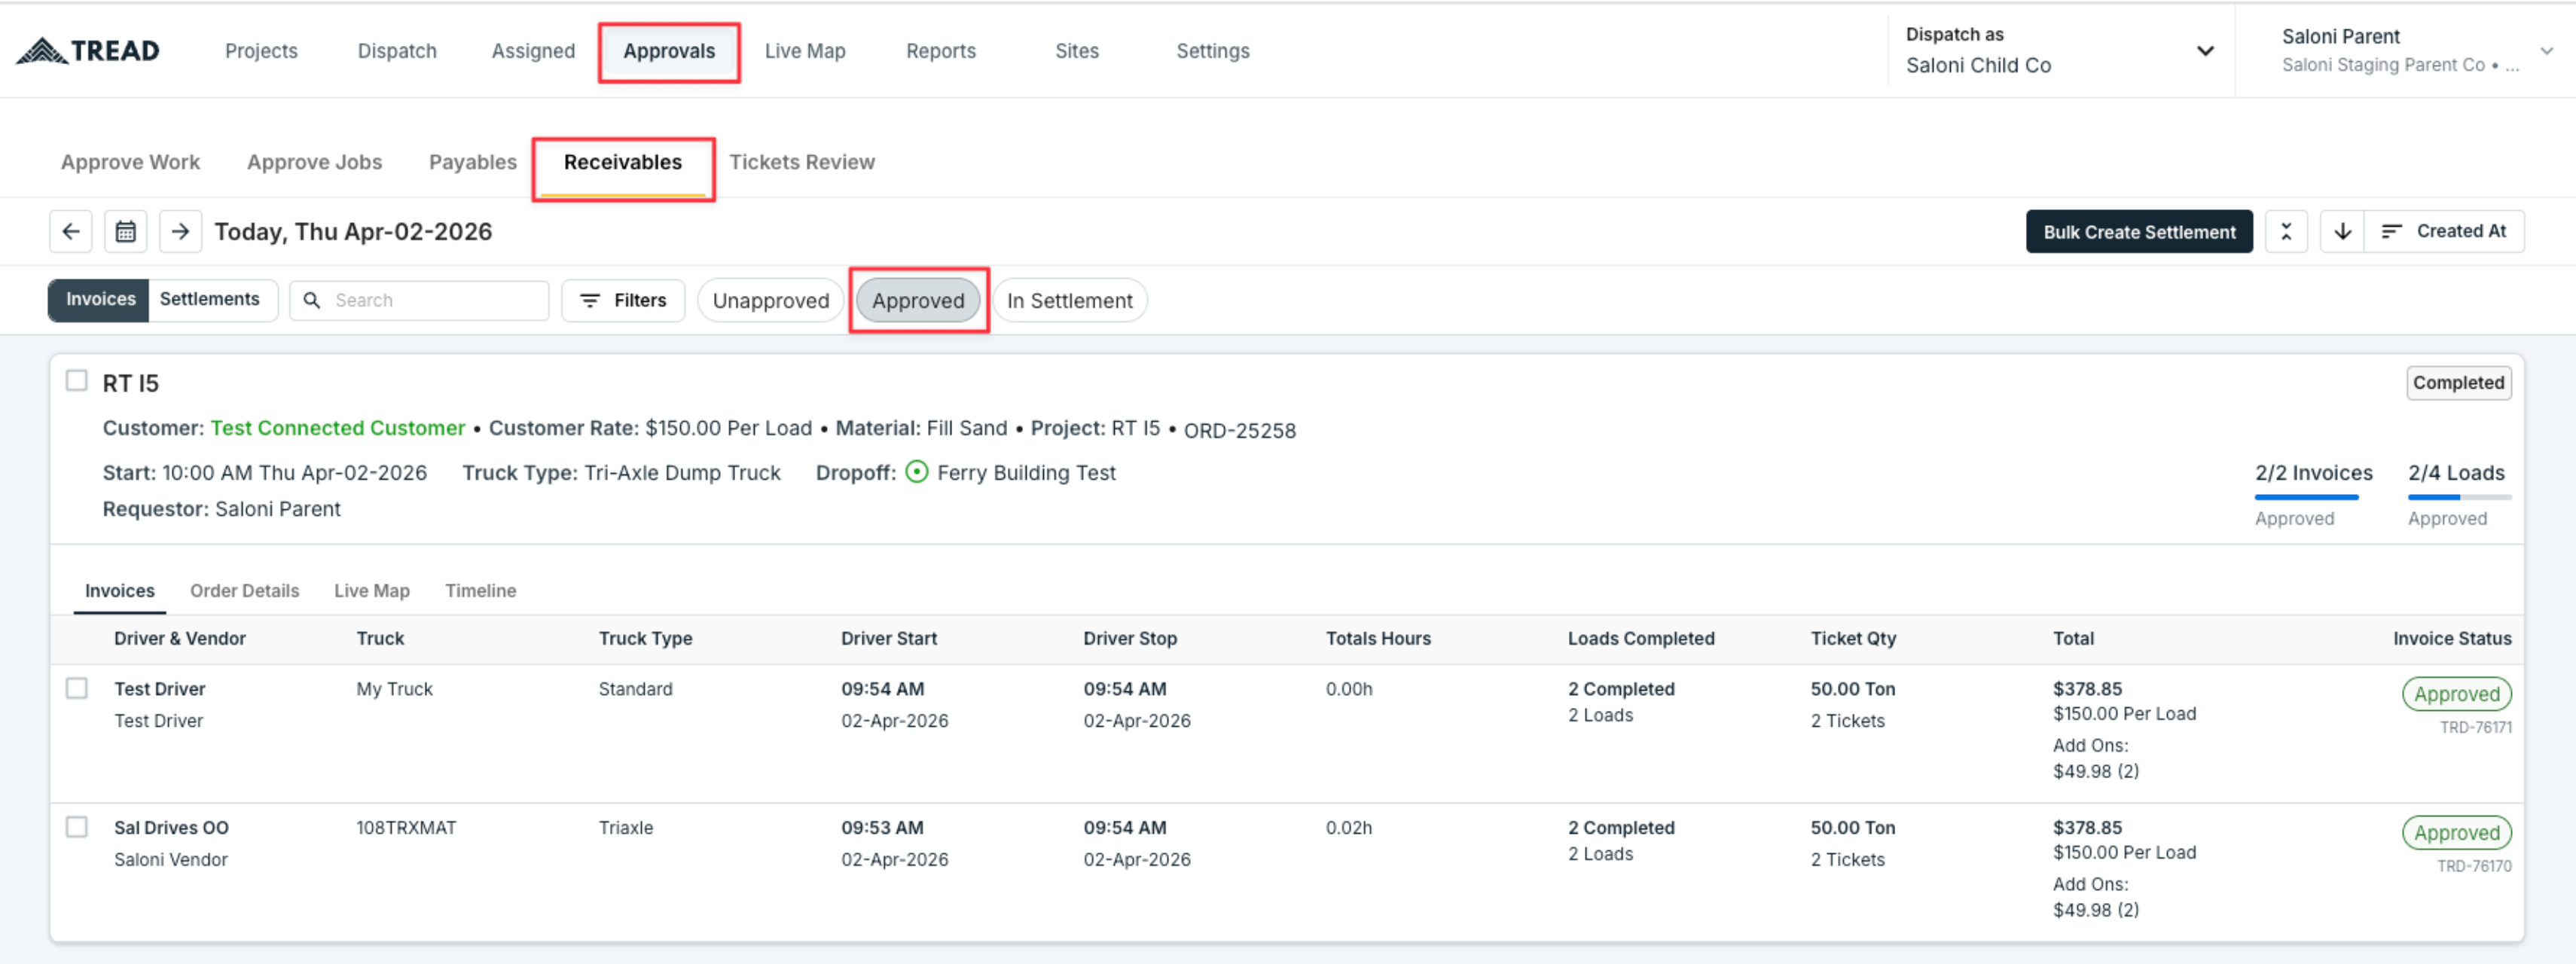
Step 1 — Navigate to the Receivables tab
Click the Receivables tab, then filter by Approved status. Verify you are viewing the correct date.In the Invoices tab, you filter by the date of the hauling. In the Settlements tab, you filter by the date the settlement was created.
Step 2 — Create the settlement
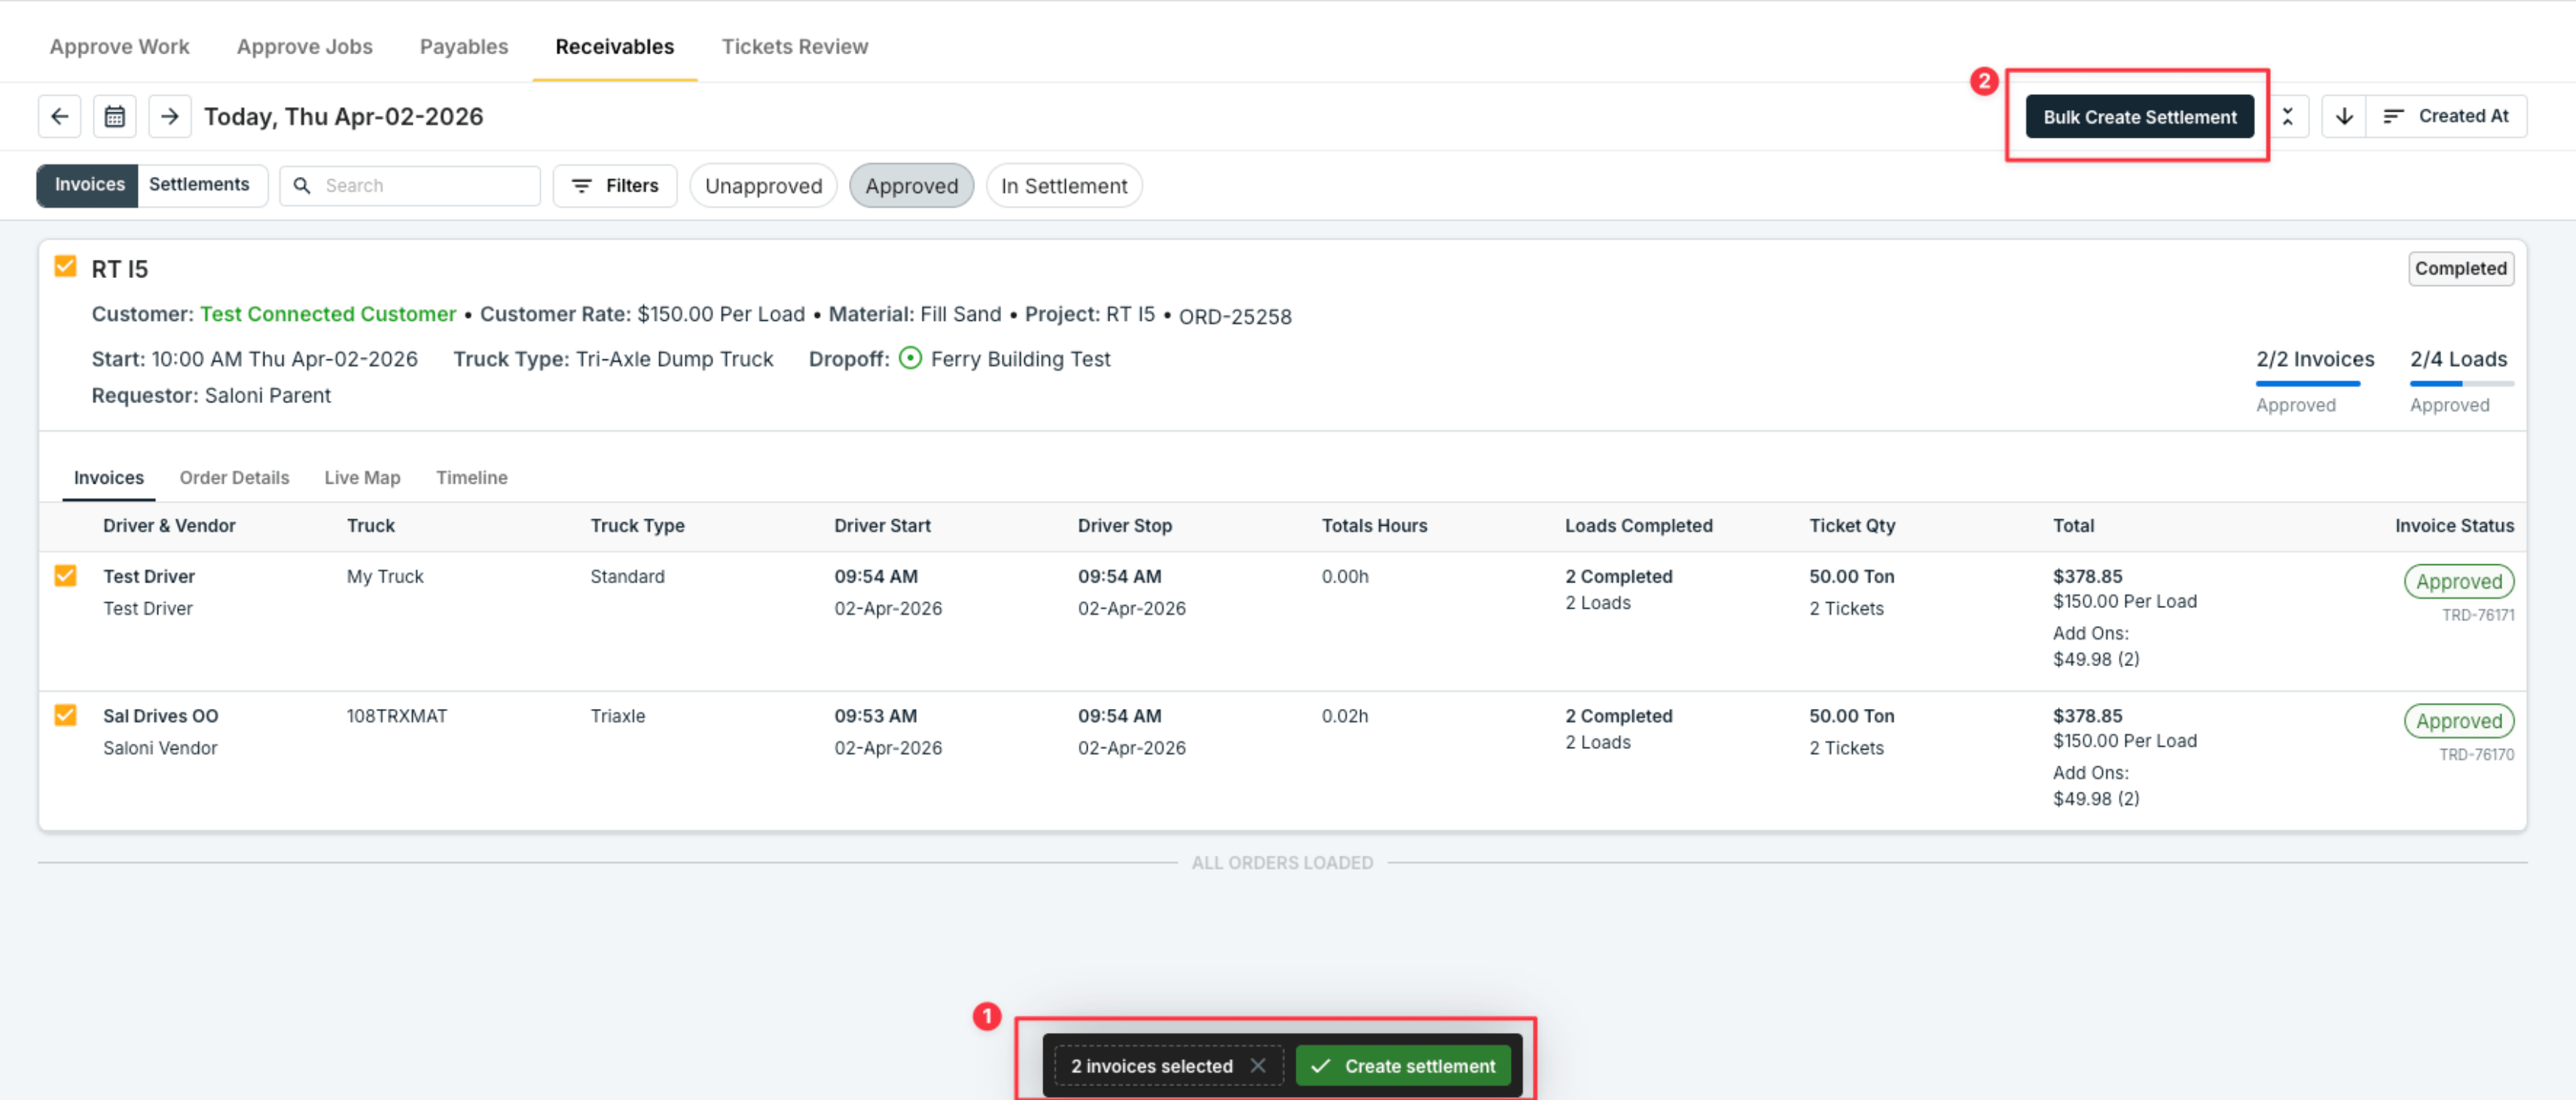
You have two options:- Option A: Manually select the specific dispatches you want to include, then click Create Settlement.
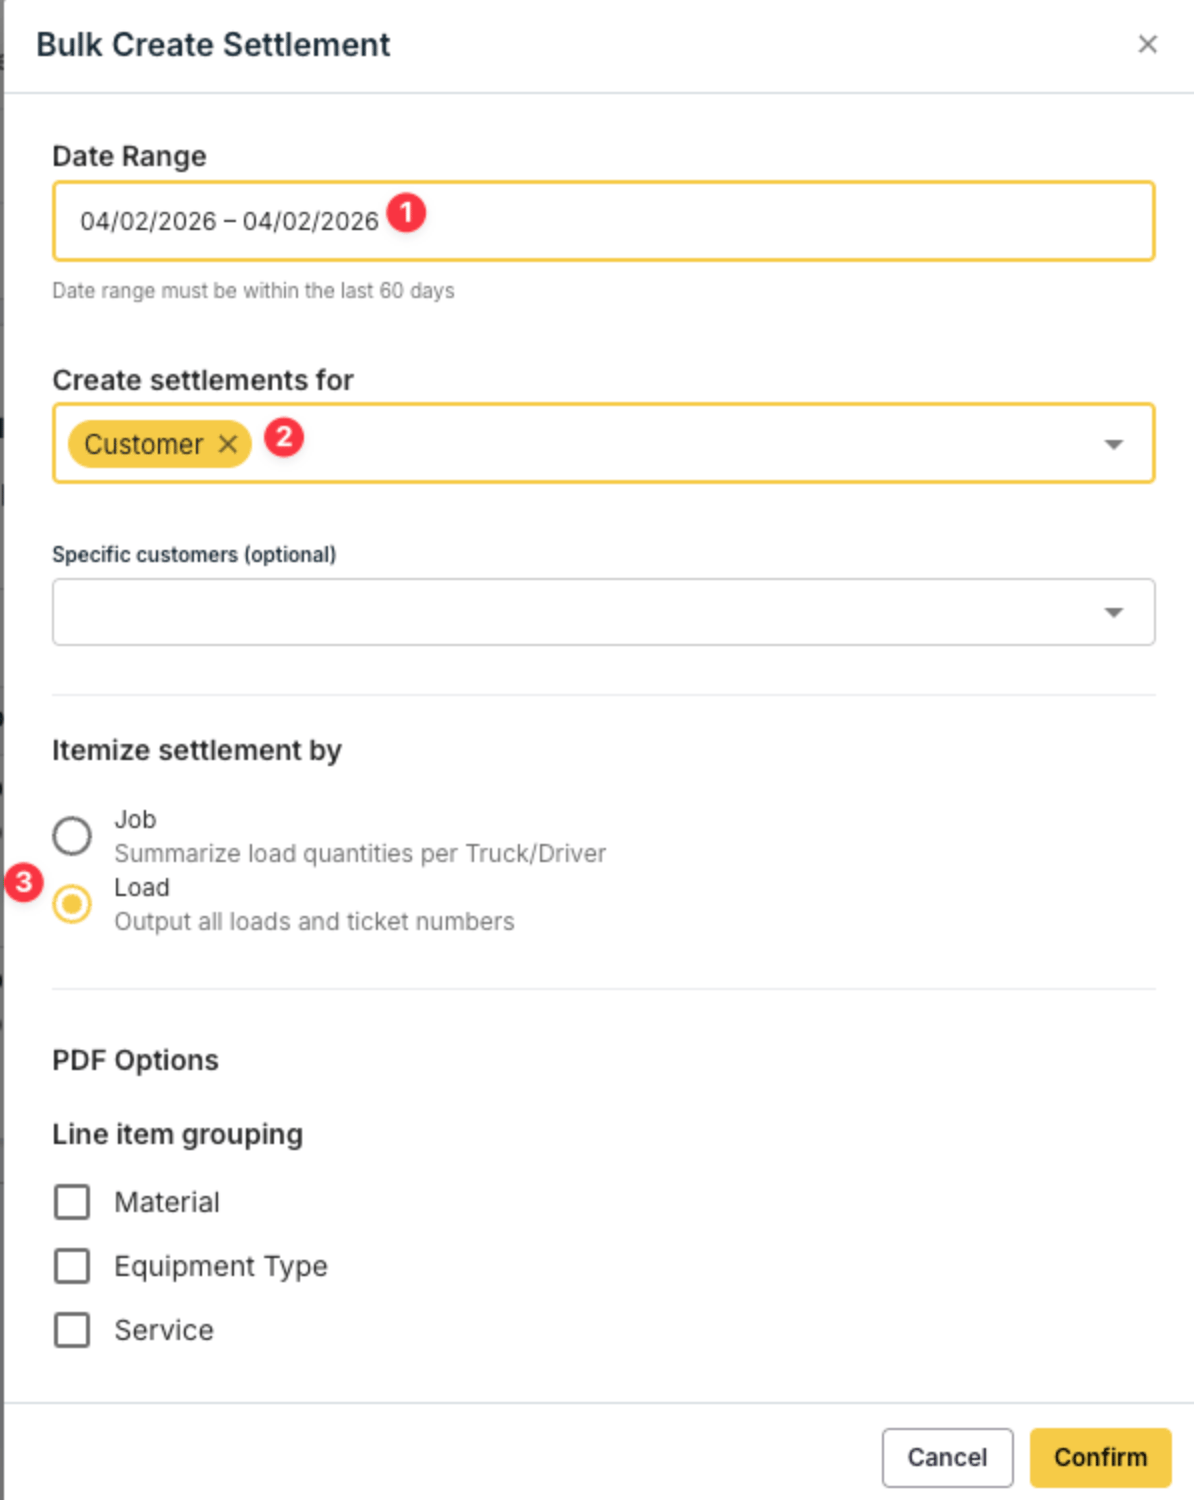
- Option B: Click Bulk Create Settlement directly, then configure:
- Date Range — Select today (or the relevant date).
- Customer — Choose a specific customer, or leave blank to generate several settlements across multiple customers.
- Output By — Select Load (recommended) to itemize the settlement by ticket number. Otherwise select Job to group by truck or by driver. This configuration can be changed even after a settlement has been created.
Step 3 — Review the settlement
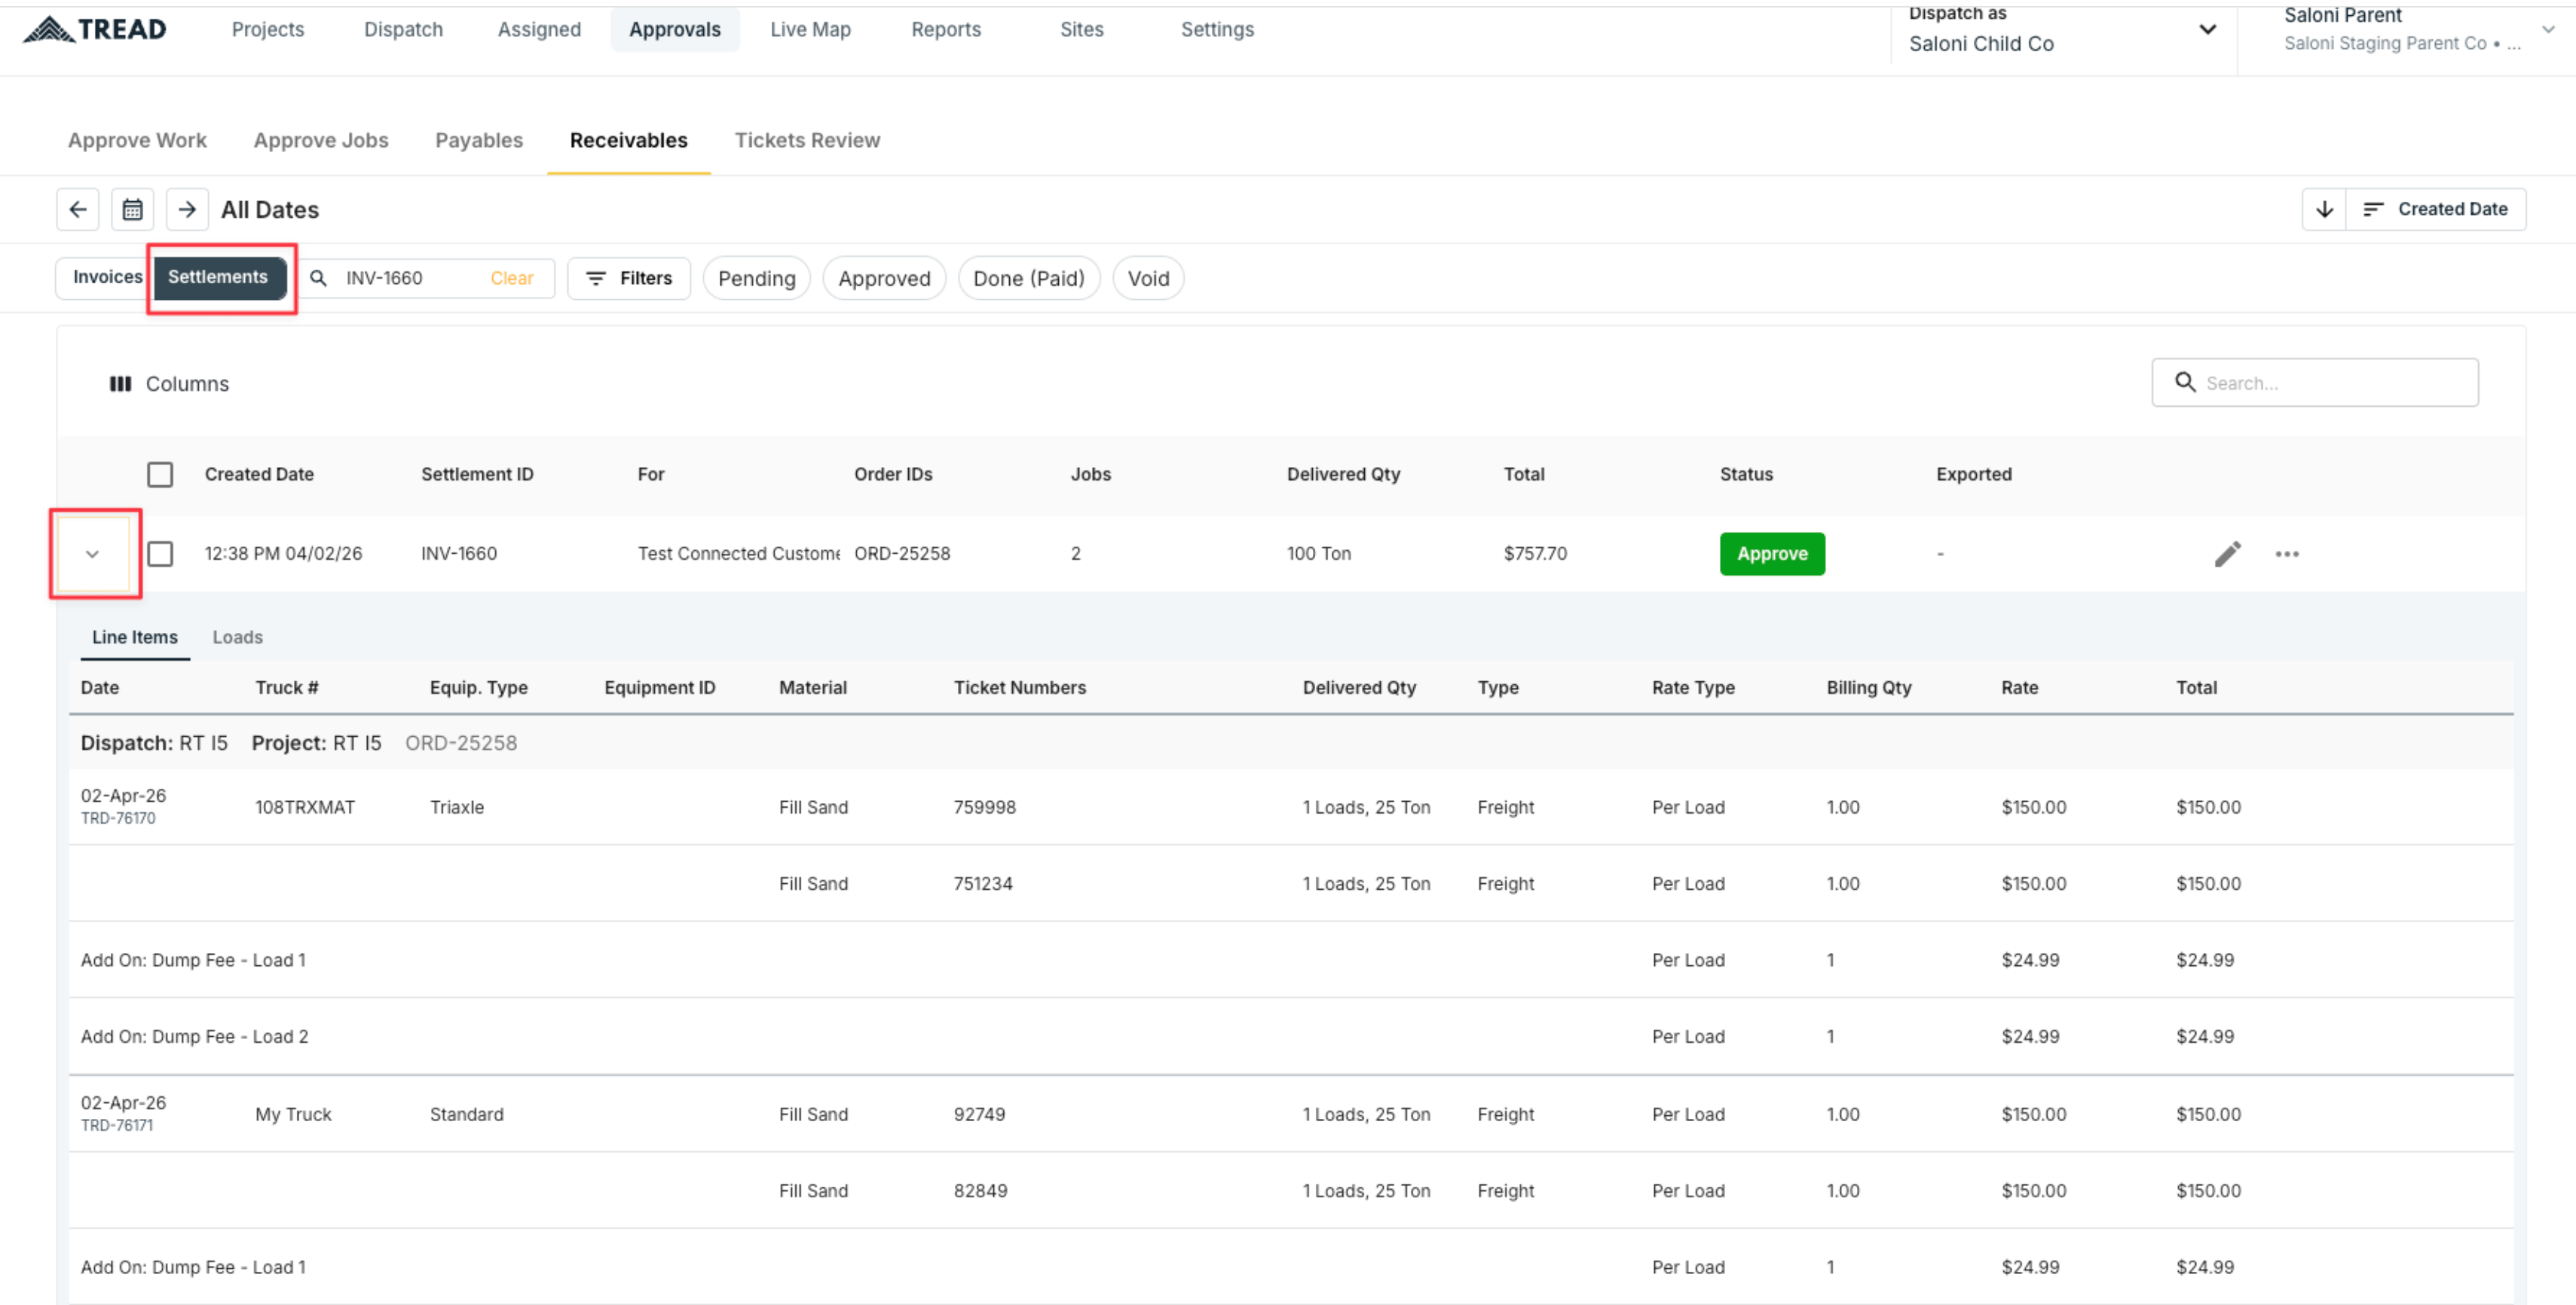
After generating, you’ll see a success message pop up with a link to your AR settlement. Click the link, or navigate directly to the Settlements tab. Find the newly created settlement and review all details, including:- Equipment type (as set on the job)
- Ticket numbers
- Rate values
Step 4 — Approve and email
- Click Approve on the settlement.
- Click Email to send the invoice to the customer. You will not be able to email without approving.
If the email field is not auto-populated when you click Email, there’s no email address on file for that vendor/driver. Open their profile, add an email address, and try again.
- Click Send to confirm delivery.
- Verify the email status — delivery confirmation appears in the status indicator and in the details section below.

Step 5 — Generate Settlement PDF
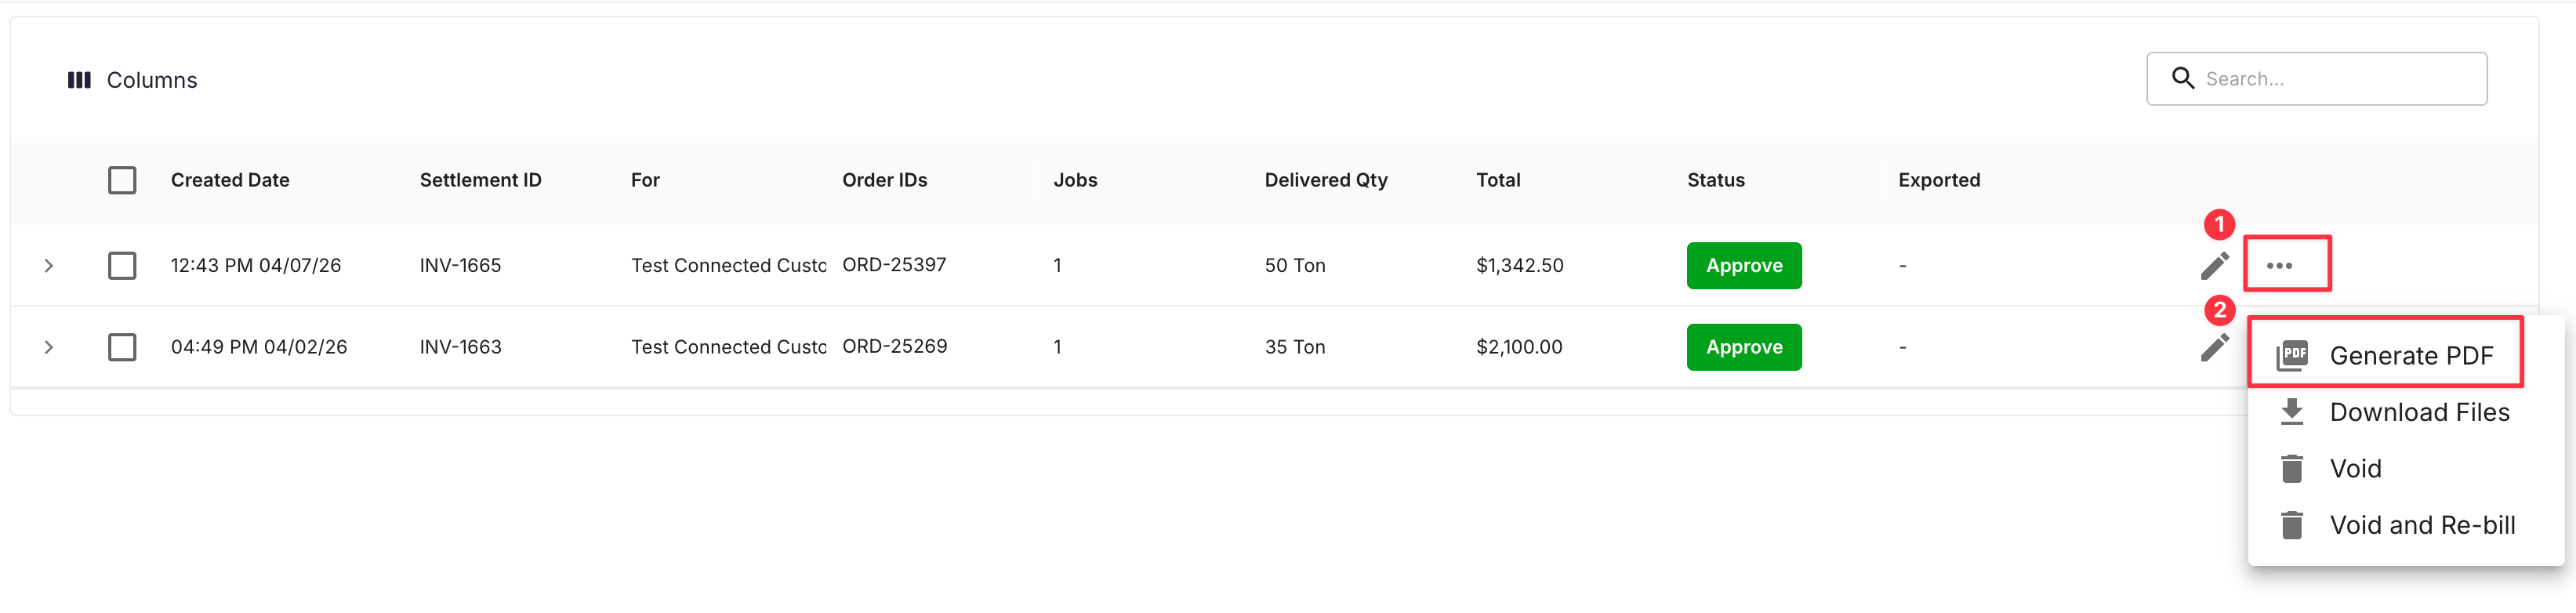
- Click on the 3-dot menu to the right of the settlement row.
- Click on Generate PDF to see your full settlement document.
- Click on Download Files if you would also like to download any other attachments as well (ex. scale tickets)
Step 6 — Need to make edits?
Follow the Settlement Void process in this training guide for making changes to individual rates & add-ons for each job.Part B — Payable Settlements (Vendor/Driver Payments)
The process mirrors receivables - follow the steps above for more information.Step 1 — Navigate to the Payables tab
Go to the Payables tab and confirm you are viewing the correct date.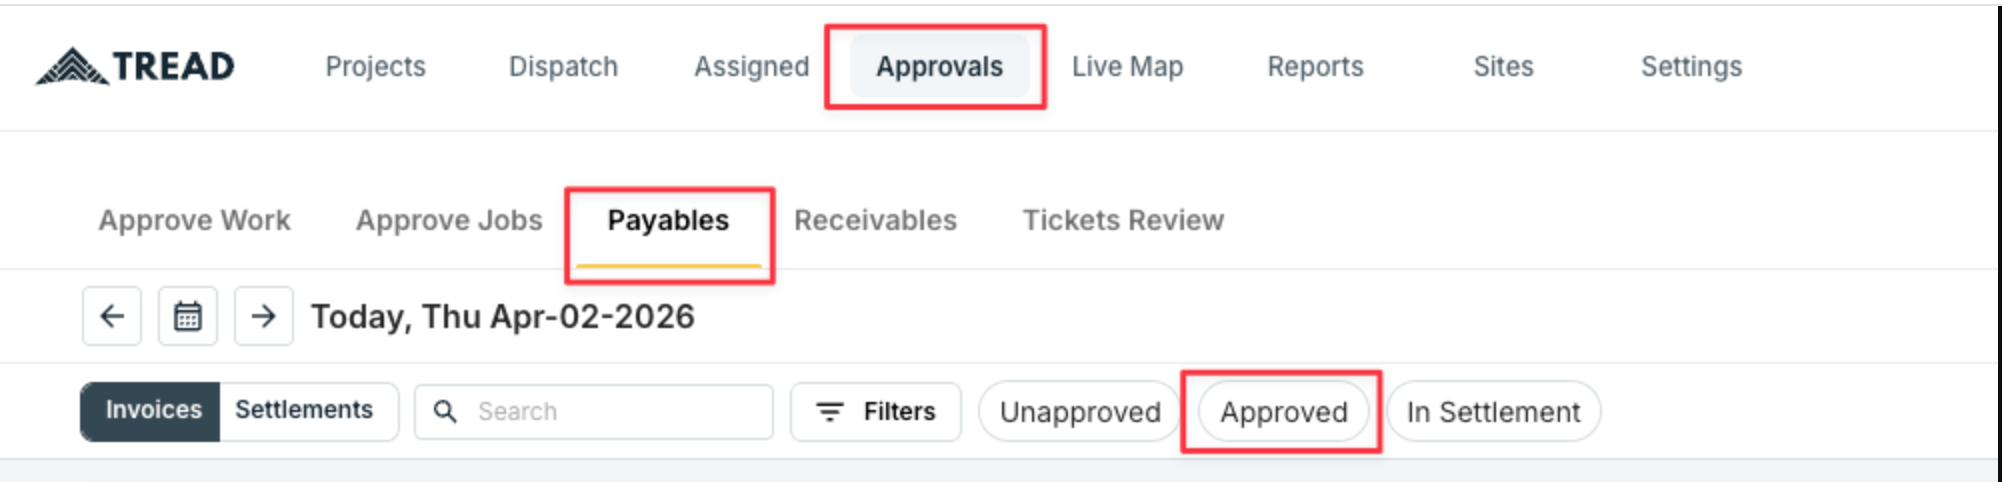
Step 2 — Create the payable settlement
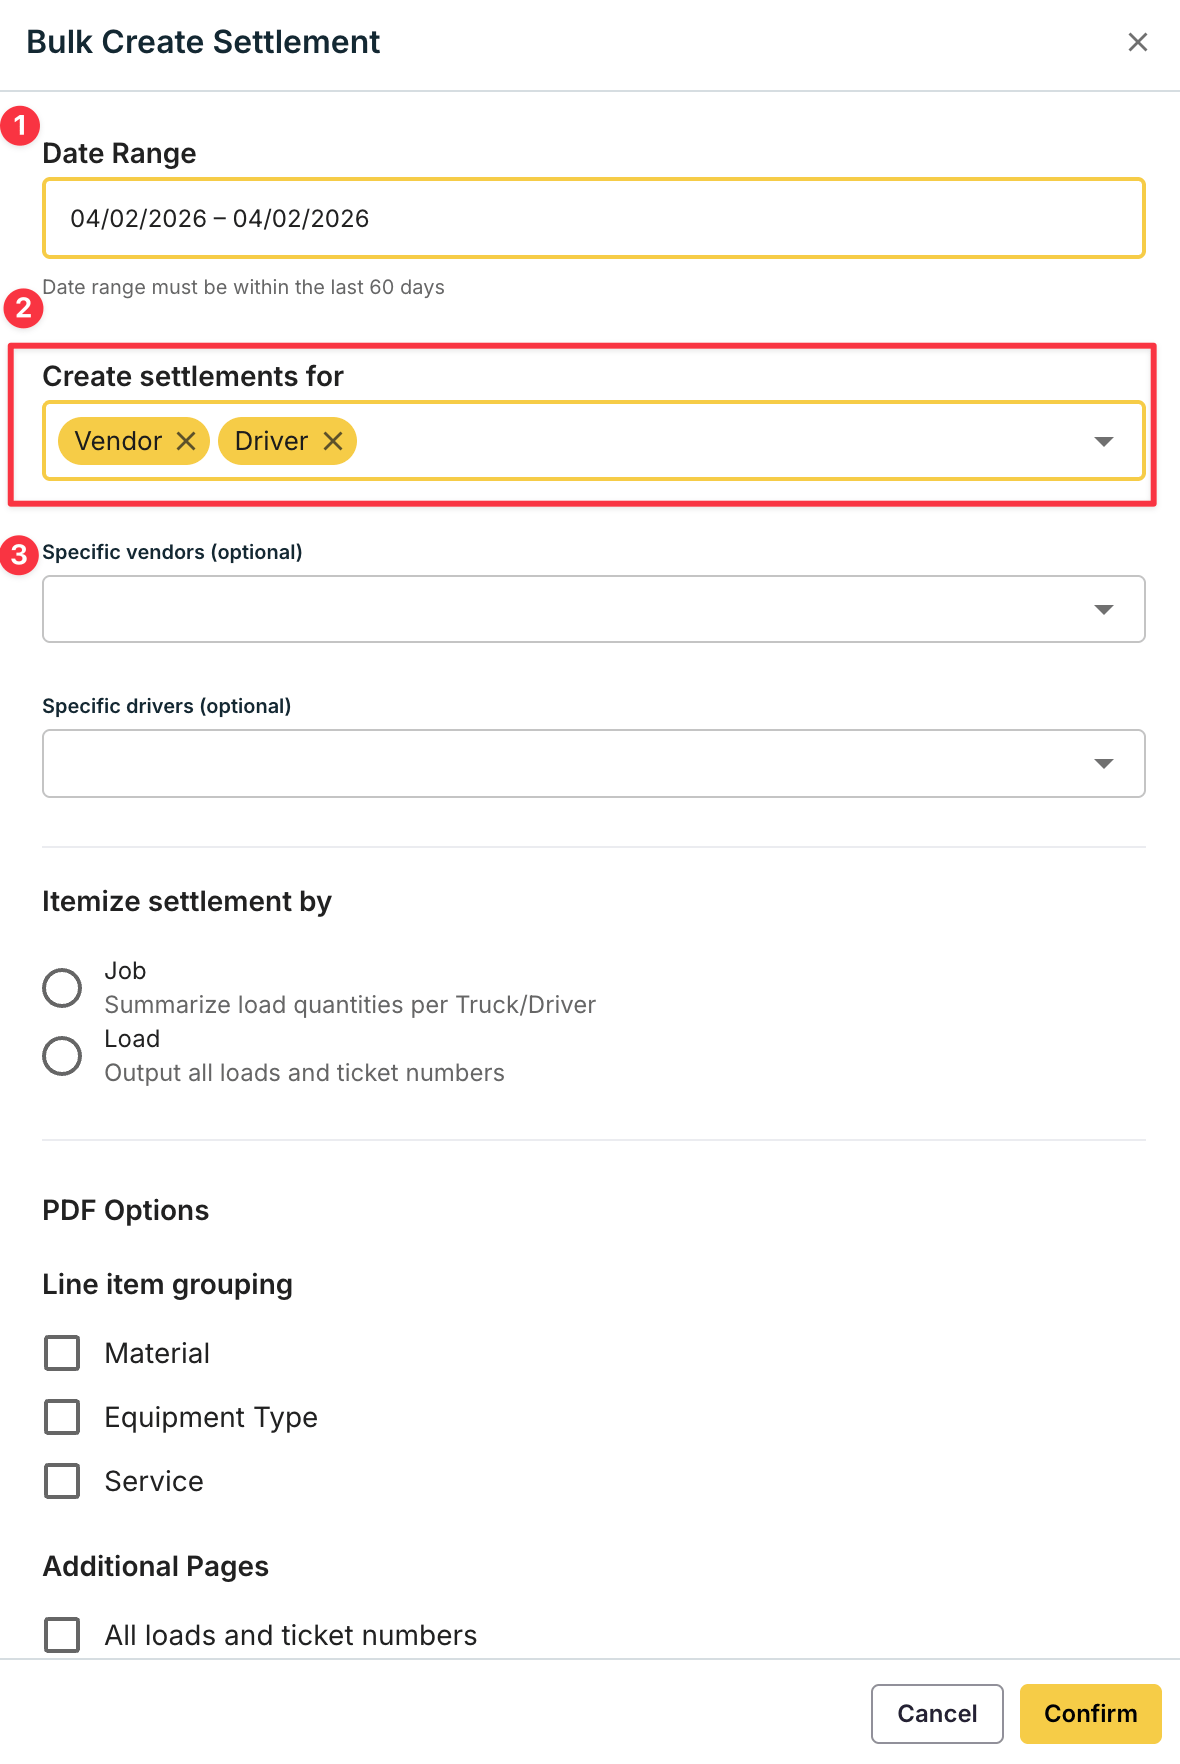
Click Create Settlement and configure:- Date Range — Select the relevant date.
- Recipient Type — Choose Vendor (sub-haulers, OOs) or Driver (internal).
- Specific Recipient — Select a specific vendor or driver. Leave blank to create settlements for all applicable vendors and drivers.
- Output By — Select your desired itemization, then click Confirm.
Step 3 — Review, approve, and email
- View the newly created payable settlement(s) in the Settlements tab.
- Review all details for accuracy.
- Click Approve on each settlement.
- Click Email to send to the respective vendor or driver.
- Click the 3-dot menu to Generate a settlement PDF.
Tips
- Filter the Settlements view to manage your workflow:
- Approved — All settlements that have been approved.
- Unapproved — Settlements still pending approval.
- Use Bulk Settlement Creation to create several settlements for different accounts at the same time for a given date range. It generates settlements for any invoice that has been approved within that date range.